How to Install Motion Sensor Lights: Step-by-Step Guide
Are you looking to enhance your home's security and energy efficiency? Installing motion sensor lights is a wise choice to achieve both goals effortlessly. Motion sensor lights, or motion-activated or motion detectors, are a practical home security device for any property.
This comprehensive guide will walk you through the step-by-step process of how to install motion sensor lights. Whether you're a DIY enthusiast or a first-time installer, these easy-to-follow instructions will help you illuminate your path to a safer and more energy-conscious home.
Note: Motion sensor cameras and lights can act as a powerful deterrent to home intruders. Be sure to read our extensive guide on how to burglar-proof your home.
- Where to Place Motion Sensor Lights
- How to Install Motion Sensor Lights: Step-by-Step Guide
- Motion Sensor Light Installation Cost: DIY vs. Professional
- Why is Motion-Activated Lighting a Good Investment?
- Best Motion Sensor Light for Smart Home: Reolink Floodlight
- Motion Sensor Light Switch: How to Choose & Installation Tips
- Bonus Tips: How to Add/Replace a Motion Sensor to Existing Outdoor Lights
- FAQs
- Conclusion
Where to Place Motion Sensor Lights
Deciding where to place your motion sensor light is crucial to ensure it functions effectively and provides the security and convenience you desire. For optimal performance, consider mounting the lights six to ten feet above the ground and positioning them to detect movement predominantly within the sensitivity zone rather than directly toward the detector.
Some ideal places to put the motion-sensor lights include the following ones:
- Entry Points: These points include doors (front, back, and side doors) and garage doors. Motion-sensor lights provide illumination when people arrive home and deter potential intruders.
- Pathways and Walkways: Many users place these lights along paths, walkways, and staircases to help navigate safely in the dark. Installing lights in these areas is particularly important for outdoor areas with tripping hazards.
- Driveways: A motion sensor light can illuminate driveways and help homeowners or guests park safely in low-lit conditions.
- Backyards and Gardens: If a backyard or garden exists, motion sensor lights can deter wildlife and provide security, allowing users to enjoy outdoor spaces after dark.
How to Install Motion Sensor Lights: Step-by-Step Guide
As an effective way to enhance security around your home, installing motion sensor lights requires some time and effort. Here are the specific steps on how to install motion sensor lights.
1. Gather Necessary Tools and Materials
Before starting the process, you must gather the necessary tools and materials. You may need a screwdriver, wire stripper or cutter, wire connectors, and electrical tapes. If you want to mount the light at a particular light, you will also need a ladder or step tool. Remember to check the product box because many manufacturers will include some installing tools or accessories in it.

2. Shut off the Electricity
After having all the necessary tools, you must ensure your safety by shutting off the electricity to the existing light fixture or the circuit you'll be working on. You may need to flip the breaker in your electrical panel. You can also use a circuit tester to confirm that no electricity flows to the wires.
3. Remove the Existing Fixture
Many homeowners replace their existing light fixtures with motion sensor lights. If you are one of them, remember to remove the old fixture. You'll need to unscrew or unclip it from its mounting bracket. Once removed, disconnect the wires by unscrewing the wire nuts and separating the wires. Be sure to support the fixture while disconnecting it.
4. Install the New Fixture Base
Most motion sensor lights come with a mounting bracket. You can also call it a base. You must secure this new base to the electric box on your wall or ceiling with the provided screws.
5. Wire the New Light
Connect the wires from the motion sensor light to the wires from your electrical box. Typically, these connections include black-to-black (hot), white-to-white (neutral), and green or bare copper to the ground wire. After finishing the wiring work, you can use wire connectors to secure these connections and wrap them with electrical tape.
6. Mount the Light
Then you can attach the light to the mounting bracket using the provided screws. Ensure that it is firmly in place.
7. Adjust the Setting
Most motion sensor lights in the market come with adjustable settings such as motion zone, sensitivity, duration, and range. In most cases, you can adjust these settings directly on the fixture or via a control panel.
8. Seal and Secure
If you finish all the necessary settings, check the base of the junction box and seal any openings around the fixture. You can use out-rated silicone caulk. This material will help protect the electrical connections and prevent water from entering.
9. Test the Light
Finally, conduct a final test to ensure your light works as intended. You can walk through the detect zone to see if it lights up. After all these steps, your motion sensor light is installed and ready to provide security and convenience to your property.
If you are still wondering the detailed installation steps, please watch the installation video for the Reolink Floodlight WiFi below.
Motion Sensor Light Installation Cost: DIY vs. Professional
Many motion sensor lights in the market are designed for easy installation and are friendly for DIYers. If you're an expert, you won't need to pay someone to install it.
However, consider hiring a pro for a safe installation if you need a pre-existing outdoor lighting setup or electrician expertise. For example, essential outdoor motion sensor lights can start at around $20 to $50 each, while more advanced and smart motion sensor lights can range from $50 to $200 or more per fixture. If you hire a professional electrician, you can expect to pay an hourly rate, typically from $50 to $150 per hour.
Why is Motion-Activated Lighting a Good Investment?
Installing motion-activated lighting is a good investment for several reasons. These lighting devices offer benefits for energy efficiency, security, convenience, and cost savings.
Energy Efficiency
Motion-activated lights are highly energy-efficient because they only illuminate when needed. They automatically turn on when motion is detected and turn off when the area is vacant or after a preset time delay. This working process eliminates the need to remember to turn lights off manually and significantly reduces wasted electricity.
Cost Savings
By reducing energy consumption, motion-activated lighting can lead to significant cost savings on your electricity bills over time. The more frequently lights are used in high-traffic areas, the more substantial the savings. You can also choose cameras with lights to secure your home without overspeeding.
Convenience
Motion-activated lights provide hands-free illumination. They are especially convenient in areas where it may be difficult to reach a light switch, such as hallways, staircases, closets, and garages. They also enhance convenience in outdoor areas, like driveways and porches, where lighting is essential for safety.
Enhanced Security
Motion-activated can enhance security for both indoor and outdoor spaces. They can scare intruders off and deter criminal activity by suddenly illuminating dark areas when detecting motion. In this way, they contribute to overall home or property security.
Best Motion Sensor Light for Smart Home: Reolink Floodlight
If you are still looking for the best motion sensor light for your smart home setup, consider Reolink Floodlight. Designed to illuminate your front door, back yard, driveway, and anywhere in low-lit conditions with 2,000 lumens, this motion-activated floodlight can act as a power barrier to protect your property.
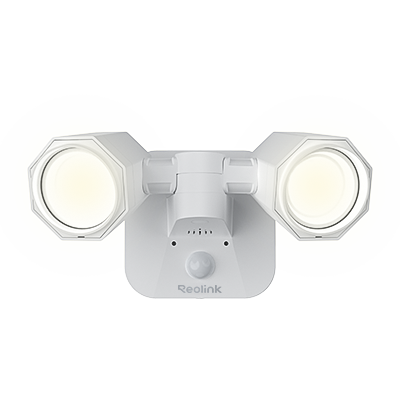
Bright Motion-Activated Security Floodlight
2000 Lumens Floodlight, Three Lighting Modes, Built-in Siren, PoE/WIFI Versions Available, Works With Reolink Security Cameras.
Typically, this light stays off during the day and turns on at night when the PIR sensor is activated. You can set the time for the light to turn on/off or choose the auto-om mode. The light will turn on automatically in this mode when it senses the change in distinct lighting conditions. Two Reolink Floodlight versions are available: the PoE and WiFi. You can choose either of them to satisfy your specific needs.
Motion Sensor Light Switch: How to Choose & Installation Tips
A motion sensor light switch is a device that automatically controls the lighting in a space based on the detection of motion or the presence of people.
How to Choose the Right Motion Sensor Light Switch
A great switch is essential for the whole working process of your motion sensor lights. Here are some important factors to consider when choosing the right one for your lighting.
- Type of sensor: The first thing you need to decide is the type of your sensor. PIR, ultrasonic, and microwave sensors are in the market, and they use different technologies to detect motions.
- Detection range: Consider the range at which you want the sensor to detect motion. Different sensors have varying detection ranges, so choose one that matches the size of the area you wish to cover.
- Sensitivity adjustment: Look for a sensor switch with adjustable sensitivity settings. This allows you to customize the sensor's sensitivity to motion, reducing false activations or ensuring it picks up smaller movements.
- Time delay: Motion sensor switches often have adjustable time delay settings, determining how long the lights will stay on after motion is no longer detected. Choose a controller with a time delay option that suits your needs, whether it's a few seconds for quick transitions or several minutes for longer illumination.
Tips for Motion Sensor Light Switch Installation
Installing motion sensor switches can be a straightforward DIY project, but strictly follow the manufacturer's instructions and safety guidelines. Here are some valuable tips you can follow.
- Connect the suitable wire: Some switches require a neutral wire. Once starting the wire, connect the hot wire (usually black) from the electrical box to the hot terminal on the motion sensor switch. Connect the neutral wire (typically white) from the electrical box to the neutral terminal on the motion sensor switch. Finally, connect the ground wire (usually green or bare copper) from the electrical box to the ground terminal on the motion sensor switch.
- Restore the power: You can turn the power back on by flipping the breaker or turning on the circuit in your electrical panel to confirm that the motion sensor switch operates correctly.
- Use a cover plate: Add a cover plate to protect the junction box. If you removed a cover plate, replace it with a new or original one. Ensure it's securely fastened.
Bonus Tips: How to Add/Replace a Motion Sensor to Existing Outdoor Lights
If you don't want to purchase an independent motion-activated light, add a motion sensor to your existing lights. The installation process, overall, closely mirrors the preceding steps, with a particular emphasis on sensor selection and wiring. Here are some valuable tips for your reference:
- Purchase a motion sensor kit designed for outdoor use. These kits typically include the motion sensor unit, a cover plate, wire connectors, and installation instructions. Ensure you have all the necessary tools and materials on hand.
- Check the compatibility between your light and the sensor. Ensure the sensor you've chosen can be integrated with your light. You can select devices from the same brand or consult the manufacturer before purchasing.
- Use a unified communication protocol. You should also check the sensor's communication protocol to connect with your smart lighting system. Your existing lighting and the new sensor should use the same protocol. Common protocols include Zigbee, Z-Wave, WiFi, and Bluetooth.
- Choose a reliable power option. Some sensors are battery-powered, while others require a wired connection to a power source. Battery-powered ones are easy to install but have a limited lifespan. Wired power sources may require extra wiring work. You can choose one that suits your installation preferences and maintenance capabilities.
FAQs
Are motion sensor lights easy to install?
Motion detector lights are generally easy to install, but installation details can vary by brand. Be sure to read the instructions carefully. Basic specifications are usually printed on the outside of the box, so check them before purchasing to understand what the unit offers. More detailed setup instructions can be found inside the box.
How do Motion Sensor Lights Work?
Motion sensor lights work by detecting changes in their immediate environment, such as the presence of moving objects or changes in temperature, and then triggering the illumination of a light source.
Several motion sensors, including passive infrared (PIR), ultrasonic, and microwave sensors, have different motion detection methods. But the general working process is: Once the sensor detects motion, it sends a signal to the control circuit of the light fixture. The control circuit activates the light source, and the lights turn on.
Do I need an electrician to install a motion sensor light?
It depends on your individual needs. Some lights are designed for the DIY installation. But suppose you don't have an outdoor lighting setup and are concerned about dealing with intricate electrical components. In that case, hiring a professional for a safe installation and a positive result is highly advisable.
Can I add a motion sensor to any light?
You can often add a motion sensor to an existing light fixture. But you need to ensure that the bulb or lamps used in the fixture are compatible with motion sensor operation. Many motion sensors are designed to work with standard incandescent, LED, or CFL bulbs. However, some advanced sensors may have specific requirements, so check the sensor's specifications.
Where is the best place to put a motion sensor light?
Some best places to put a motion sensor light include entry points, backyards, gardens, garages, or driveways. You can install a motion sensor light at any place where it needs to be illuminated at night. Consider mounting the lights six to ten feet above the ground for optimal performance.
Conclusion
Motion-activated lights are a good investment for homeowners and business owners. Installing motion sensor lights can effectively enhance the overall security of your property. You can finish this process all by yourself or hire a professional electrician for further assistance. As an integral component of these lights, choosing the right light switch can be vital in the whole installation process.
We hope that you find this step-by-step guide useful. If you have any other valuable tips, please tell us in the comment section below!
Search
Subscribe for the Latest Updates
Security insights & offers right into your inbox