Floodlight Camera Installation: Step-by-Step Guide
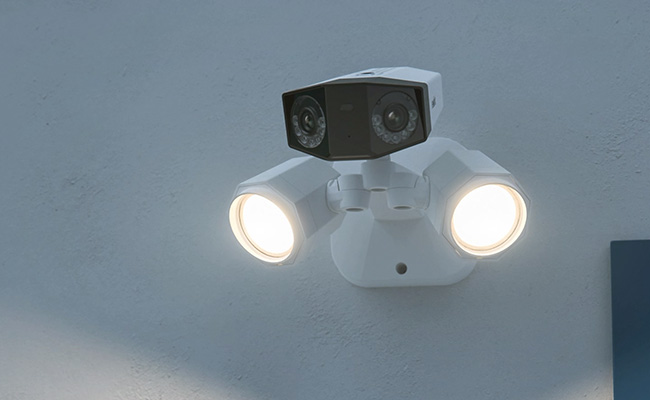
Are you looking to enhance the security of your home or property while enjoying the convenience of advanced surveillance technology? Installing a floodlight camera is an innovative and proactive step in safeguarding your surroundings. This comprehensive guide will show you the step-by-step process of installing a floodlight camera, ensuring you can protect your home against intruders, monitor your property remotely, and enjoy peace of mind.
Note: Before installing, choosing the right camera model can somehow facilitate the installation process. Check out our comprehensive home security camera buying guide.
Floodlight Camera Installation: Step-by-Step Guide
Installing a floodlight camera is easier than you might imagine. Here are some straightforward steps to get you started.
1. Choose the right location
The location should be at least a minimum of nine feet off the ground to allow for the most efficient illumination of the floodlight. And the place should strike a balance between the best angle of lighting and camera filming.
2. Turn off the power before starting
Safety remains the priority for any installation. You must head to your circuit breaker box, locate the switch for your outdoor power sources, and flip it to the OFF position before installing.
3. Mount the bracket
The bracket holds the whole system, including the light and the camera. You need to mount the bracket on the wall or attach it to other places at a certain height.
4. Connect the floodlight cam to existing wires
You need to make sure that you match the wires of the new fixture to the existing wires in your home by colors. After that, tape them together, plug the bulb into the fixture, and finally turn on the power to test them to see whether they are installed correctly. If you are using a wireless floodlight cam, skip this step.
5. Add the floodlight
Some floodlight camera models require separate installation for the lighting fixture and the camera. You can place the camera first and add the floodlight if you have such models. Use a mounting template to mark the places for drilling holes, and then use drills to make holes in the place where the light fixture is installed. Then, locate a junction box near the mounting area and use the fish tape to run wires through the tube to connect the camera and floodlight.
6. Seal the junction box
After combining the two parts, you can seal all the wires in the junction box. This box can help keep water or other pollutants from the cables, extend the lifespan, and secure the stability of the whole system.
7. Test the floodlight camera
Once the installation is complete, check whether your camera is working correctly. You can also adjust the optimum angle of the camera and set up the proper illumination for the maximum brightness effect. Then, turn on the camera again. If everything is working in order, then the installation process is complete.
You can check the video below for more information about installing a floodlight camera.
How to Install Floodlight Camera without Existing Wiring?
In most cases, floodlight cameras can be connected to existing wiring. However, check out the following steps to install the floodlight cam without existing wiring.
Some tools and materials required for this installation process include:
- Gauge wire
- 2-inch UF adapter
- Junction box
- Power drill
- Staples for wire
- Single pull switch and cover
After gathering all these materials, let's jump in on the steps involved in installing the floodlight camera.
- Find a power source. The first step is to locate a power source for powering the floodlight camera.
- Connect new wires. It would help if you connected the new wires to the hot and neutral ends. Twist the ground wires together and feed them into a single ground wire location.
- Install new junction box. Drill holes near the junction box and twist the wire from the junction box to the switch.
- Mount the bracket. Please put in place the mounting bracket on the junction box. The box can make the whole system stay put.
- Connect the wires. Connect the copper ground wire from the floodlight cam to the bracket's green ground screw and the junction box's existing ground wire. Remember to use a supplied wire nut to join the wires together.
- Finish the installation and test the system. You can test the floodlights to determine whether they are at the perfect angle. You can also make slight adjustments to the camera, ensuring the camera is in the proper position.
How to Install Outdoor Flood Lights?
- Turn Off Power – Switch off the circuit breaker for the area where you’ll install the flood light to ensure safety.
- Choose Location – Select a location that provides maximum coverage, avoids obstructions, and is near a power source.
- Mount the Bracket – Secure the mounting bracket to the wall or eave using screws and anchors suitable for your surface.
- Run Wiring – If hardwiring, connect the electrical wires from your house to the flood light wires, matching color codes (black to black, white to white, green/bare to ground).
- Attach the Flood Light – Connect the flood light to the bracket, securing it according to the manufacturer’s instructions.
- Seal Connections – Use waterproof wire nuts and silicone sealant to protect wiring from moisture and weather.
- Adjust the Angle – Position the light to cover the desired area, adjusting the flood light angle as needed.
- Test the Light – Turn the circuit breaker back on and test the flood light to ensure it works and covers the target area.
Cost of Floodlight Camera Installation
The average cost of installing a floodlight camera typically ranges from $200 to $900, including the device and basic installation. A standard floodlight camera costs around $150–$300, while professional installation can add $150–$450. Costs may rise to $800–$1,000+ if new wiring, electrical upgrades, or multiple cameras are needed.
Best Floodlight Camera Recommendation
Reolink Solar Floodlight Cam
If you’re new to security cameras and want an easy-to-use, hassle-free option, the Reolink Solar Floodlight Cam is a great choice. This 2K battery- and solar-powered camera can be installed anywhere, providing reliable surveillance without complicated wiring. Its bright 1000-lumen floodlight features adjustable color temperature to suit your needs, and motion detection adds an extra layer of protection by deterring intruders.
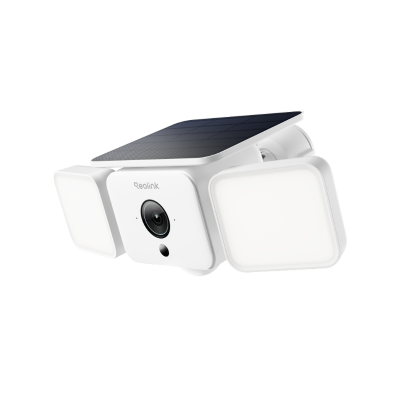
Smart 2K Solar Floodlight Security Camera
150° Ultra-Wide View, 2K 4MP HD Resolution, AI-Based Adaptive Floodlight, Endless Power with Reolink SolarEase™.
Reolink Duo Floodlight PoE/WiFi
With the development of technology, a wealth of floodlight cameras is emerging in the market. They not only have beautiful appearance but also powerful functions.
Reolink Duo Floodlight Camera features an astounding 180°viewing angle with two lenses, and the images captured by two cameras can be integrated into one for a better visual experience. You can choose PoE version or WiFi version according to your individual needs. The floodlight is effective for detecting suspicious moves and objects. The floodlights can be triggered automatically when people or vehicles are detected. You can also select other activation modes for your lights or schedule your lights to turn on and off at specific times.
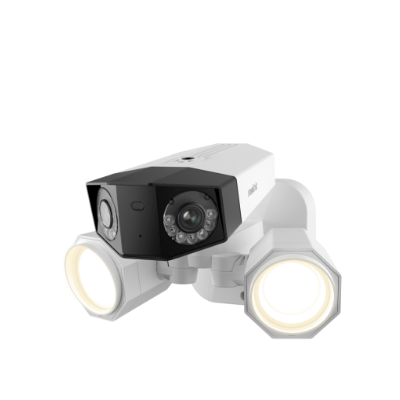
4K PoE Floodlight Camera
Dual Lens, Power over Ethernet, 180° Wide-Angle Panorama, 1800 Lumen Floodlights
With 4K 8MP resolution, you can access unparalleled clarity from anywhere via the Reolink app or Client. Thanks to the advanced AI algorithms, the Reolink Floodlight Camera accurately detects people and vehicles and recognizes pets. When it detects anything suspicious, the floodlights and siren activate automatically, and you can promptly respond using the built-in microphone and speaker.
FAQs
Do I need an electrician to install floodlight cameras?
No, you can handle the installation process all by yourselves. Plenty of online resources can help walk you through the step-by-step installation process. However, if you need more clarification about your installation techniques, you can hire a professional to install a floodlight cam.
Can I install floodlights by myself?
Yes. Installing a floodlight cam is relatively easy because you can find the installation guide easily on the Internet and do it independently. Still, it would help if you took all necessary precautions to keep yourself safe.
Where is the best place to put a floodlight camera?
The best placement for a floodlight camera depends on your specific security and surveillance needs, as well as the layout of your property. Aim your floodlight cam at the area where you first want to be alerted, and the optimal motion zone of the cam should overlay the perimeter of your property.
Should the floodlight be above or below the camera?
While both above and below camera placement can work, positioning the floodlight above the camera is generally the preferred option for minimizing glare and ensuring even illumination. But the floodlight of many camera models is fixed, and the position can not be changed. If you want to add a floodlight to your security camera, consider putting the light above the camera.
Conclusion
Floodlight cameras can enhance home security across the board, demonstrating several advantages, such as flexibility, waterproofness, and all-weather monitoring. When installing the camera, you can follow the general steps mentioned above. It is time to get started to install your floodlight cameras! Do you have any more insights? Please keep us informed by commenting below. We would appreciate your sharing it with your friends and family.
Search
Subscribe for the Latest Updates
Security insights & offers right into your inbox