
Hallway Camera Guide: How to Find The Right Camera
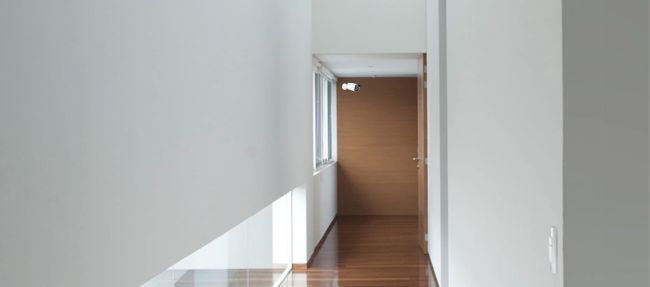
A hallway camera solves a problem a doorbell camera cannot. It watches areas like a shared entry, stairwell landings, or a long interior corridor that a single wide-angle lens at the front door never reaches.
Get the lens angle, mounting height, or power source wrong and you end up with sharp footage of two side walls. The camera's battery might also require unnecessary charging every three weeks.
The right setup comes down to three things. Who controls the space, where power is available, and how long the straight run of corridor is. A duplex owner with an Ethernet port near the entry needs a different camera from a renter watching only the approach to their own apartment door.
Why Most Hallway Camera Installations Go Wrong
Four things account for almost every disappointing hallway camera.
- Lens is too wide for the space
- Infrared light is bouncing off nearby walls
- The camera is aimed across a neighbor's doorway
- or the Wi-Fi signal dies behind a fire door.
Luckily, all four are cheaper to fix before you drill than after.
Start with the lens first, because it is the mistake that wastes the most money. Buyers pick a camera built for a wide-open driveway and mount it in a corridor four feet across. At ten feet of distance, an 87 degree lens is already covering 19 feet of width. Your hallway is using roughly a fifth of the frame. The rest is wall.
Infrared reflection causes the second problem. Infrared (IR) night vision floods the scene with invisible light and records the bounce-back in black and white. A hallway is a box with walls on both sides, so that light returns straight into the lens instead of scattering into open air. Pale paint, glass panels, and glossy skirting within a few feet of the camera all make it worse. Check a recorded night clip from the exact mount position before you commit to the holes, not after.
Aim is the problem that gets people in trouble. A camera pointed down a shared corridor can capture a neighbor's actions along the area. That can breach your lease even in a building where cameras are otherwise allowed. Point the camera toward your own door and the area directly in front of it. If your lease requires landlord approval, get it in writing first.
Wi-Fi range is the failure people never test for. Concrete stairwells, fire doors, and steel mailroom walls all absorb signal. A camera that streams perfectly on a bench ten feet from the router can drop out entirely once it is mounted around a corner and through two walls. The 5GHz band is worse for this than 2.4GHz, because higher-frequency Wi-Fi loses more strength passing through brick and concrete. Be sure to test the signal at the mount point with your phone before you buy.
Pro Tip: Check your Wi‑Fi signal where the camera will actually be mounted, not a few steps away. Hold your phone against the wall or door frame at the installation spot and make sure you have a strong connection first before drilling any holes.
Which Power Source Fits Your Hallway
Power is the first real decision because it rules out most of the catalog before you look at a single spec. Wired PoE suits shared entries and long corridors that need round-the-clock recording. Plug-in Wi-Fi suits a private entry with an outlet. Battery only makes sense where drilling is banned and traffic is light.
Wired PoE Power
A PoE camera receives power and network data through one Ethernet cable run from a router, switch, or recorder. PoE stands for Power over Ethernet, standardized as IEEE 802.3af in 2003 and still the baseline most cameras use today. One cable means no batteries and no Wi-Fi dependency, which is why it dominates commercial corridors.
The catch is the cable itself. Fishing Ethernet through a finished older building is real work, and running camera wire indoors takes planning even when the route looks obvious.
Plug-In Wi-Fi Power
A plug-in Wi-Fi camera draws power from a standard wall outlet and sends video over your wireless network. Nothing gets drilled, which is what makes it work for renters. You trade the cable problem for two smaller ones.
Hallway outlets are rarer than people expect, and you are now dependent on wireless signal at a spot you probably have not tested. Reolink's full comparison of PoE against Wi-Fi power goes deeper on where each one breaks down.
Battery Power
A battery camera runs on an internal rechargeable pack and wakes only when it detects motion. That is exactly why hallways punish it. A driveway camera can sit on one charge for months because it triggers a handful of times a day. A corridor with regular foot traffic triggers constantly, and every trigger is a wake, a recording, and an upload.
Reolink's own battery camera guide points to dialing back the PIR motion sensor as one of the biggest levers on power consumption, which tells you how much the trigger count drives runtime. Plan on charging a busy stairwell camera far more often than a product page figure implies.
Note: Most battery cameras record on motion only, not continuously. A handful of high-capacity models are the exception, but they are the exception. If round-the-clock footage is the reason you are buying, plan on PoE or plug-in Wi-Fi unless you have specifically confirmed a battery model that supports true 24/7 recording.
What to Look For in a Hallway Camera
Four specs decide whether a hallway camera earns its place. Lens angle, night vision type, detection filtering, and where the footage lands. Resolution matters far less than most buying guides suggest because a 4K sensor behind the wrong lens still delivers a face too small to name.
Lens Angle and Field of View
Field of view is how wide a slice of the world the camera sees, measured in degrees. In a corridor, a narrower field of view wins. A wide lens spreads its pixels across side walls and ceiling, so the person walking toward you occupies a thin vertical strip of the picture. A narrower lens concentrates the same sensor across the walking path, which is the only part of a hallway anyone reviews footage for.
This is also where high resolution gets oversold. Going from 2K to 4K roughly doubles pixel density, and that is genuinely useful, but it multiplies whatever the lens hands it. Fix the lens first.
Night Vision in a Narrow Corridor
Hallways are dim during the day and dark at night, so night vision does most of the work. Infrared night vision records in black and white and works in total darkness. As for color night vision, it uses a wide aperture and a low-light sensor to hold color detail, which needs some ambient light to work with.
In a narrow corridor, the trade-off flips from the usual outdoor logic. Theoretically, a low-light color sensor should be immune to error mechanisms caused by reflections of a sensor's own IR emitter because it operates passively. But, that does not necessarily mean it will perform better overall. It only suggests a different and potentially more favorable failure mode in environments where IR reflections are significant.
Spotlight-based night vision solves glare differently by lighting the scene for real, which produces the clearest footage of the three and also announces the camera to everyone who walks past. In a shared hallway at 2am that is a neighbor complaint waiting to happen.
Motion Detection and AI Alerts
Basic motion detection triggers on heat and movement. In a corridor, that means shadows, a passing pet, and the light changing when a door opens. AI detection classifies what it sees and only alerts on a person, a vehicle, or a package. Reolink's own guide puts the gap at up to 90 to 95 percent of false alarms filtered out.
Worth knowing that not every installer agrees this matters in a hallway. In one public installer Q&A about a three-camera corridor job, the technician specced cameras with no AI features at all and called them unnecessary for hallway monitoring. That advice holds up in one specific case. A private entry inside a unit you control sees almost no traffic, so basic motion detection produces a manageable alert log and AI buys you little. Flip it to a shared corridor with twenty neighbors and the same setup fires all day until you mute it, which is the same as having no camera.
Storage and Where the Footage Lands
Footage goes to a microSD card in the camera, to a network video recorder, or to a cloud plan. Local storage on a card or an NVR carries no monthly fee and keeps the video on your own premises, which matters more than usual for a hallway because the footage may include people who never agreed to be recorded.
An NVR becomes worth considering once you're running more than a couple of cameras, which is exactly what happens the moment your corridor has a bend in it.
Is 2.8mm or 4mm Lens Better for a Hallway?
For most residential hallways, 4mm. It holds any given level of detail about 28 percent further down the corridor than 2.8mm does on the same sensor. Choose 2.8mm only when the run is short and you care more about seeing doorway to doorway than naming a face at the far end.
This is a genuine split among people who install cameras for a living, so it is worth showing the arithmetic rather than asserting a winner. Take the Reolink RLC-810A, which ships in two lens versions on the same 8MP sensor. Its published field of view is 101 degrees horizontal on the 2.8mm lens and 87 degrees on the 4mm. From those two numbers and the sensor's 3840 pixel width, the pixel density at any distance is fixed geometry.
Pixels per foot, or ppf, is the useful unit here. It is how many horizontal pixels land on each foot of the scene at a given distance. The figures below are calculated from the published field-of-view specs.
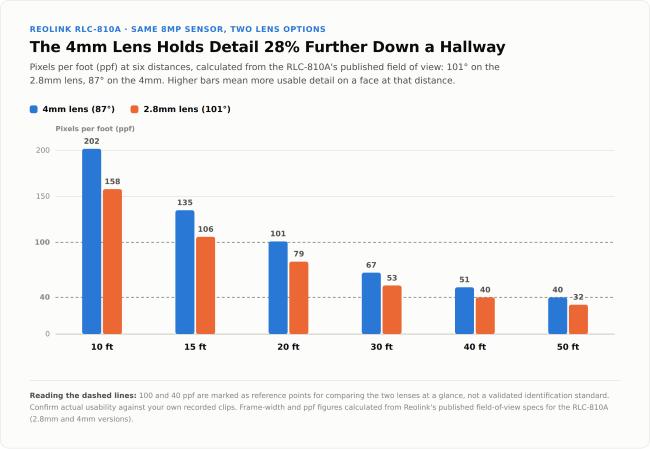
The 100 and 40 marks on the chart above are reference points for comparing the two lenses at a glance, not a validated identification standard. Confirm actual usability against your own recorded clips before finalizing a lens choice.
Read the table against a four-foot-wide hallway and the waste becomes obvious. At 20 feet the 4mm lens is covering 38 feet of width to photograph a four-foot corridor. Your hallway is 10.5 percent of the frame. The 2.8mm lens at the same distance covers 48.5 feet, so the hallway drops to 8.2 percent. Neither is efficient, and that is the honest reason a 180 degree lens belongs nowhere near a narrow corridor.
The practical read:
- Run under 20 feet, and you want doorway-to-doorway width. 2.8mm is defensible for a short apartment hallway end to end.
- Run of 20 to 50 feet, and you want more detail at distance. 4mm holds a higher pixel count than 2.8mm at every distance in the table, a gap that matters most once you're past 20 feet.
- Either way, the walls eat most of the frame. Mounting height and downward angle recover more usable detail than the lens choice does, which is the next section.
How Many Hallway Cameras Do You Need
The simple rule is this: one camera for each straight run, then add one more for every turn.
A single camera at the end of a straight residential hallway covers roughly 20 to 40 feet of usable detail depending on lens and mount height. No lens sees around a right angle, so a corridor with a T-junction needs two cameras regardless of how wide the first one is.
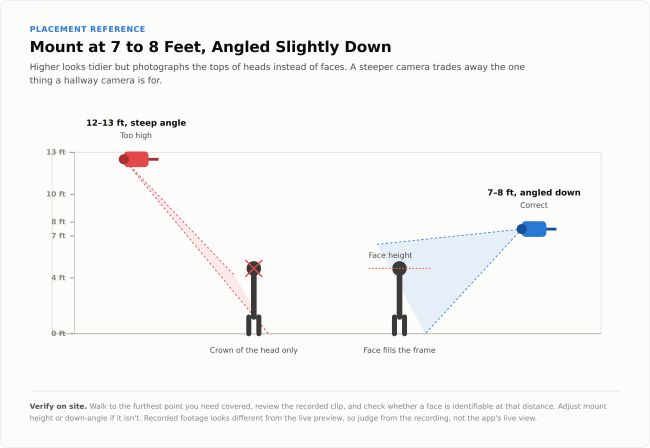
Mount at 7 to 8 feet, angled slightly down. Placing the cameras higher looks tidier and sounds safer, but it trades away the quality footage you actually need because a steeper down-angle photographs the tops of heads instead of faces. In the installer Q&A referenced earlier, the customer planning a three-camera corridor job chose to mount at about 8 feet despite 13-foot ceilings. That's well below what the ceiling height would have allowed.
What About Stairwells and Landings?
A stairwell is not a hallway with steps. The camera looks down a vertical run instead of a flat one, so both mounting height and angle need rethinking. Mount partway up the flight or on the landing, angled down the stairs rather than across them, and treat each flight as its own straight run, the same rule that applies to a level corridor. A landing connecting two or three flights usually needs its own camera, because a lens aimed down one flight cannot also cover the door at the top of the next.
Unheated stairwells add a problem cameras rarely get credit for. Cold raises a lithium-ion battery's internal resistance and measurably worsens discharge performance, so the coldest stairwell in the building drains a battery camera faster than the manufacturer's runtime figure implies, and it's also the stairwell with the least foot traffic to remind you to recharge it. A PoE camera sidesteps the problem entirely, since it never depends on a charge.
Then verify it on site rather than trusting the number. Walk to the furthest point you need covered, have someone review the recorded clip, and check whether a face is identifiable. Adjust the mount position or the down-angle if it is not. Recorded footage looks different from the live preview, so judge from the recording.
Longer commercial corridors in small office buildings and multi-unit apartment floors typically need a camera every 40 to 50 feet, with overlap at doorways and stairwell entries where incidents concentrate. Confirm the interval against your own lens and lighting before you finalize a layout, and plan storage alongside it. Reolink's retention formula puts a 2TB recorder running four cameras at roughly six days of continuous footage, so a multi-camera corridor layout eats retention faster than most people expect.
Match power to access before you shortlist models:
- PoE: if you have Ethernet access and want continuous recording.
- Plug-in Wi-Fi: if you control the space and there is an outlet nearby.
- Battery: only when installation is permitted, wiring is genuinely impossible, and regular charging is realistic.
Which Reolink Hallway Camera Matches Your Situation
Three hallway situations cover most of what people are actually dealing with. Here is which Reolink camera answers each one, and where each falls down.
Reolink RLC-810A
Best for a Long Wired Corridor in a Building You Manage
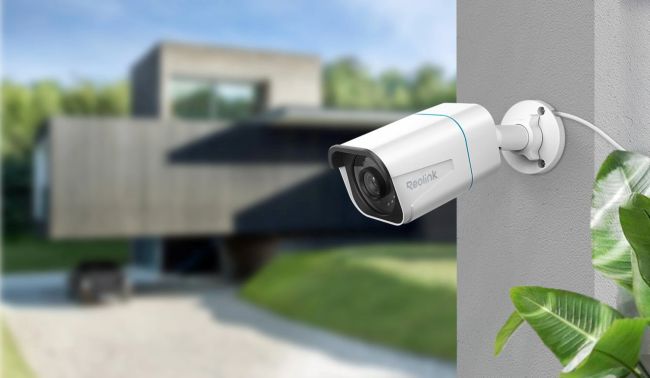
If you have Ethernet reaching the corridor and you need footage from every hour, not motion clips, then the Reolink RLC-810A fits this scenario.
It is an 8MP PoE camera on a 1/2.7 inch sensor, and the 4mm version delivers 87 degrees horizontal by 44 degrees vertical, which is the tighter of the two lens options and the right one for a run past 20 feet.
Its IR night vision reaches 30 meters using eighteen 850nm LEDs, so a 40-foot corridor is well inside range after dark. Person, vehicle, and animal detection cut the false-alert load.
For a long straight run, the RLC-810A also supports Corridor Mode, which physically rotates the camera 90 degrees and switches the output from 16:9 to 9:16. That reclaims exactly the frame the pixel table earlier in this guide showed getting wasted on side walls, since the sensor's width now runs down the length of the corridor instead of across it. Enabling it requires the latest firmware and, as of this writing, can only be toggled through a web browser rather than the app. The camera restarts and resets AI sensitivity, detection zones, and privacy masks to default, so plan to reconfigure those afterward.
Footage goes to a microSD card up to 512GB or to a Reolink NVR with no subscription. It draws power over standard 802.3af PoE and carries an IP67 rating, which means it's dust-tight and able to survive brief immersion, so an unheated stairwell or a covered walkway is not a problem.
This camera is not suitable if Ethernet does not reach the mount point. There is no Wi-Fi fallback on this model and fishing cable through an older building is sometimes not worth what it costs. Also worth planning for the IR bounce discussed earlier, because 30 meters of infrared in a four-foot corridor is a lot of light with nowhere to go.
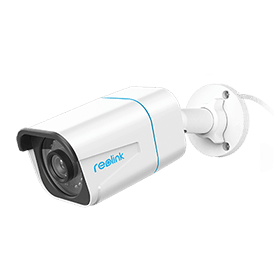
4K PoE IP Camera with Person/Vehicle Detection
Smart Person/Vehicle Alerts; 4K UHD Day; Night; 100ft Night Vision; Time Lapse; IP66 Certified Weatherproof; Audio Recording.
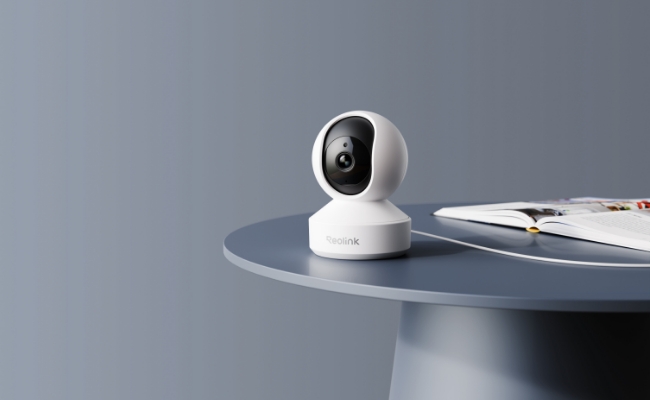
Reolink E1 Pro
Best for a Private Entry You Control With an Power Outlet Nearby
This one only works inside a space that is yours. The Reolink E1 Pro is a DC-powered camera that sits on a shelf or table with nothing drilled, which is what makes it viable for renters. It records 2880x1616 at 20fps through an f/1.6 lens, and its motorized base pans 355 degrees and tilts 50 degrees. That pan range earns its place near a corner where a fixed lens would miss half the approach, and how pan-tilt cameras trade coverage for a moving blind spot is worth understanding before you rely on it.
It runs dual-band 2.4GHz and 5GHz Wi-Fi. Use 2.4GHz if there is a wall between the camera and the router, because the 5GHz band loses more through masonry even though it is usually the less congested choice. Its detection capabilities cover motion, person, pet, and crying. Privacy Mode matters more on this camera than on the other two picks in this guide, because it sits inside your living space on a shelf or table rather than mounted outside looking only at a doorway. A tap in the app turns the lens to face the wall and pauses monitoring, so you can shut it off for a video call or while guests are over without unplugging it or hunting through settings for a full power-down.
Note: The full E1 Pro review covers the indoor use cases in more depth.
Storage options are aplenty as it footages can be stored via microSD, FTP, NAS, or a Reolink NVR, with scheduled and 24/7 recording available.
There are one real limit for this camera. As a DC-powered camera, it needs constant power from its adapter. So, it is more suitable as a unit interior, reception area, or private entry camera rather than a shared corridor camera. There is also something to take note. Because the view can be repositioned remotely, it's imporatant to check the saved position periodically so it has not been left pointing somewhere it should not, like your neighbor's door.
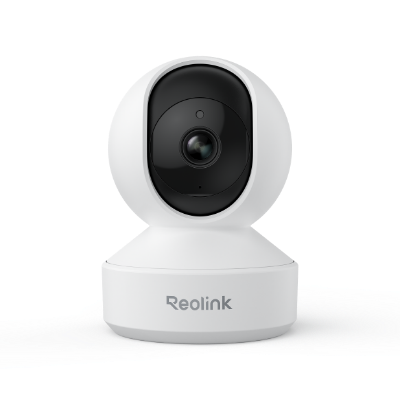
Smart 5MP Wi-Fi PT Indoor Security Camera
Crying Detection for Baby Monitoring; Smart Detection & Auto Tracking; 360° Coverage with Pan & Tilt; 5MP Super HD.
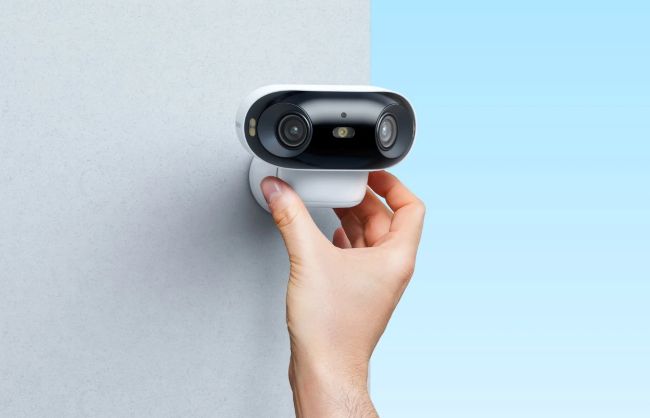
Reolink Argus 4 Pro
Best for an Entry Point With No Outlet and No Cable
When neither Ethernet nor an outlet exists, such as a shared entry alcove or a hallway junction beside an exterior door, the Reolink Argus 4 Pro provides a flexible installation solution. Its 5000mAh rechargeable battery eliminates the need for wired power, while the optional 6W Solar Panel 2 can help maintain continuous operation with minimal maintenance.
It captures 5120x1440 at 15fps across a 180 degree horizontal field of view by stitching two lenses, and its ColorX system pairs an f/1.0 aperture with a 1/1.8 inch sensor rather than using infrared. Reolink lists no IR night vision on this model at all, which removes the wall-bounce problem entirely.
Two things the spec sheet makes clear that matter in a corridor. It uses five 2W 6500K spotlights for night footage, so in a shared hallway it will light up whoever walks past, and that is worth thinking through before you mount it near someone's front door.
Its runtime moves with motion frequency, clip length, Wi-Fi strength, and temperature, so a busy shared corridor drains it far faster than a quiet entryway. The Solar Panel 2 helps only where the camera gets genuine direct daylight, which a fully indoor hallway does not offer. Its IP66 rating handles a drafty entryway or a covered outdoor corridor.
Skip this camera if you have a narrow interior hallway. That 180 degree view is the widest lens in this guide, and per the pixel table above it is not ideal for a four-foot corridor. Instead, put it where a hallway opens into a lobby, a landing, or a wider entry space.
Hallway Camera Buyer Decision Table
Comparing four specs across three cameras gets confusing fast. This table sorts it by situation instead. You can find the row that matches your hallway and the rest of the decision is already made.
Two things apply no matter which row above matches you. If the corridor is shared and busy, turn on AI person detection and set tight motion zones on whichever camera you land on, or the alert log becomes noise you stop reading. If a monthly fee is a dealbreaker, all three cameras in this guide support microSD or NVR storage with no subscription, so zero-cost storage does not narrow the choice on its own. It only rules out a camera if you specifically plan to rely on cloud storage instead.
Not sure which row you are in? The Reolink Solution Finder narrows it down in five questions.
FAQs
Are cameras allowed in apartment hallways?
It depends on your location, your lease, building rules, and what the camera records. Landlords and property managers can often use visible cameras in common areas such as entrances, lobbies, and corridors. Tenants usually need written permission before mounting a camera outside their own unit. Avoid aiming at a neighbor's interior, windows, door-code panel, or private space, and check local recording laws before enabling audio. This is general information rather than legal advice, so review your lease and applicable local privacy rules before installing anything.
Where should I mount a hallway camera?
Start at 7 to 8 feet, angled slightly down, at the end of the straightest run you have. Then verify face detail at the far end before you finalize the position. Avoid mounting directly across from a neighbor's door, because capturing their comings and goings raises privacy problems even in a common area. Corners and T-junctions need a second camera rather than one wide lens attempting both directions.
Do hallway cameras need color night vision?
Color night vision helps most when the hallway keeps some ambient light from a window, a fixture, or a nearby entrance. In a completely dark corridor a good infrared or low-light camera may be more reliable unless you are willing to add lighting. A color sensor has no IR emitter to bounce back off close walls, so it should in principle reduce that glare, but test recorded footage in your own hallway before relying on color detail after dark.
Can I record audio in a shared hallway?
It depends on your state and the circumstances. Some states allow recording with one party's consent. Others require every party to consent, including California under Penal Code § 632(a), Florida under Fla. Stat. § 934.03(2)(d), and Illinois under 720 ILCS 5/14-2(a)(1). A shared hallway involves people who have not agreed to anything, which is why many property managers disable audio on corridor cameras and rely on video alone. The state-by-state recording guide covers the rest.
How many cameras do I need for a long hallway?
One camera covers a straight residential hallway up to roughly 40 feet with the right lens and mount height. Confirm that by checking recorded footage at the far end rather than assuming it from the distance. Add a camera at every bend, T-junction, and stairwell entrance, because no lens covers a corner. Commercial corridors typically need one every 40 to 50 feet to keep faces identifiable at the edge of the frame.
Can a doorbell camera monitor a hallway?
Not well. A doorbell camera is built to cover the small area directly in front of one door, not the length of a corridor, so it either misses movement further down the hallway or catches it at an unusable angle. If you need the corridor itself rather than just your own doorstep, a dedicated indoor camera with the right lens is the better tool.
Does a hallway camera need to be weatherproof?
For a fully interior corridor, no. For a stairwell, an entry alcove, or a covered walkway open to outside air, yes. IP66 handles high-pressure water jets and IP67 adds brief immersion, and either is enough for a drafty entryway. Unheated stairwells matter more for temperature tolerance than for water, and battery cameras lose runtime in the cold.
Conclusion
A hallway camera earns its keep when the lens matches the corridor's shape, not when it carries the highest resolution on the shelf. At 10 feet, even an 87-degree lens loses about 79 percent of its frame to the side walls in a four-foot-wide hallway, and that waste only compounds as you move further down the corridor. Choose the tighter lens, mount it at 7 to 8 feet, and you'll get more usable detail than doubling the megapixel count ever could.
Power comes down to what your access allows. Go PoE if you control the cabling and want continuous recording. Plug-in Wi-Fi suits a private spot near a reliable outlet. Battery power only makes sense where installation is permitted and recharging is actually realistic. From there, check your building's rules, mount the camera, and pull a recorded clip from the farthest point you need covered before calling the job done.
Still torn between a wired run and going wireless? the PoE versus Wi-Fi comparison covers the installation trade-offs in detail.
Search
Subscribe for the Latest Updates
Security insights & offers right into your inbox