
Recording Security Cameras Footage to PC or NVR: What's the Difference?
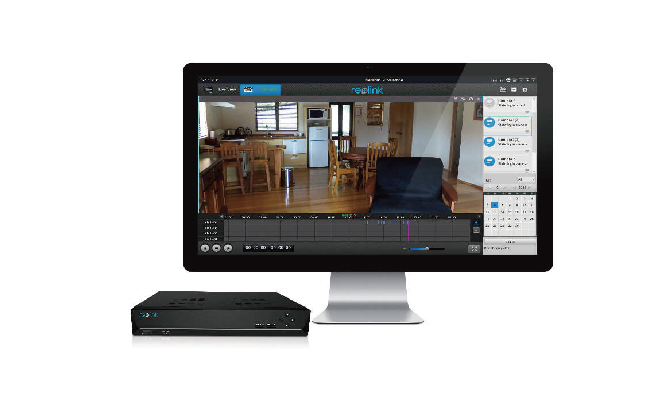
Many security cameras allow you to record footage either to a PC or to a Network Video Recorder (NVR). Both options let you store and review recordings, but they differ significantly in terms of setup, reliability, storage capacity, performance, and long-term maintenance.
In this guide, we'll compare recording security camera footage to a PC versus an NVR, explain the key differences, and help you decide which solution is best for your home or business.
Key Difference between Recording Security Cameras' Footage to PC or NVR
Setup & Configuration
Recording security camera footage to an NVR is typically the easiest option. Simply connect compatible cameras to the NVR using Ethernet cables (PoE models) or pair them over Wi-Fi if supported. The NVR automatically manages recording, storage, and playback through a single interface.
Recording to a PC requires installing video management software (VMS), such as Reolink Client, Blue Iris, or Milestone. You also need to configure recording schedules, storage locations, and camera settings. While this provides greater flexibility, it usually requires more setup and ongoing maintenance.
Compatibility
Modern NVRs support multiple cameras within their channel limit (such as 8, 16, or 32 channels). Many also support ONVIF-compatible cameras, allowing them to work with selected third-party devices, although compatibility and available features may vary by manufacturer.
A PC offers greater flexibility because many VMS platforms support cameras from multiple brands. This makes a PC a good choice if you already own cameras from different manufacturers or need advanced management features.
Storage Capacity
Both PCs and NVRs can store large amounts of video, but they manage storage differently.
An NVR is designed for 24/7 recording and typically supports up to 16TB (or more) of storage, providing 30–90 days of continuous recording for an 8-camera 4K system, depending on recording settings.
A PC uses internal or external hard drives, and storage can be expanded as needed. However, recording multiple cameras continuously consumes CPU, memory, and disk resources, so a more powerful computer is recommended for larger systems.
Remote Viewing & Playback
Both PC and NVR recording solutions support remote live viewing and playback.
With an NVR, users can access live streams and recorded footage through the manufacturer's mobile app or desktop client from virtually anywhere with an Internet connection.
If recordings are stored on a PC, remote access is also possible through compatible VMS software, provided the computer remains powered on and properly configured for remote connections.
Cost
Using an existing PC can reduce the initial hardware cost since no dedicated recorder is required. However, additional expenses may include surveillance software licenses, larger hard drives, or future hardware upgrades as more cameras are added.
An NVR requires a higher upfront investment, but it provides dedicated recording hardware, centralized camera management, and lower ongoing maintenance. For homes and businesses with multiple cameras or continuous recording needs, an NVR often offers better long-term value.
How to Record IP Security Cameras Video Footage to NVR?
Recording footage to an NVR is simple and supports both continuous recording and motion-triggered recording.
-
Connect compatible PoE or Wi-Fi cameras to the NVR and ensure a hard drive is installed for local storage.
-
Go to Menu > Recording > Schedule, select the camera, enable Normal Recording, and set the recording schedule. Select all time periods if you want 24/7 recording.
-
Go to Menu > Alarm > Motion, enable Motion Detection, and adjust the detection area and sensitivity to reduce false alerts.
-
Enable Alarm Recording and choose when motion-triggered events should be recorded. You can enable both Normal Recording and Alarm Recording simultaneously.
-
Open Playback on the NVR, Reolink App, or Client to search recordings by camera, date, or event. Motion events are highlighted on the timeline, making important footage easier to find.
How to Record/Store IP Camera Footage to a PC?
You can record IP camera footage directly to a Windows PC or Mac using Reolink Client. The software allows you to save recordings to your computer's hard drive without purchasing a dedicated NVR.
Method 1: Record Manually
Manual recording is useful when you only want to save footage during specific events.
- Download and install the latest Reolink Client on your Windows PC or Mac.
- Connect your IP camera to the same network as your computer and add the camera to Reolink Client.
- Open Client Settings and choose a local folder where recordings will be stored.
- Select the camera from the device list and open Live View.
- Click the Record button to start recording. The software will begin saving footage to your selected folder.
- Click Record again to stop recording. You can review the saved video directly from your computer.
Method 2: Set Up Automatic Recording
If you want your camera to record without manually starting and stopping each session, you can configure automatic local recording.
- Open Reolink Client and select your camera.
- Go to Client Settings > Local Record and enable Local Recording.
- Choose a folder on your computer to store recorded videos.
- Configure a recording schedule based on your needs, such as:
- 24/7 Continuous Recording
- Motion-Triggered Recording
- Save the settings and keep Reolink Client running. The software will automatically record footage according to the schedule you configured.
Note: Recording to a PC only works while Reolink Client is running and your computer remains powered on. If the PC is turned off, enters sleep mode, or the Client is closed, recording will stop. If you need reliable 24/7 recording without relying on a computer, a dedicated Reolink NVR is the recommended solution.
PC or NVR: Which One to Choose?
Choose a PC if you already have a spare computer, only need to manage a small security system (typically up to 4 cameras), or want the flexibility to use third-party video management software. It offers lower upfront costs and customizable recording options, but requires more setup, ongoing maintenance, and sufficient hardware for continuous recording.
Choose an NVR if you're building a larger surveillance system or need reliable 24/7 recording. An NVR is purpose-built for security, making it easier to manage multiple cameras while providing stable performance, centralized storage, and lower power consumption. Many PoE NVRs also eliminate the need for a separate PoE switch, simplifying installation.
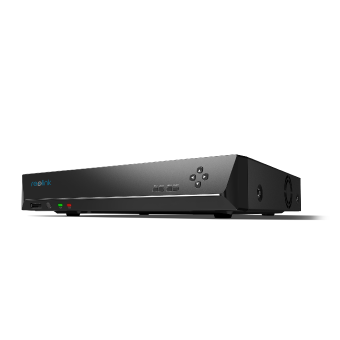
12-Channel PoE NVR
Supporting Up to 16MP, Power over Ethernet, 24/7 Continuous Recording, Expandable Storage Up to 16TB.
For maximum protection, you can also adopt a hybrid approach by recording footage to an NVR while backing up important recordings to a PC, NAS, or cloud storage. This provides an additional layer of data protection and ensures your recordings remain available even if one storage device fails.
FAQs
Can you use a PC instead of an NVR?
Yes. You can use a PC instead of an NVR by installing video management software (VMS), such as Reolink Client or other compatible surveillance software. A PC is a good option for small camera systems and users who want more flexibility. However, it requires more setup and maintenance, while an NVR provides more reliable 24/7 recording and easier management for multiple cameras.
Will NVR work without internet?
Yes. An NVR can record security camera footage without an Internet connection as long as the cameras are connected to the NVR and a hard drive is installed. Internet access is only required for features such as remote viewing, mobile notifications, firmware updates, and cloud services.
How much does an NVR cost?
An NVR typically costs $100 to $1,000+, depending on channels, storage, and PoE capabilities:
-
Entry-Level ($100 – $200): Standalone unit (4–8 channels), no hard drive included.
-
Mid-Range / Home ($200 – $450): 8–16 channels, built-in PoE, includes a 2TB–4TB hard drive.
-
Business / High-End ($500 – $1,200+): 16–36+ channels, multi-bay storage (6TB+), advanced features.
Main Extra Costs:
-
Surveillance Hard Drive: Adds $60 – $200 if bought separately.
-
Complete Camera Kits: Bundles (NVR + 4 to 8 PoE cameras) cost $400 – $900+.
Conclusion
Choosing between recording security camera footage to a PC or an NVR ultimately depends on your surveillance needs, budget, and the size of your system. While a PC offers flexibility for smaller setups, an NVR provides a more reliable and scalable solution for continuous security monitoring.
Whichever option you choose, proper storage is just as important as the cameras themselves. A well-planned recording system ensures you can quickly access critical footage when it matters most. If you expect your surveillance system to expand over time, investing in a dedicated NVR can provide a smoother and more dependable experience.
Search
Subscribe for the Latest Updates
Security insights & offers right into your inbox