Here's Everything You Need to Know About Mounting a Trail Camera
Mounting your trail camera correctly can make the difference between getting good footage of your targets or not getting any useful material.
Whatever you need a trail camera for, there are guides you have to follow to get the most out of it.
Whether you are a beginner who is inexperienced with trail cams or a veteran looking to learn something new, this guide will teach you all you need to know about setting up a trail camera.
Trail Camera Mounting Options
There is an array of accessory options to pick from when mounting your trail cam. Usually, your budget, surveillance area, and requirements determine which one you pick.
Below are the common trail cam mounting accessories on the market.
1. Trail Camera Mounting Strap
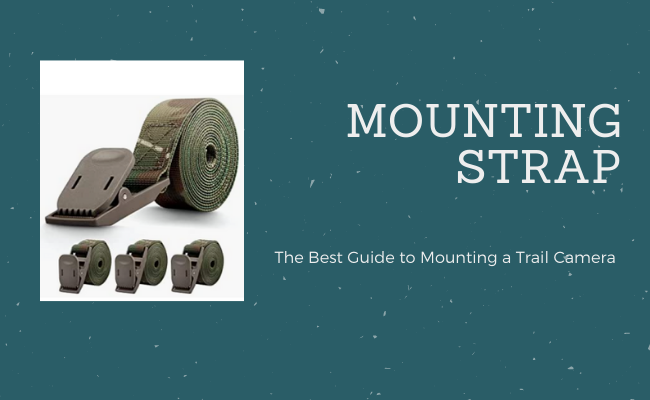
The Trail Camera Mounting Strap is the default camera fitting and is usually included in the camera box, although you can buy it separately on Amazon.
The mounting strap goes around the back of the camera and ties to a tree, securing your device firmly.
Some might say the fact that its use does not damage the tree is an advantage; however, using it limits how much you can adjust the camera angle. But you can always improvise with other things like a tree branch.
Overall, the Trail Camera Mounting Strap is simple and effective for setting up your trail camera.
2. Trail Camera Tree Mount
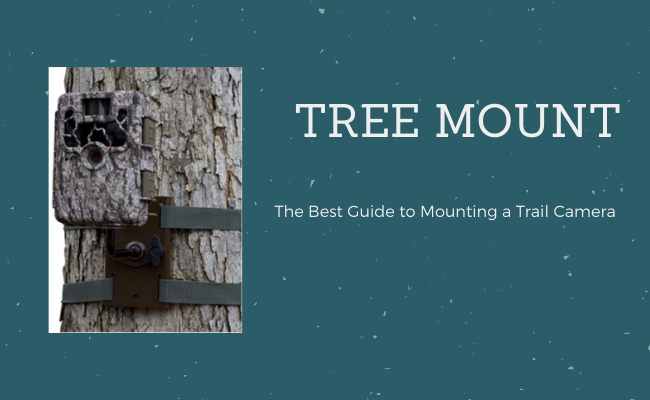
This accessory is similar to the mounting strap, with a few features marking the differences.
Unlike the mounting strap, which secures the camera directly to the tree, this tree mount comes with an adjustable camera holder. The holder is fastened to the tree via durable straps and gives the camera more flexibility in terms of angle and rotation compared to the ordinary mounting strap.
3. Pan Tilt Lock Mount
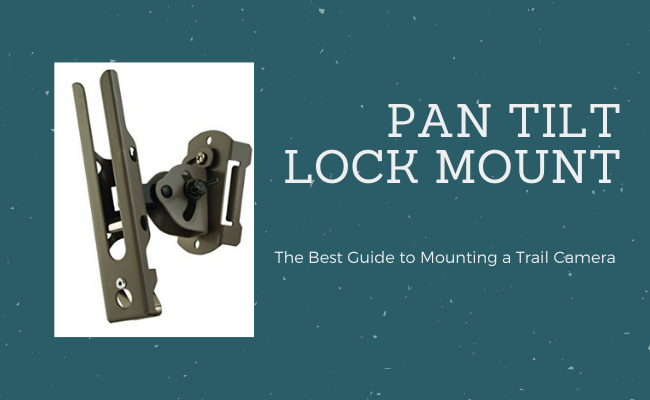
The Trail Camera Pan Tilt Lock Mount may be the most complicated looking on the list, but don’t let that fool you; it works just as well.
The mount rotates on all its three axes, offering flexibility and allowing you to pan, aim, and tilt your camera to your desired angle. It also features a locking mechanism, protecting your camera from thieves and securing it in place even in the unfriendliest of weathers.
Setting it up is easy too. The accessory is compatible and attaches to any 1/4-20 tripod mount.
4. Trail Camera Holder Mounting Bracket with Tree Screw
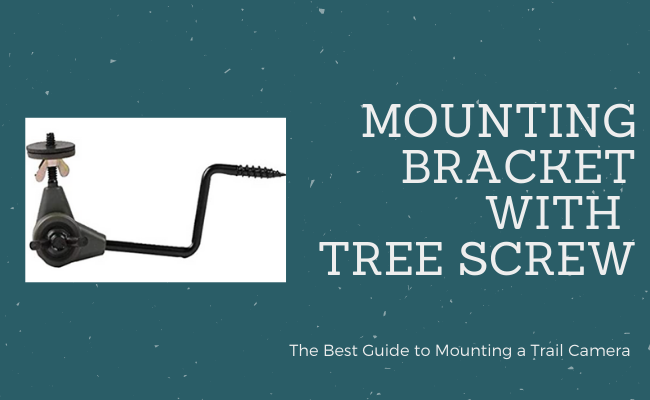
Using the Trail Camera Holder Mounting Bracket is as easy as it looks. It has a screw end that goes directly into the tree, while the camera is attached to the other end. The main advantage of this option is that your camera can be rotated 360 degrees, allowing positioning for optimal aim.
The bracket also supports cameras with ¼ x 20 thread, so you can use it with most cameras. And because it’s made of durable metal, it can withstand all kinds of weather conditions.
6. Trail Camera Holder Ground Mount or mounting stick
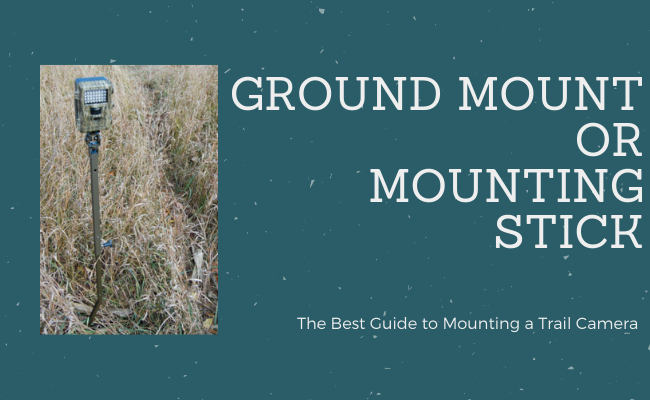
The Trail Camera Holder Ground Mount or mounting stick is perfect for use in locations with no trees, such as grasslands. The metal pole is stuck into the ground and provides adjustable height support for cameras with a ¼ x 20 thread insert.
The camera is fixed atop the mount and can also be rotated 360 degrees. The mount also has a pan/tilt function that lets you adjust the camera view.
7. T-post trail camera mount
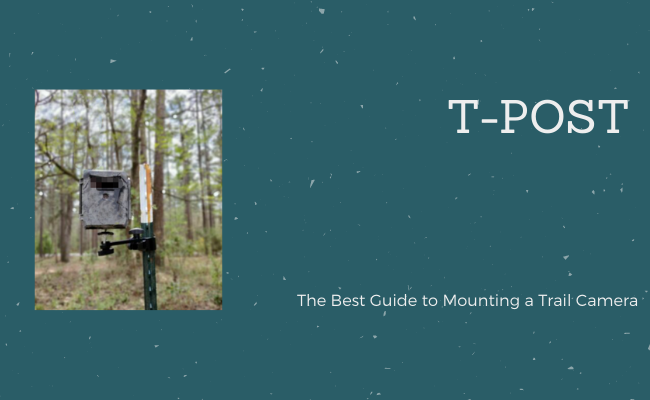
Like the mounting stick, the T-post trail camera mount was also intended for use in open areas without trees. When stuck in the ground, it resembles a “T,” hence, the name.
The T-post trail camera mount works similar to the mounting stick too. It is easy to set up, and the mounted camera can be rotated 360 degrees.
How to Make Your Trail Camera Mount DIY-Style
If you are more of the handy type and like to make stuff yourself, we’ve got you covered. Below is a step-by-step guide you can use to make your cheap camera mount for under $5!
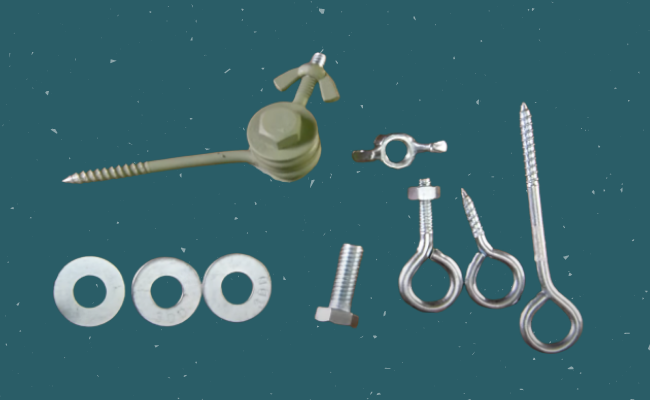
First, you need to get certain materials from a nearby hardware store.
You will need;
-
1 Eye Screw: 2 inches
-
1 Eyebolt: 1/4 x 2 inches (20 threads per inch)
-
1 Hex bolt: 3/8 x 1 inches
-
1 Hex nut: 3/8 inch
-
1 Wing nut: 1/4 inch
-
3 Washers: 5/16 inch
-
1 Lock Washer: 3/8 inch
-
Two 9/16-inch wrenches
-
Spray paint (optional)
Follow these steps to assemble the mount
1. Take your hex bolt and slide one washer onto it.
2. Place the eye bolt on the first washer, then put another washer on.
3. Next, put the eye screw on the hex bolt and add another washer.
4. Then put the lock washer on and put the nut on the hex bolt, and tighten till it is firm.
5. Finally, put the wing nut on the eyebolt.
6. You can spray-paint the finished mount to prevent rust and help it blend with the environment.
How High Should You Mount a Trail Camera?
Depending on your game, you’ll want to mount your camera at the height of your subject. For example, if you’re trying to capture images of deer, you’ll want to mount your camera at about 3 feet off the ground.
You can also mount your camera higher – about 6 or 7 feet above the ground - if you feel it could spook the animals away.
If you plan to monitor human movement, it’s best to place your camera above eye level. People are less likely to look above their heads when walking; fixing the camera higher keeps it out of sight while capturing footage of trespassers.
Since the cameras that are set high up are not easily detected, there are fewer risks of your cameras being stolen or damaged by trespassers and animals. Plus, it also provides a better angle for capturing footage.
Having an elevated camera with a pan & tilt function is also very useful. It allows you to automatically adjust and rotate the camera to record a particular area. This way, you don’t have to go over and adjust the camera every time.
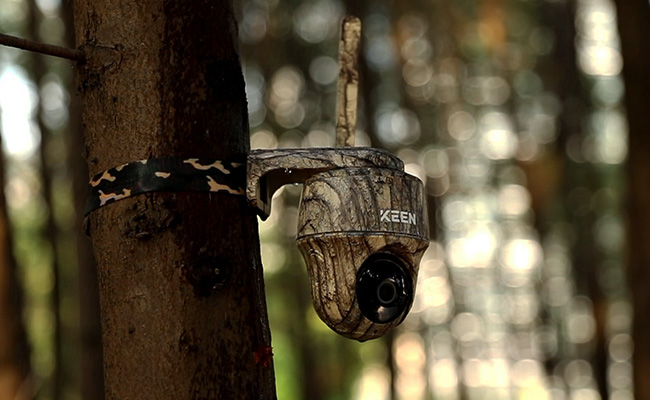
A great suggestion is Reolink's KEEN Ranger PT, which is a recently released trail camera that offers 4G network connection and PT function, you can easily set it up in high places with great viewing angel. I hope you will find it to be a valuable addition to your trail camera arsenal.
Where To Mount a Trail Camera
Camera location is a decisive factor in game surveillance. Your priority is to observe the movement patterns of your game and gather as much intel as possible.
Naturally, we’d recommend setting up your cameras in high traffic areas, so you have higher chances of monitoring your target. However, your choice of location could be influenced by the season, type of footage, and the animal you are trying to record.
Here are some tips on where you can set up your camera:
-
Food and water sources: Most animals are food-driven. You have to learn their diet and eating patterns prior to setting up your camera. Deer, for example, love wild berries, shrubs, and acorns. Freshwater spots (streams, lakes) are also good places to scout wildlife with your camera, especially in the rainy season.
-
Bedding areas: A bedding area is where animals go to rest between feeding sessions. It is usually a central hub for the animals, and all their paths originate from there. In these locations, consider opting for cameras equipped with 4G connectivity to ensure smooth remote monitoring and control. The Reolink Go PT Ultra is a great choice. An animal’s choice of bedding area may vary from one individual to another, but they generally like places where they feel safe and can spot dangers quickly. Set your camera near one, and your chances of getting premium game footage improve.
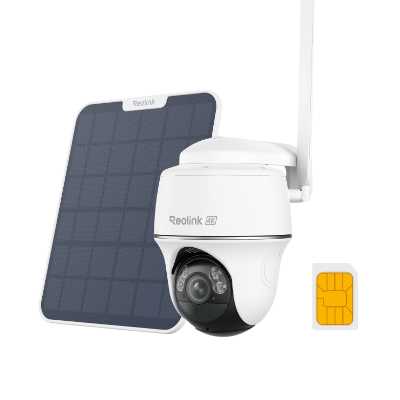
4K 8MP Wire-Free 4G LTE PT Battery Camera
4K 8MP; Smart Detection; 355° Pan & 140° Tilt; Battery/Solar Powered; Color Night Vision; Smart Real-Time Alert.
- Trail intersections: After you’ve scouted the favorite spots of your targets, try to find points where trails to those spots cross. An ideal place would be where paths from drinking spots and bedding areas meet. Consider using PTZ cameras to enhance your field of view. For instance, the Reolink Argus Track comes with auto-zoom tracking functionality, allowing it to monitor animal movements in areas where paths intersect.
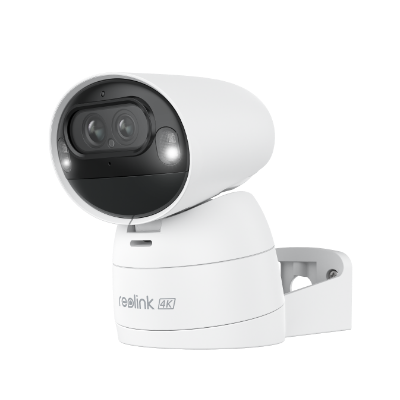
4K Dual-Lens Wi-Fi Solar/Battery Camera
4K 8MP Ultra HD, Auto-Zoom Tracking, Pan, Tilt & 6X Hybrid Zoom, Color Night Vision, Dual-Band Wi-Fi.
- Over mineral sites: If you are tracking deer, you can also bait them with mineral deposits. Put these salt minerals near feeding or drinking spots and watch the deer troop in. Just make sure to set your camera nearby.
Set Up a Trail Camera Mount - Step by Step Guide
-
Before installation, use a damp rag to wipe off human scent from the camera. Clean the lens and other nooks to ensure there are no smudges on your recordings. Ensure your SD card has enough space before inserting it. Finally, remember to wear gloves while fixing the camera.
-
Once you’ve picked a suitable installation spot, ensure the camera angle is right and nothing is blocking its view. If possible, mount the camera somewhere high and hidden. Also, avoid facing the camera towards the sun so as not to mess up your shots.
-
After turning on the camera, configure it and connect it to your phone or computer. Preview the camera feed to ensure everything is perfect. Remove any low-hanging branch that could trigger the camera unnecessarily. If you are using a Reolink camera, you can set the app to ignore object movement and reduce false alarms.
-
Try not to visit the camera too frequently. Remember, your scent can drive the animals away. Most trail camera apps often provide stat reports such as battery levels to help you monitor the camera. Try to track of your SD card capacity, too. Depending on the memory size, you can expect it to fill up in a couple of months.
Tips for Mounting Your Trail Camera
There are a few things to keep in mind when you’re out in the woods and want to mount your trail camera.
-
One camera is hardly enough for surveillance. You’ll need multiple cameras at different points to get the best results.
-
Face your trail camera north, away from the sun, to get better lighting and avoid false triggers.
-
Consider investing in high-quality batteries for longer camera performance.
-
If you strapped your camera high up a tree, you can keep the strap slack and place a twig between the camera and the tree to tip it for better angles.
-
Use baits to make animals stand still for the camera. These could be salt licks for deer and grains for birds.
-
Infrared lights or flashes from the camera can scare the animal away. You may want to use low-glow trail cams instead.
-
Use a mounting stick or T-post mount when there are no trees around.
Conclusion
Understanding the movement patterns of wildlife is an essential factor in getting the best out of your trail camera and mount. Remember, areas of high game traffic are of priority, and setting up your camera in such areas improves your chances of getting valuable footage.
You can further boost those chances by using any Reolink camera with a high-resolution display and long-lasting battery life for optimal performance on the field.
Also, you have to be careful when screwing camera mounts on trees on public land. Remember to confirm your hunting lease agreement or public land regulations to ensure you are not breaking any rules by screwing mounts into trees.
Search
Subscribe for the Latest Updates
Security insights & offers right into your inbox