
How to Install a Doorbell? (Video Doorbell)
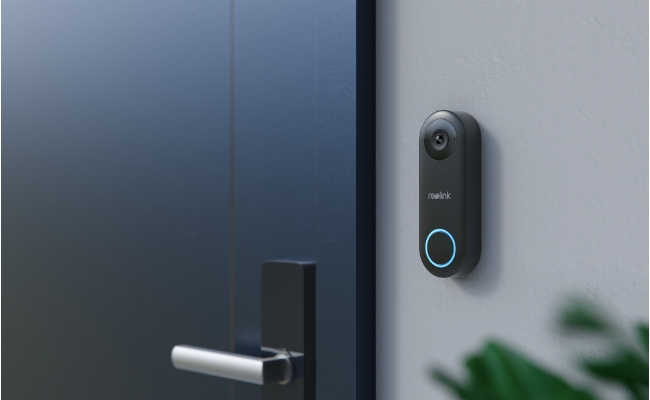
A video doorbell adds a real layer of security to your house. It records what's happening outside and detects movement before someone even knocks. It also lets you talk to whoever's there, even when you're not home.
If you are thinking of installing one, here is a complete step-by-step process of how to wire a doorbell without any hassle.
Is It Necessary to Hire an Electrician for Doorbell Installation?
It isn’t necessary to hire an electrician for doorbell installation, especially if you are changing the old one or installing a wireless doorbell. It is more like a DIY task, and you just need to follow a few simple steps carefully.
But if you aren't familiar with wiring and unsure about anything, hiring an electrician would be a better idea than harming yourself.
What You'll Need Before You Start
Having the right tools on hand before you start saves you a trip back to the hardware store mid-install.
For any doorbell install:
- A screwdriver, including one for security screws if your doorbell uses them
- A drill, with masonry or concrete bits if you're mounting on brick or stucco
- A level, so the doorbell sits straight
- Mounting screws and wall anchors (most doorbells include these in the box)
For a wired doorbell specifically:
- A voltage tester or multimeter, to confirm the transformer is off before you touch any wires
- Wire nuts or wire connectors, in case you need to extend or splice existing wiring
- A flathead screwdriver small enough for the terminal screws on the transformer and chime
A wireless or battery doorbell skips the wiring tools entirely. All you need is what's in the box, plus the screwdriver and drill for mounting.
How to Install a Wired Doorbell?
If you are installing a wired doorbell for the first time, you will need a doorbell transformer. It lowers the voltage according to the requirements of the doorbell.
Let’s see how to install a doorbell transformer before wiring a wired doorbell.
How to wire a doorbell transformer?
A doorbell transformer is connected to the main electric supply (junction box). It can be dangerous for people who do not have practical knowledge of wiring. It is better to hire an electrician.
The transformer's job is to step your home's regular 120-volt power down to the 16 to 24 volts a doorbell actually runs on. That low-voltage output is why doorbell wiring counts as its own separate, low-risk circuit type under electrical code. It's also why most homeowners can safely handle everything past the transformer itself.
The transformer's input side is the one part still connected to full household voltage and because of that, the circuit breaker has to be off before you touch it.
Note: Some areas require a permit for this kind of work and some don't, so check with your local building department if you're unsure.
- Mount the transformer on the wall. Mark the position with a pencil and use a drill machine to drill the holes.
- Place the mounting bracket on the wall and secure it using screws. Mount the transformer on the bracket, and make sure to check the input and output terminals.
- Turn off the circuit breaker before doing this. Connect a 3-core cable to the input of the transformer, and then connect the other end to the ground, neutral, and phase of the AC supply.
How to wire a doorbell?
Once the transformer is ready, you can connect the doorbell to it.
-
You need to mount the doorbell outdoor unit on the wall outside your home. Place the mounting plate and mark the position of the holes. Now, drill the holes using a drill machine and mount the doorbell on the mounting plate. Some doorbells do not have a mounting plate and can be fixed using adhesive tape.
-
Connect the doorbell to the output of the transformer. There will be two terminals at the output of the transformer and two terminals at the doorbell. Connect one terminal of the doorbell to one output terminal of the transformer. Now, connect the doorbell's second terminal to the transformer's other terminal. It is AC, so you don’t have to worry about the polarity (positive or negative).
-
It is time to install the chime box. You only need to insert it in a wall outlet. But it is better to place it in the center of the house. Once it is installed, turn on the doorbell and test it.
How to Install Your First Doorbell?
If you do not have a doorbell before and want to install one, it is better to use a wireless video doorbell. It is the easiest option, and you don’t need an electrician for this.
- Find a suitable place for the doorbell switch. You can either install it on the wall with the help of an adhesive tape or screws. It is better to use screws because it lasts for a very long time.
- Place the back mounting plate on the wall and mark the holes for screws. Use a drill machine to drill holes for screws and install the back mounting plate. Insert the battery in the unit to power it. Now, mount the doorbell switch on the plate.
- It is time to install the chime unit. Find a suitable place inside your home. There are two types of chime units available. One directly goes into the wall socket, and the other one requires batteries. If it requires a wall outlet, you can insert it without any hassle. But if it requires batteries, install the batteries, and you may also need to drill a couple of holes in the wall to mount it.
- Turn on the doorbell. Install the required app on your device and connect the doorbell to the Wi-Fi. Finally, test the doorbell and check whether it is working fine or not.
Best Picks for Doorbell Cameras
Reolink Video Doorbell 2nd Gen
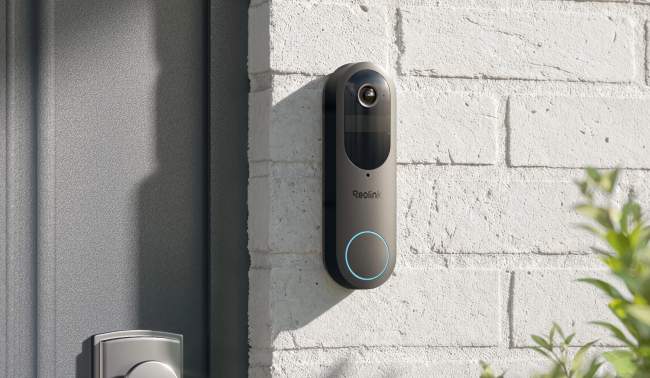
The Reolink Video Doorbell 2nd Gen delivers crisp 2K 4MP video with a head-to-toe 1:1 aspect ratio, giving you a complete view of visitors and packages at your doorstep. Powered by the Qualcomm® Micro-Power Wi-Fi solution, it offers reliable dual-band 2.4/5GHz Wi-Fi connectivity and an impressive battery life of up to 300 days on a single charge.
Advanced AI detection can accurately identify people, vehicles, packages, and animals, helping reduce false alerts and improve home security. The doorbell supports both battery-powered and hardwired installation, allowing you to choose wire-free flexibility or enable 24/7 continuous recording with existing doorbell wiring.
It also integrates seamlessly with the Reolink Home Hub and Wi-Fi NVR for centralized local storage and management, making the Reolink Video Doorbell 2nd Gen an excellent choice for smart, subscription-free front door protection.
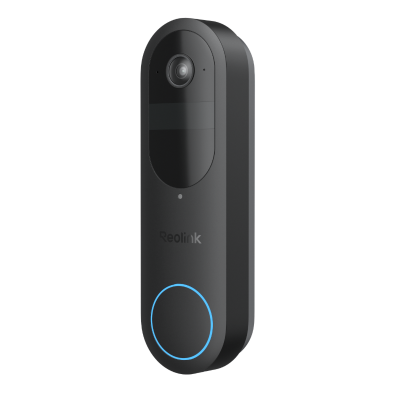
2K Battery Wi-Fi Video Doorbell with Smart Detection
- 2K 4MP Head-to-Toe View
- Person/Vehicle/Animal/Package Detection
- 300-Day Lasting Battery Life
- No Monthly Fees for Local Storage
Reolink Video Doorbell PoE
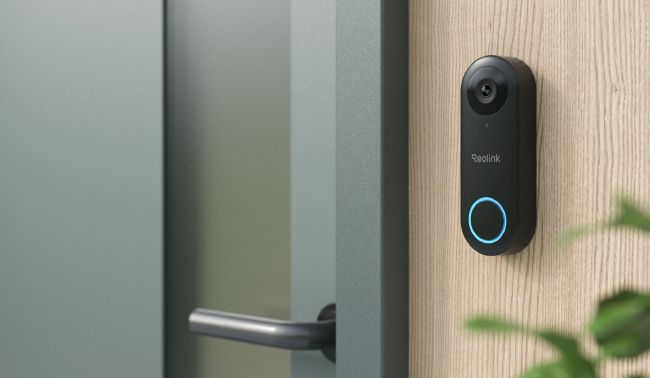
An incredible wired video doorbell that offers 2K+ (5MP) HD video for crisp and clear visuals. It covers a wide area around the door and shares extra details of the person and surroundings. It can detect movements near the door and send you alerts on your device. You can also monitor the area at night as it has infrared LEDs.
It is equipped with built-in mics and a speaker to facilitate communication with anyone at the door, even if you are not at home. It gives instant alerts, allows you to view your house from anywhere, and records everything for later use.
It is a PoE-wired doorbell, which means one ethernet cable handles both power and data. It runs on a constant wired connection instead of a battery. It's built for a fixed spot where you'd rather not think about charging or swapping a battery again.
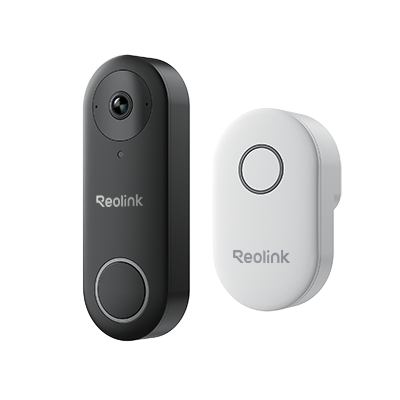
Smart 5MP Video Doorbell with Chime
5MP Super HD, Person Detection, Power over Ethernet, 180° Diagonal Viewing Angle, Two-Way Audio, High-Quality Night Vision.
Reolink Video Doorbell WiFi
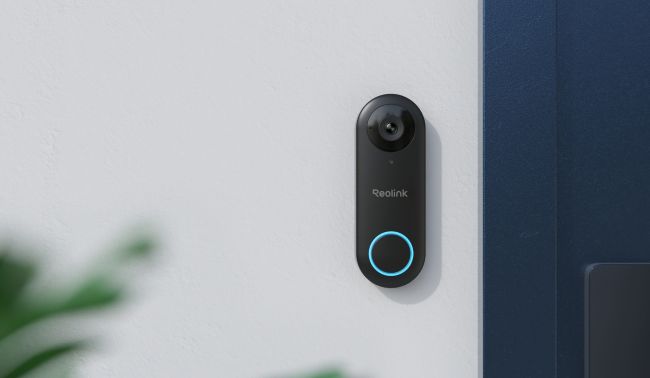
This video doorbell has the same features as the previous one. It also has a 2K+ (5MP) HD video camera for optimal clarity, person detection, and instant alerts. Night recording is built in too, along with a mic and speaker for two-way talk.
The only difference is the Wi-Fi, which means it does not require an ethernet cable. It can be connected within the Wi-Fi range and supports 2.4GHz & 5GHz for a stable connection.
Most importantly, it is a great option if you want to change your existing doorbell. You can connect this to the same wiring and enjoy better features.
Smart 5MP Video Doorbell with Chime
5MP Super HD Day & Night, Person Detection, 2.4/5 GHz Dual-Band WiFi, 180° Diagonal Viewing Angle, Two-Way Audio, Rich Notification.
How to Install These Doorbell Cameras?
You can install these Reolink video doorbells on your own. Here are two quick videos with illustrations and images that you can easily follow.
Battery video doorbell:
PoE video doorbell and WiFi video doorbell:
Where to Mount Your Video Doorbell for the Best View
The right spot matters as much as the right doorbell. Mount it too high and you lose faces. Too low and it misses packages on the ground or stops picking up motion reliably.
Height: Recommendations range from about 40 to 62 inches depending on the source. 48 inches (4 feet) sits in the middle of nearly all of them and is the figure cited most often. That's high enough to catch a visitor's face and low enough to still see what's sitting at their feet.
Angle: Point the camera slightly downward rather than straight ahead. A dead-level angle tends to catch foreheads and the tops of heads instead of faces.
Light: Avoid mounting directly under a porch light. During the day, it causes glare and washes out the video. At night, that same light can work against the doorbell's own infrared night vision instead of helping it.
Direction: Mount it on whichever side of the door gives the clearest view of the approach path, usually the handle side. Keep the frame on your own property. Picking up a neighbor's windows or door in the shot is a real privacy issue, worth avoiding from the start.
Troubleshooting Tips: Common Issues and Solutions During Installation
Here are a few tips that might help you prevent issues during the installation.
- Make sure to connect the input and output of the doorbell transformer correctly. Wrong connections can damage the doorbell transformer and cause a short circuit.
- Always switch off the circuit breaker while interacting with high voltages.
- Make sure there are no wires inside the wall before drilling. You might damage them, which will eventually increase the expense.
- If there is an existing wiring or connection, take a picture before removing the wires. It helps to remember where the wires need to be connected.
- It is possible to bypass the old mechanical chime without removing it. You only need to install a jumper that many doorbell sellers offer along with the box, or you can buy from the market.
- For a standard doorbell switch, mount it at a height where everyone in the house can reach and see it easily. If it's a video doorbell, height and angle affect what the camera actually captures. See "Where to Mount Your Video Doorbell for the Best View" above for the specifics.
- Choose a suitable place for the indoor chime unit. The center of the house is the perfect place to cover all rooms.
- Consult an electrician if you are unsure about anything.
Wi-Fi Connection Problems
The steps above cover physical installation. These steps are troubleshooting tips for any video doorbells that require a WiFi connection to work. At times during installtion, they can be mounted perfectly and still fail to connect during setup. According to Reolink's own support documentation, these are the most common causes and fixes.
- Wrong Wi-Fi password or network name: Double-check both, including capitalization. Testing the same password on your phone first confirms whether the network itself is the problem.
- Weak signal at the door: If the doorbell sits far from the router, or a wall or metal door frame sits between them, move the router closer or add a Wi-Fi extender.
- Router security settings blocking the doorbell: MAC address filtering and parental controls can stop a new device from joining, even with the right password. Turn these off while setting up, then reconfigure them afterward if needed.
- Insufficient power for a wired doorbell: A transformer under-rated for the doorbell's power draw can cause it to drop off Wi-Fi intermittently after setup instead of failing to connect outright. Reolink's own support documentation specifies a 16V AC transformer for wired models.
- Outdated firmware: Once connected, check for a firmware update in the app. Older firmware is a common, easy-to-miss cause of dropped connections.
FAQs
1. How much does it cost to install a doorbell?
Electrician labor typically runs $80 to $150 for a wired doorbell and $60 to $80 for mounting a wireless one. The exact cost depends on your area and how complex the job is. Our doorbell installation cost guide breaks this down further. That being said, installing a Reolink video doorbell yourself by following the steps above costs nothing beyond the doorbell itself.
2. How to install a new doorbell?
If there is no doorbell at your home or existing wiring, go with a wireless doorbell. For this, you only need to place the doorbell switch outside the door and insert the chime into a wall socket. There is no wiring required.
3. How to install a doorbell chime?
To install a wired doorbell chime, you need to install the doorbell transformer first. Follow the steps we have mentioned above. Once the transformer is installed, connect the chime and doorbell unit to it.
Mechanical chimes have three terminals. Connect the Trans terminal to one of the output terminals of the transformer. Then, connect the Front terminal of the chime to the doorbell outdoor unit. Finally, connect the remaining terminal of the doorbell unit with the remaining output terminal of the transformer.
Conclusion
A video doorbell is essential to ensure the security of the house and keep intruders and thieves away. It gives you complete peace of mind as you can monitor your house even if you are away. You can install a doorbell on your own if you like DIY and know how to handle wiring. It is pretty simple, but if you are unsure, it is better to hire an electrician.
Search
Subscribe for the Latest Updates
Security insights & offers right into your inbox