Home Automation Installation: What You Need to Know
Home automation has revolutionized the way homeowners experience convenience, efficiency, and enhanced security. With a few taps on smartphones or a simple voice command, individuals can now control various aspects of their homes through a centralized system.
This comprehensive guide will explore the installation process of home automation. You'll discover the necessary components, understand how the system operates, and gain valuable tips for troubleshooting and maintaining the setup. By following this guide, you'll be able to fully enjoy the benefits and convenience of your smart home setup.
- How Does Home Automation Work?
- Essential Components of Home Automation Installation
- Home Automation Installation: A Step-by-Step Guide
- Cost of Home Automation Installation
- Professional Home Automation Installation vs. DIY Home Automation Installation: Pros & Cons
- Bonus Tips: Troubleshooting and Maintenance Tips for Home Automation Systems
- FAQs
- Conclusion
How Does Home Automation Work?
Home automation refers to integrating various electronic devices, appliances, and systems within a residence, allowing homeowners to remotely control and automate their home's functions. With home automation systems, individuals can conveniently monitor their home's lighting, temperature, security, entertainment, and more through a smartphone, tablet, or voice commands.
Home automation integrates various devices and systems in your home to create a centralized control system. It connects smart devices, such as thermostats, lights, security cameras, and appliances, to a central hub or network. This hub serves as a command center that allows you to control and automate these devices through a mobile app or voice commands. Home automation operates over technologies like Wi-Fi, Bluetooth, and Zigbee to establish communication between devices.
Optimizing Home Automation Installation: Essential Components
Several key components are essential for the functionality of a smart home. These components form the foundation of a comprehensive home automation system:
Central Hub/Controller
The central hub or controller acts as the brain of the home automation system. It connects to all the smart devices in your home, allowing for seamless communication and control. The hub can be a dedicated device or a software-based solution that runs on your smartphone or computer.
Smart Devices
Smart devices are the foundation of home automation. They include smart thermostats, smart lighting, smart security cameras, smart locks, and more. Thanks to their built-in sensors and wireless capabilities, these smart home appliances can communicate with each other and the central hub or controller.
Communication Technologies
Smart devices utilize different communication technologies to establish connections and interact with each other. Commonly used communication protocols in home automation installations are Wi-Fi, Bluetooth, Zigbee, and Z-Wave. A recent emerging trend is the Matter protocol, designed to enhance compatibility across various brands and platforms. These protocols enable dependable and secure communication between devices, ensuring seamless interoperability within smart home systems.
Mobile App and Voice Assistants
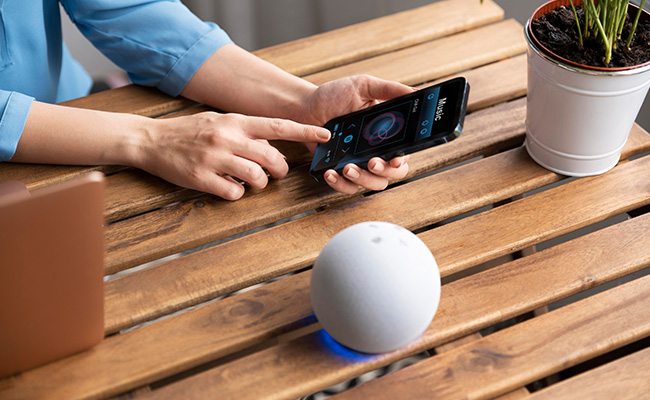
To effectively control and manage your home automation system, you can use manufacturer-provided mobile apps or third-party applications that offer compatibility with multiple devices. With a simple tap on your phone, you can effortlessly adjust the temperature indoors or illuminate your living room. Mobile apps have simplified remote control, providing seamless management at your fingertips.
Furthermore, voice assistants like Amazon Alexa or Google Assistant are convenient for controlling your smart home through simple voice commands. For example, you can say, "Hi Alexa, show me the front door," to instantly view the live footage from your security camera.
Sensors and Detectors
These devices, such as motion sensors, door/window sensors, temperature sensors, and smoke detectors, are specifically designed to detect changes in the environment or specific conditions within the home. Once a sensor detects a predetermined event or situation, it sends a signal to the automation system, which can then initiate pre-programmed actions, such as turning on lights, adjusting the thermostat, or sending alerts to the homeowner's smartphone.
Home Automation Installation: A Step-by-Step Guide
Setting up a home automation system might seem overwhelming at first, but with the right guidance, you can successfully create your smart home. Follow these steps for a smooth installation process.
1. Assess Your Needs and Prioritize
Before delving into your home automation journey, determine your specific requirements and priorities. Think about which aspects of your home you want to automate, such as lighting, security appliances, HVAC systems, or entertainment. Understanding your needs will help you choose the most suitable devices and designs for your smart home setup.
2. Choose a Central Hub
Select a central hub or controller to act as the brain of your smart home. This hub will serve as the command center, allowing you to manage and control all connected devices from a single interface. Make sure the hub is compatible with a wide range of devices and protocols to future-proof your system. Also, consider its connectivity options like Wi-Fi, Bluetooth, Zigbee, Z-Wave, or Matter to ensure seamless communication with your smart devices.
3. Select Devices and Systems
Research and choose devices and systems that align with your needs and preferences. From smart thermostats and lighting solutions to security cameras and voice assistants, the market offers a wide array of options. Prioritize interoperability and compatibility when selecting devices to ensure smooth integration. It's crucial that the devices work together seamlessly and communicate effectively. Additionally, consider your budget and choose devices that fit your financial plans.
4. Plan the Installation
Create a detailed plan for the installation process. Consider factors such as device placement, wiring requirements, and network connectivity. Take measurements, determine the ideal device locations, and ensure access to power outlets and internet connectivity. Proper planning will prevent potential issues and make the installation process smoother.
5. Install and Configure Devices
Follow the manufacturer's instructions to install and configure each device in your smart home system. Ensure that all devices connect to your central hub and communicate seamlessly with each other. Configure settings, preferences, and automation routines according to your requirements.
6. Test and Troubleshoot
Once the installation is complete, thoroughly test each device and system to ensure proper functionality. Verify that all devices respond correctly to commands, test automation scenarios, and troubleshoot issues. Stay attentive to device firmware updates, and regularly update your system to benefit from the latest features and security enhancements.
Cost of Home Automation Installation
The installation costs of home automation systems can vary significantly depending on several factors, including the home's size, the system's complexity, the number of devices to be integrated, and the chosen technology.
General Cost
One of the advantages of home automation is the ability to install the system on your own, with options available for various skill levels. Do-it-yourself (DIY) systems usually involve a single upfront purchase ranging from $100 to $3,000. Installing these systems is a DIY endeavor, requiring your time and effort, but it doesn't incur additional costs. If you prefer professional installation, hiring a team can cost between $100 and $300 for a DIY system.
Alternatively, high-end home automation packages from companies like Elan, Savant, and Crestron often include installation as part of the total cost, offering a hassle-free option that allows you to choose a solution that best suits your installation preferences and eliminates concerns about self-installation or hiring separate installation services.
Comparing Installation Costs of Various Home Automation Systems
A comprehensive home automation system consists of multiple subsystems, each with a unique installation cost. Here's an overview of installation costs for different types of home automation systems:
- Lighting control systems: On average, the installation cost for a lighting control system can range from $500 to $5,000, depending on the number of light fixtures and the complexity of the wiring required.
- HVAC control systems: Installing an HVAC control system costs between $2,000 and $10,000. The cost varies based on the size of the home, the number of HVAC zones, and the level of integration with existing HVAC infrastructure.
- Security and surveillance systems: The installation cost for security and surveillance systems can range from $1,000 to $5,000 or more. Factors such as the number of cameras, sensors, and wiring complexity affect the overall cost.
- Entertainment systems: Installing an entertainment system can range from $1,000 to $10,000 or more, depending on the complexity and the number of devices to be integrated.
- Smart appliances: The installation cost for smart devices varies depending on the specific devices chosen. It typically involves connecting the devices to the home automation system, and prices can range from $100 to $500 per appliance.
Resource: Angi
Professional Home Automation Installation vs. DIY Home Automation Installation: Pros & Cons
When it comes to installing a home automation system, homeowners usually have two options: hiring professionals or undertaking a do-it-yourself (DIY) installation. Both approaches have their merits and considerations. Here is a comparison table of the pros and cons of both methods.
Professional Home Automation Installation: Pros & Cons
Pros:
- Expertise and Experience: Professional installers have specialized knowledge and expertise in home automation systems.
- Time and Convenience: Hiring professionals allows homeowners to save time and effort.
- Customization and Integration: Professionals can offer valuable guidance on selecting suitable devices and customizing the system to meet specific needs.
- Warranty and Support: Professional installations often come with warranties and ongoing support. If any issues arise after the installation, homeowners can rely on the expertise and assistance of the installers.
Cons:
- Cost: Professional home automation installation can be expensive, especially for larger and more complex setups. The price includes labor, expertise, and any additional fees for consultation, design, and post-installation support.
- Limited Control: With professional installation, homeowners may have limited control over the installation process.
DIY Home Automation Installation: Pros & Cons
Pros:
- Cost Savings: DIY home automation installation can be significantly cheaper than hiring professionals. Homeowners can save on labor costs and choose budget-friendly devices that suit their requirements.
- Complete Control and Flexibility: DIY installations give homeowners total control over the installation process.
- Learning Experience: Undertaking a DIY installation allows homeowners to learn about home automation systems and gain hands-on experience.
Cons:
- Technical Challenges: The installation process can be technically challenging, especially for those without experience or technical expertise.
- Time and Effort: DIY installations require significant time and effort.
- Limited Expertise: DIY installers may need more specialized knowledge and experience compared to professionals.
Bonus Tips: Troubleshooting and Maintenance Tips for Home Automation Systems
Troubleshooting and regular maintenance are essential for maintaining the functionality and performance of your home automation system. Here are some general tips for your reference.
Regular Inspection and Cleaning
It's crucial to regularly clean and dust the devices in your home automation system to prevent debris buildup. Dust accumulation can affect performance and cause overheating. To clean the devices, use a soft, lint-free cloth or compressed air.
Check Batteries
If your system includes battery-powered devices like sensors or remote controls, it's essential to regularly check and replace the batteries as needed. Low batteries can cause devices to malfunction or lose connectivity.
Secure Cable Connections
Periodically check your devices' connections, ensuring that cables are securely plugged in and that there are no loose connections. Loose or damaged threads can cause intermittent issues with device performance.
Update Firmware and Software
Keep your devices' firmware and software updated by checking for manufacturer-provided updates regularly. These updates often include bug fixes, performance enhancements, and new features.
Test System Components
Regularly test the various components of your home automation system to ensure their proper functioning. Verify that devices respond to commands, sensors detect activity, and automation routines execute as expected.
FAQs
How much does it cost to install a home automation system?
The cost of home automation installation varies depending on the complexity of the system, the number of devices, and the level of customization. DIY systems typically require a one-time purchase ranging from $100 to $3,000. If you prefer professional installation, hiring a team can cost between $100 and $300 for a DIY system. Setting a budget and consulting with professional installers is advisable to get accurate cost estimates.
Is home automation installation complicated?
Home automation installation may seem daunting, but it can be a smooth and hassle-free process with the proper guidance and expertise. Professional installers are well-versed in setting up the necessary infrastructure, configuring devices, and ensuring seamless integration. They will work with you to understand your needs and design a customized system that aligns with your lifestyle.
What are some common challenges when installing a home automation system?
Some common challenges when installing a home automation system include compatibility issues between devices and hubs, Wi-Fi connectivity problems, and learning curves associated with new technology. Patience and troubleshooting skills are vital to overcoming these challenges. If you encounter difficulties, consult the manufacturer's support resources or seek assistance from online communities dedicated to home automation enthusiasts.
Can I add more devices to my smart home system after installation?
Absolutely! One of the benefits of a smart home system is its expandability. You can add more devices to your system as your needs and preferences evolve. Most home automation hubs support a wide range of devices, making it easy to integrate new additions seamlessly. Just ensure that the devices you choose are compatible with your existing hub.
Conclusion
By following the steps outlined in this article, you're well on your way to creating a smart home that meets your needs and simplifies your daily life. Remember to assess your goals, choose the suitable devices and hub, plan your layout, and troubleshoot. With each smart device you add, you'll unlock new possibilities and enjoy the benefits of a connected and automated home.
Have you ever installed a home automation system in your own home? We would love to hear about your experience! Feel free to share your tips and insights in the comment section below. Let's engage in a discussion together. Also, if you found this article helpful, don't hesitate to share it with your family and friends.
Search
Subscribe for the Latest Updates
Security insights & offers right into your inbox