
Best Reolink Camera Mounts: Secure, No-Drill & Weatherproof Options
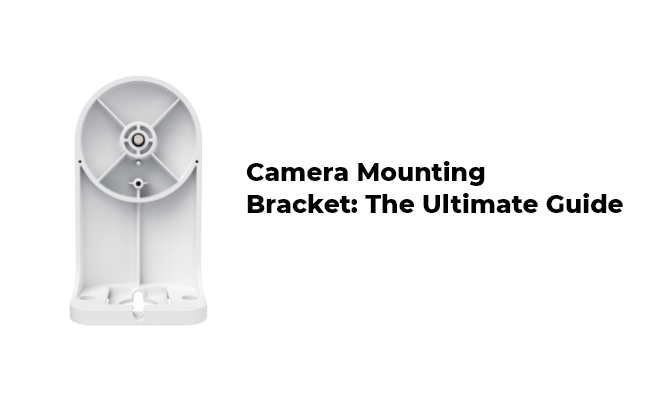
Mounting brackets are essential components for installing security cameras in your home or business premises. Whether you are setting up a new surveillance system or upgrading an existing one, choosing the right camera mounting bracket is crucial for optimal performance and safety. In this comprehensive guide, we will help you navigate the world of security camera mount brackets and make an informed decision.
- What is a Camera Mounting Bracket?
- What Are Common Types of Security Camera Mounts?
- Quick Selection Guide: Which Mount Matches Your Scenario?
- Best Reolink Camera Mounts for Different Scenarios
- How to Install an Outdoor Camera Mount?
- 3 Common Mounting Mistakes to Avoid When Using a Camera Mounts
- Real-World User Feedback About Reolink Mounting Options
- FAQs
- Conclusion
What is a Camera Mounting Bracket?
A camera mounting bracket is the foundational hardware used to securely lock a security camera onto a wall, ceiling, or pole. Its primary purpose is to keep your device stable, eliminate video vibrations from high winds, and position the lens at the precise angle needed to eliminate blind spots.
Choosing a high-quality reolink camera mount ensures your hardware is weatherproofed against the elements and physically protected from tampering or vandalism.
What Are Common Types of Security Camera Mounts?
Not all installation spaces are the same. Security camera mounts are engineered to solve specific structural challenges, whether you are trying to overlook a wide driveway or mount a device without drilling into a rental property.
Wall Mounts
Wall mounts attach cameras vertically to flat surfaces like siding, brick, or drywall. They are the most common choice for capturing eye-level or slightly angled front-door and perimeter footage.
- Best Used For: Home exteriors, hallways, and monitoring entryways.
Pro Tip: Look for brackets with integrated cable management channels. Keeping the power or PoE cables hidden inside the wall mount prevents weather wear and stops intruders from cutting the wires.
Ceiling Mounts
Ceiling mounts suspend cameras downward from overhead structures like ceilings, soffits, or roof overhangs. They maximize your field of view and are excellent for 360-degree panoramic coverage.
- Best Used For: Patios, retail storefronts, porches, and open-plan warehouses.
Pro Tip: Dome cameras paired with a ceiling mount are highly effective because the dome shape makes it difficult for people below to see exactly where the lens is pointing, acting as a natural psychological deterrent.
Pole Mounts
Pole mounts use heavy-duty steel straps to clamp a camera onto vertical cylinders or posts without drilling directly into them.
- Best Used For: Parking lots, driveways, perimeter fences, and agricultural properties.
Pro Tip: Standard pole mounts are engineered to withstand high wind loads. When installing a PTZ (Pan-Tilt-Zoom) camera on a pole, ensure the bracket is rated for the camera's exact weight to prevent the video feed from shaking when the camera moves.
Corner Mounts
Corner mounts feature a specialized V-shaped design that bridges the 90-degree intersection of two walls, allowing a single camera to look down two paths simultaneously.
- Best Used For: L-shaped building exteriors, intersecting hallways, and tight indoor spaces.
Pro Tip: Placing a wide-angle camera on an exterior corner mount effectively eliminates the blind spots typically found right underneath the camera's housing, giving you seamless coverage across two sides of your property.
Quick Selection Guide: Which Mount Matches Your Scenario?
Best Reolink Camera Mounts for Different Scenarios
Choosing the right hardware configuration ensures your surveillance system operates at peak performance. Below is a breakdown of official Reolink camera mounts, brackets, and accessories engineered for specific installation scenarios.
You can purchase all the mounting brackets listed below from the Reolink Official Accessories Page.
Best Junction Box for Cable Protection
Reolink weatherproof junction boxes, like the D20, are designed to conceal and shield pigtail cables and RJ45 connectors from rain, dust, and vandalism.
- Best Scenario: Outdoor PoE or wired Wi-Fi camera installations on flat brick, concrete, or wood walls where cables cannot be tucked behind the surface.
Leaving camera cable connections exposed to the elements causes moisture corrosion over time, which voids warranties and drops video feeds. A junction box creates an airtight, IP66-rated seal to guarantee long-term connection stability.
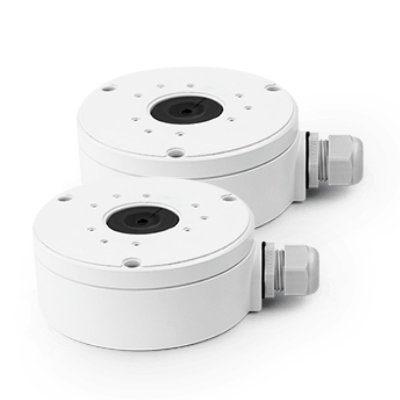
The D20 is the best junction box for PoE cameras, like the Reolink RLC-810A or RLC-842A, installed on a solid brick facade.
Best NVR Bracket for Central Management (RLA-RM1)
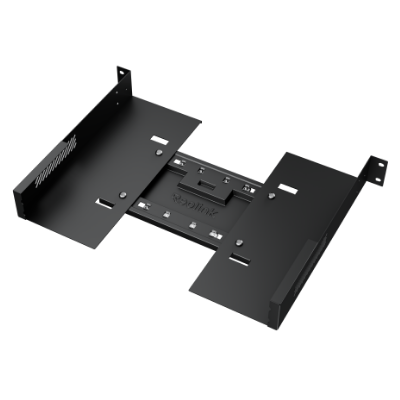
The Reolink RLA-RM1 is a 2U-sized hardware rack mount bracket built to securely house and organize Reolink Network Video Recorders (NVRs) inside standard server setups or directly on walls.
- Best Scenario: Centralized business or smart home networking closets utilizing 8-channel, 16-channel, or 36-channel NVR systems.
Key Features:
- Dual Mounting Options: Supports flat vertical wall mounting or fits perfectly into standard 19-inch equipment racks.
- Device Protection: Includes integrated ventilation alignment and optional EVA foam pads to absorb drive vibrations and mitigate mechanical shock.
Best PT Bracket V1 for Outdoor Auto-Tracking
The PT Bracket V1 provides a specialized, rigid platform optimized for suspended or extended overhang placements of Pan-Tilt (PT) security cameras.
- Best Scenario: Mounting indoor or outdoor Pan-Tilt cameras beneath deep roof eaves, soffits, or ceiling beams where a standard wall base limits vertical tilt angles.
Pan-tilt cameras require a perfectly level, unobstructed base to rotate dynamically without catching on nearby structural trim or losing visibility along the horizon line.
Best overhang mount for the Reolink E1 Series or Reolink TrackMix on a covered patio. If you mount a pan-tilt camera flush against a wall, the wall itself blocks half of the camera's rotation path. The PT Bracket V1 drops the camera down past structural trim and gutters, ensuring the lens can rotate dynamically 360° without catching on obstacles or losing visibility along the horizon line.
Best Corner Mount (RLA-BKC1 V1.0)
The Reolink RLA-BKC1 V1.0 is a durable 90-degree corner bracket designed to bridge structural intersections and capture two perpendicular fields of view simultaneously.
- Best Scenario: Tight structural hallways, warehouse interiors, or the exterior corners of L-shaped buildings.
Standard flat wall mounts leave massive blind spots immediately behind and beneath the camera housing. Corner mounting pushes the camera outward to take full advantage of wide-angle or multi-lens setups (like the Reolink Duo series).
Note: Ensure your device matches the Pattern layout of V1.0, as some newer models require the expanded hole configurations found on V2.0.
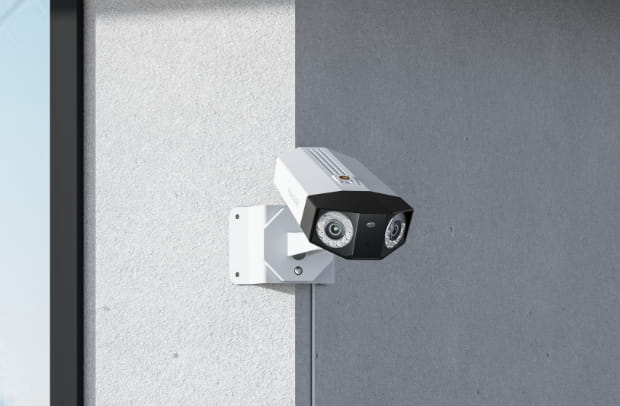
Best corner bracket for the Reolink Duo 3 PoE or multi-lens cameras on an L-shaped property exterior.
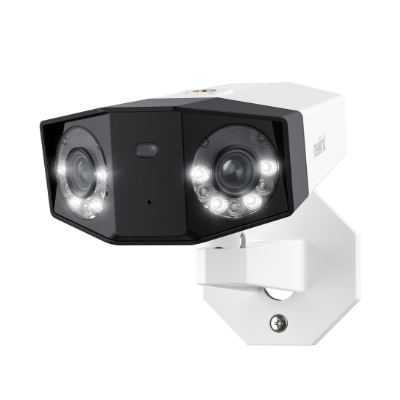
Groundbreaking 16MP Dual-Lens PoE Camera
16MP UHD, Dual-Lens, Motion Track, 180° Wide Viewing Angle, Power over Ethernet, Color Night Vision.
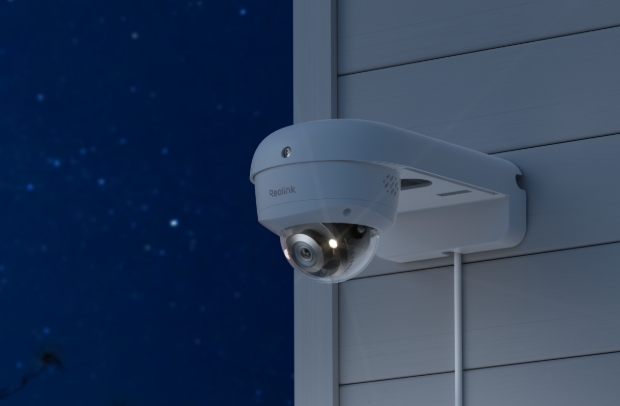
Wall Mount Bracket (RLA-BKW4)
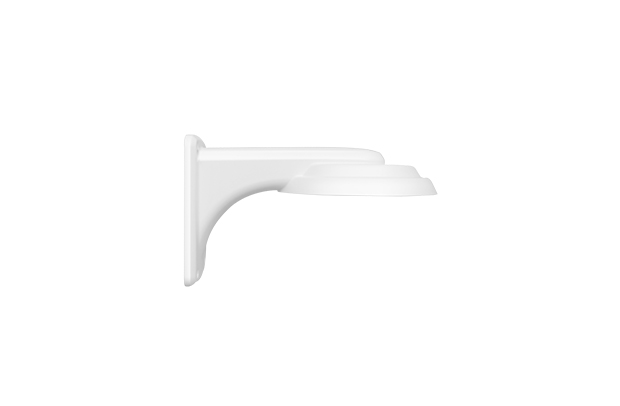
The Reolink RLA-BKW4 is a heavy-duty wall bracket featuring a suspended arm layout and an integrated cable management chamber.
- Best Scenario: Installing dome or vandal-proof cameras on flat vertical walls where no flat ceiling overhang is available.
Key Features:
-
Concealed Wiring: Features internal routing tracks and three directional wire notches to completely hide and protect network cables from being cut or weather-worn.
-
Sliding Top Cover: The top armor plate slides completely open for simple on-wall adjustment and clean, hassle-free tool access during maintenance.
Best Integrated Mount for Battery Models (RLA-BKW5)
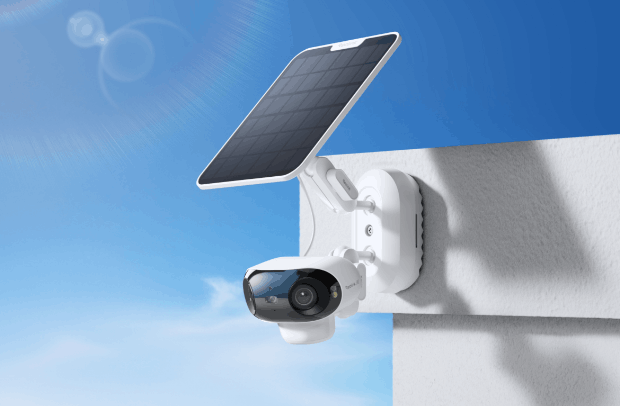
The Reolink RLA-BKW5 is a specialized dual-mounting bracket that holds a wire-free battery camera and its companion solar panel on a single, unified mount.
- Best Scenario: Wire-free, off-grid installations on trees, poles, or exterior siding where you want to minimize drilling points.
Key Features:
-
Independent Dual Articulation: Built with two separate arms containing 360-degree ball heads, letting you point the camera down at an entryway while angling the solar panel directly toward maximum sunlight.
-
Toolless Strap-Mounting: Supports heavy-duty strap loops alongside traditional screw anchoring, allowing you to mount the complete power-and-camera system to poles or tree trunks without damaging the structural surface.
Best Wedge Mounts for Video Doorbells
A video doorbell wedge mount is an angled backing plate that adjusts your camera's field of view horizontally (left/right) or vertically (up/down). It is the single best accessory to eliminate blind spots caused by deep door frames, adjacent walls, or stairs.
- Best Scenario For: Doorbells mounted on a side wall perpendicular to the door, or entryways where visitors approach from a long pathway to one side.
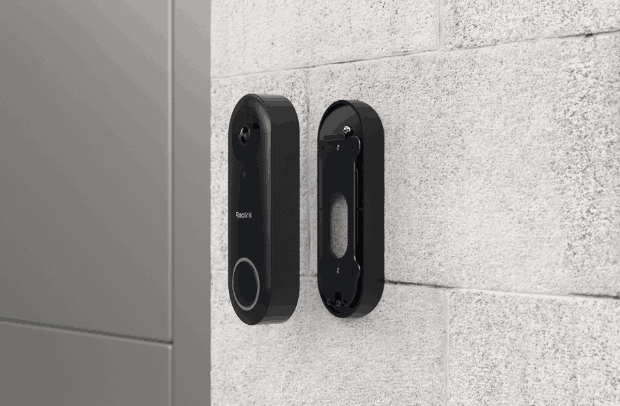
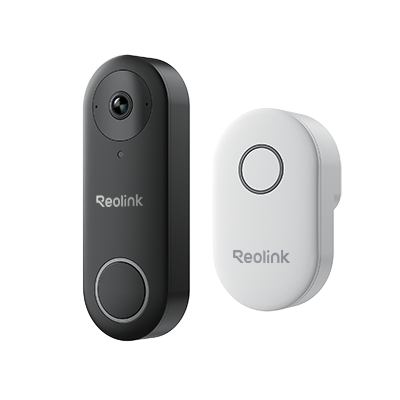
Smart 5MP Video Doorbell with Chime
5MP Super HD Day & Night, Person Detection, 2.4/5 GHz Dual-Band WiFi, 180° Diagonal Viewing Angle, Two-Way Audio, Rich Notification.
How to Install an Outdoor Camera Mount?
Installing an outdoor camera mount involves securing a weather-resistant bracket to a stable surface, routing your cables safely, and positioning the lens to maximize coverage. A proper installation takes about 20 minutes and protects your equipment from harsh weather and tampering.
Follow this step-by-step installation guide to ensure a secure, long-lasting setup.
Step 1: Choose the Optimal Location
Determine the best vantage point for your security camera based on your target monitoring zone.
-
Put on the Right Height: Mount your camera 8 to 10 feet (2.4 to 3 meters) off the ground. This is high enough to prevent intruders from tampering with or stealing the hardware, yet low enough to capture clear facial details.
-
Lighting Angles: Avoid pointing the camera directly toward the sun or bright streetlights, which can cause lens flare and wash out your footage.
-
Wi-Fi Strength Check: If installing a wireless camera, use your smartphone to check the Wi-Fi signal strength at the exact mounting spot before drilling.
Step 2: Prepare the Surface & Mark Mounting Points
Clean the mounting surface so it is free of dirt, cobwebs, or loose debris.
-
Place your reolink camera mount flat against the surface and use it as a template.
-
Use a marker or pencil to accurately mark the drilling holes through the bracket’s screw slots. Ensure the bracket is perfectly level.
Step 3: Drill Pilot Holes & Prep Anchors
Drill pilot holes at your marked points, taking care not to puncture underlying water pipes or electrical utilities.
-
For Wood/Siding: Drill small pilot holes directly into the surface. Screw anchors are usually not required for solid wood.
-
For Brick/Stucco/Concrete: Use a masonry drill bit (typically 1/4-inch or 6mm) to drill holes for the plastic expansion wall anchors included with your Reolink hardware. Gently tap the anchors flush into the holes using a hammer.
Step 4: Secure the Mounting Bracket & Protect Cables
Align the bracket with your pre-drilled holes and drive the mounting screws firmly in place.
-
If your mount has an integrated cable management arm, route the camera’s pigtail cable through the bracket before tightening it completely against the wall.
-
If you are not using an external junction box, apply a bead of outdoor-rated silicone sealant around the edges of the bracket base where it meets the wall. This prevents rainwater from seeping behind the mount and rotting your siding or entering your home's wall cavity.
Step 5: Install and Align the Camera
Attach your security camera to the secured bracket following the manufacturer’s locking mechanism (e.g., tightening the collar ring or securing the hex locking screws).
-
Loosen the adjustment screws on the mount's articulation arm to pan, tilt, and rotate the camera until it frames your desired field of view.
-
Ensure the camera's image horizon line is parallel to the ground to keep your motion detection zones accurate.
Step 6: Test, Power On, and Fine-Tune
Power on your camera (via PoE cable, power adapter, or battery/solar connection) and open the Reolink App on your smartphone.
-
Look at the live feed to check for any blind spots, tree branches that might trigger false alerts, or wall reflections that could ruin your night vision.
-
Tighten all adjustment screws on the mount firmly so the camera cannot shake or sag over time due to high winds.
3 Common Mounting Mistakes to Avoid When Using a Camera Mounts
Capturing high-intent users means helping them avoid costly mistakes before they happen. Keep these installation pitfalls in mind:
Mistake 1: Pointing the Camera Straight Down a Wall.
Placing a camera completely flush against a wall causes the infrared (IR) night vision lights to bounce directly off the brick or siding. This blinds the camera at night, turning your video feed completely white. Always angle the mount at least 15–20 degrees away from adjacent walls.
Mistake 2: Leaving the Cable Pigtail Exposed to Rain.
Even if a camera is IP66 waterproof, the open ethernet/power split connectors on the tail end are highly vulnerable to moisture corrosion. Always protect these connections inside a sealed junction box or fish them directly through the wall into a dry space.
Mistake 3: Over-tightening Screws into Vinyl Siding.
Vinyl siding needs room to expand and contract with temperature changes. Cranking the mounting screws down too tightly will warp or crack the siding. Snug the screws, but do not crush the material beneath the bracket.
Real-World User Feedback About Reolink Mounting Options
In a Reddit discussion about Reolink mounting options, users said the main concern is not camera performance, but installation flexibility and cable management.
Users noted that different Reolink camera styles may require different mounting solutions. Bullet cameras are often easier to mount on walls or junction boxes, while turret and dome cameras may need more planning for cable routing.
For Duo and TrackMix-style cameras, some users prefer DIY solutions, weatherproof boxes, conduit, or soffit mounting to keep cables protected and improve the overall look.
Overall, users recommend checking the camera model, mounting surface, cable direction, and weather protection before installation.
For a cleaner and more secure setup, a compatible Reolink mounting bracket or junction box can make the installation easier and help protect exposed cables outdoors.
FAQs
How do I mount my camera?
Choose the right bracket for your camera model and mounting surface. Fix the bracket with the included screws, attach the camera, adjust the viewing angle, and test the live view to make sure the area is fully covered.
Where is the best place to mount a security camera?
Mount security cameras near key areas such as front doors, back doors, windows, driveways, garages, and patios. Choose a spot with a clear view, stable lighting, fewer obstructions, and enough height to reduce tampering.
What are the different types of mounts?
Common security camera mounts include wall mounts, ceiling mounts, pole mounts, corner mounts, pedestal mounts, and adjustable mounts. The best option depends on where you install the camera and how much angle flexibility you need.
Conclusion
Choosing the right camera mounting bracket is a crucial step in ensuring the optimal performance and longevity of your security camera system. Remember, a well-mounted camera is a powerful tool for protecting your home or business premises, providing valuable peace of mind and security.
If you found this article helpful, feel free to leave a comment and share your experiences or any additional tips you may have on choosing the best camera mounting bracket.
Search
Subscribe for the Latest Updates
Security insights & offers right into your inbox