
IP Camera Configuration: How to Set Up an IP Camera
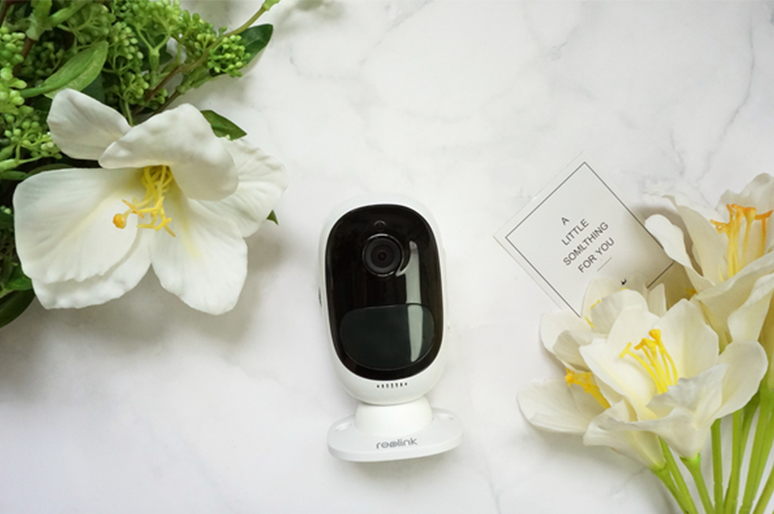
IP camera configuration is the process of connecting a network camera to your local network and setting its IP address, network settings, recording options, and remote access. Most modern IP cameras can obtain an IP address automatically through DHCP, so manual configuration is often unnecessary for basic setup.
Depending on your system, you can configure an IP camera through a mobile app, desktop client, web browser, NVR, or router. More advanced setups may also use a static IP address, port forwarding, RTSP, ONVIF, or other network settings.
What Is IP Camera Configuration?
IP camera configuration is the technical process of assigning network settings to an IP camera so it can stream video and communicate with other network devices. Key configurable parameters include the camera’s IP address, subnet mask, default gateway, DNS server, network ports, and remote-access options.
What Network Settings Does an IP Camera Use?
DHCP vs Static IP for IP Cameras
DHCP automatically assigns an IP address to an IP camera, while a static IP keeps the camera at a fixed network address. For most users, DHCP is the easiest option because the router or NVR handles the network configuration automatically.
A static IP address can be useful when the camera needs to remain at the same address for integrations such as RTSP streams, ONVIF connections, third-party NVRs, browser access, or certain remote-access setups.
In many cases, a good alternative is a DHCP reservation, which lets the router automatically assign the same IP address to the camera each time. This provides the convenience of DHCP while helping keep the camera’s network address consistent.
How to Configure an IP Camera?
To configure an IP camera, power the camera, connect it to your network, obtain an IP address, add it to a viewing device or software, configure recording settings, and enable remote access if needed. Most modern IP cameras use DHCP for automatic network configuration, so users typically don't need to assign an IP address manually.
Step 1. Power and Connect the Camera
First, power the IP camera according to its connection type.
-
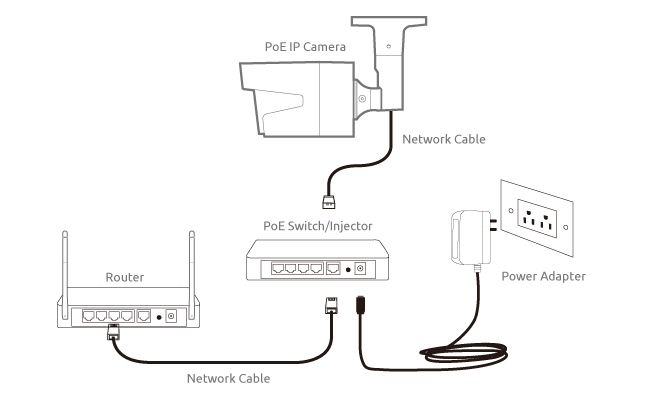
PoE camera: Connect an Ethernet cable to a PoE NVR, PoE switch, or PoE injector for both power and data.
-
Wi-Fi camera: Connect the camera to power and follow the manufacturer's setup process to join your Wi-Fi network.
-
Battery camera: Charge the battery and use the camera app to complete the initial wireless setup.
Make sure the camera, phone, computer, or NVR used for setup can communicate over the same local network when required.
Step 2. Connect It to Your Network
Next, connect the IP camera to your local network through Ethernet, Wi-Fi, or a compatible NVR.
For most home networks, the router automatically recognizes the camera and assigns it an IP address through DHCP. PoE cameras may instead connect through a PoE switch or directly to a compatible NVR.
If you use Wi-Fi, choose a supported Wi-Fi band and make sure the signal is strong enough at the camera's installation location.
Step 3. Find or Assign Its IP Address
Once connected, the IP camera usually receives a local IP address automatically through DHCP. You can typically find this address through the camera software, NVR interface, or your router's connected-device list.
Most users can leave DHCP enabled. If the camera needs a consistent address for RTSP, ONVIF, third-party software, or other network integrations, consider assigning a static IP or creating a DHCP reservation.
Make sure manually assigned addresses are within the correct subnet and do not conflict with another device.
Step 4. Add the Camera to an App, Client, NVR, or Browser
Add the camera to the interface you plan to use for monitoring. Depending on the camera and setup, this could be a mobile app, desktop client, NVR, or web browser.
Many modern IP cameras can be added by scanning a QR code, entering a device UID, or discovering the camera automatically on the LAN. For local browser access, supported cameras may also be accessed by entering their IP address into the browser's address bar.
The exact setup method varies by camera model, so check its compatibility with browser access, NVRs, and third-party protocols when necessary.
Step 5. Configure Recording and Detection
After adding the camera, configure its surveillance settings according to how and where it will be used.
Important settings may include:
-
video resolution, frame rate, and bitrate
-
continuous or motion-triggered recording
-
person, vehicle, pet, or other supported smart detection
-
detection zones and sensitivity
-
recording schedules
-
push notifications and alerts
-
microSD, NVR, FTP, or other supported storage
For example, continuous recording is useful when you need a complete video timeline, while event-based recording can reduce storage use by saving footage primarily when activity is detected.
Step 6. Set Up Remote Access
Remote access lets you view an IP camera when your phone or computer is outside the camera's local network.
For supported cameras, the easiest method is typically the manufacturer's app or client using a device UID/P2P connection. This can provide remote viewing without manually configuring a public IP address or port forwarding.
Advanced users may use methods such as VPN access or port forwarding for certain direct-IP, browser, or third-party integrations. If using manual remote access, enable only the network services you need, use strong unique passwords, keep camera firmware updated, and prefer encrypted connections where supported.
If you only need local monitoring or recording, Internet-based remote access may not be necessary.
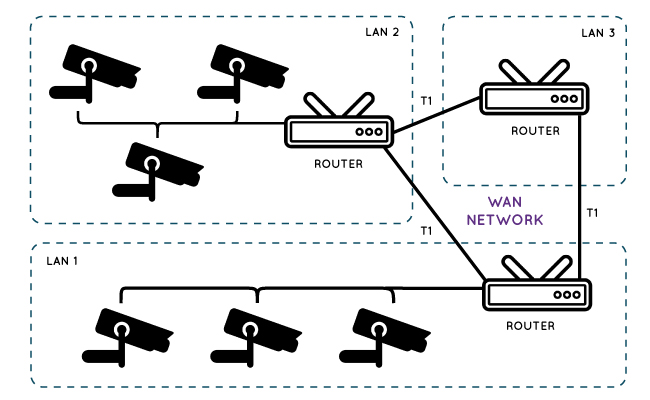
How to Configure an IP Camera on a LAN?
-
Connect the camera: Use Ethernet, PoE, or Wi-Fi to connect the IP camera to your local network.
-
Get an IP address: The router's DHCP server will usually assign the camera a local IP address automatically, such as 192.168.1.100.
-
Find the camera: Check the manufacturer's app or client, NVR interface, or router's connected-device list to locate its IP address.
-
Access the camera: Add the camera to the compatible app, client, or NVR. If web access is supported, enter the camera's IP address in your browser's address bar.
-
Configure network settings: DHCP is sufficient for most users. For integrations that require a consistent address, consider a static IP or DHCP reservation.
How to Set Up an IP Camera without Router?
Method 1: Direct Connection to a PoE NVR (Plug-and-Play)
Connecting a Power over Ethernet (PoE) IP camera directly to a PoE NVR bypasses the need for an external router.
-
Power & Data Handling: The NVR supplies power via standard Ethernet cables (IEEE 802.3af/at standards) and runs an internal DHCP server on isolated ports.
-
Local Operation: The NVR creates a self-contained local network to detect, manage, and record camera streams to an internal Hard Disk Drive (HDD).
-
Limitation: Live viewing and playback are restricted to a local monitor connected to the NVR via HDMI/VGA. Remote viewing via mobile apps remains unavailable until the NVR connects to an upstream internet gateway.
Method 2: Direct Connection to a Computer (Manual IP Setup)
Connecting an Ethernet IP camera directly to a PC or laptop is ideal for diagnostic testing, firmware updates, and isolated local monitoring.
-
Power Supply: Use an external 12V DC power adapter or an inline PoE injector (since standard PC Ethernet ports do not output power).
-
Physical Link: Connect an Ethernet cable from the camera directly to the computer's Ethernet port (modern network cards support Auto-MDIX, eliminating the need for crossover cables).
-
Static Subnet Alignment: Manually assign a static IP address to the PC’s network adapter so it resides on the camera's default IP subnet.
Example: If the camera's factory IP is
192.168.1.108, set the PC IP to192.168.1.50with a Subnet Mask of255.255.255.0.
- Access: Open a web browser or specialized Video Management Software (VMS) to access the camera's stream.
Method 3: 4G LTE Cellular Security Cameras (Off-Grid Solution)
For locations lacking fixed broadband or Wi-Fi infrastructure (such as farms, construction sites, or cabins), 4G LTE IP cameras bypass routers completely.
-
Cellular Networking: Instead of using Wi-Fi or Ethernet LANs, the camera transmits data using an integrated SIM card connected to cellular networks.
-
Cloud & Remote Support: Unlike offline local setups, 4G cameras support real-time mobile app alerts, two-way audio, and remote viewing over cellular data.
-
Requirements: Requires an active mobile data plan and solar panel or battery power for total off-grid operation.
Local Operation vs. Internet Capabilities
Operating an IP camera without a router or internet connection affects feature availability:
Available Without Internet:
-
Continuous 24/7 local recording to NVR HDDs or onboard MicroSD cards.
-
High-definition local live viewing on PC monitors or NVR displays.
-
Motion-triggered recording to local storage.
Unavailable Without Internet:
-
Real-time push notifications and email alerts.
-
Remote viewing from mobile apps outside the local physical site.
-
Cloud storage backups and remote firmware updates.
How to Set Up Multiple IP Cameras?
-
Connect the cameras: Connect PoE cameras to a PoE NVR or PoE switch, or connect Wi-Fi cameras to the same local network.
-
Assign IP addresses: A router or NVR can usually assign each camera a unique IP address automatically through DHCP. Avoid duplicate IP addresses, which can cause connection problems.
-
Add the cameras: Use a compatible NVR, camera app, desktop client, or video management software to discover and add each camera.
-
Configure each camera: Set recording schedules, resolution, detection zones, alerts, and other settings based on where each camera is installed.
-
Set up storage: Choose local storage such as an NVR, microSD card, FTP server, or another supported option. For several cameras recording continuously, an NVR is generally more practical for centralized storage.
-
Test the system: Check live streams, recordings, motion detection, notifications, and remote access for every camera before completing the installation.
Common IP Camera Configuration Problems
Most IP camera configuration problems are caused by network connectivity, incorrect IP settings, changing DHCP addresses, firewall rules, or remote-access configuration. Start by checking that the camera has power and is connected to the correct network before changing advanced settings.
Why Can't I Find My IP Camera?
The camera may be offline, on a different network, or missing a valid IP address. Check power, Ethernet/Wi-Fi, your router’s device list, and whether the camera and viewing device are on the same LAN.
Why Can't I Open the Camera's IP Address?
The camera may not support web access, or the IP address, port, or protocol may be incorrect. Make sure you use the browser address bar and verify whether HTTP or HTTPS access is supported.
Why Does Its IP Address Keep Changing?
DHCP may assign the camera a different IP address after a restart. Use a static IP or DHCP reservation if you need a consistent address for RTSP, ONVIF, or third-party software.
Why Does Local Viewing Work but Remote Viewing Doesn't?
Local access can work even when remote access fails. Check the Internet connection, UID/P2P settings, firewall rules, VPN settings, or port forwarding if used. For supported cameras, UID/P2P is usually easier than manual port forwarding.
FAQs
How do I connect my IP camera to my phone?
Install the camera manufacturer's app, connect the camera to your network, and add it by scanning a QR code, entering its UID, or using local device discovery. Once added, you can usually view live video and change settings from your phone.
Does an IP camera need a static IP?
No. Most IP cameras work well with DHCP, which assigns an IP address automatically. A static IP is mainly useful for RTSP, ONVIF, third-party software, or other setups that require a consistent network address.
Should an IP camera use DHCP?
For most users, yes. DHCP makes setup easier by assigning network settings automatically. If you need the camera to keep the same IP address, use a DHCP reservation or properly configured static IP.
Do I need port forwarding?
Not always. Many modern IP cameras support UID/P2P remote access through an app or client without manual port forwarding. Port forwarding is mainly used for certain direct-IP or third-party remote-access setups.
Conclusion
IP camera configuration is usually straightforward once the camera is connected to the network. For most users, DHCP, a mobile app, and UID/P2P remote access handle much of the setup automatically.
More advanced configurations may use static IP addresses, RTSP, ONVIF, NVRs, or port forwarding. The best setup depends on whether you need local recording, remote viewing, third-party integration, or a multi-camera system.
Search
Subscribe for the Latest Updates
Security insights & offers right into your inbox