How to Connect a DVR/NVR to the Internet & Set Them Up for Remote Viewing

You have a digital video recorder (DVR) or network video recorder (NVR) recording and storing all your surveillance footage while you want to access their video recorder remotely over the internet from a mobile phone, web browsers or a computer at another location outside your home.
So how do you connect NVR/DVR to the internet and set up or configure them for remote viewing or access outside your home network?
Could You View or Access a DVR/NVR Remotely
DVRs/NVRs are normally equipped with standard processors and embedded operating systems; however, many old analog DVRs don’t have the ability to connect it to the internet for remote viewing.
DVRs/NVRs that have a built-in network capability can be accessed over the internet remotely or outside your home network on a computer, desktop video surveillance software, phone apps or web browsers.
How Do You Connect a DVR/NVR to the Internet
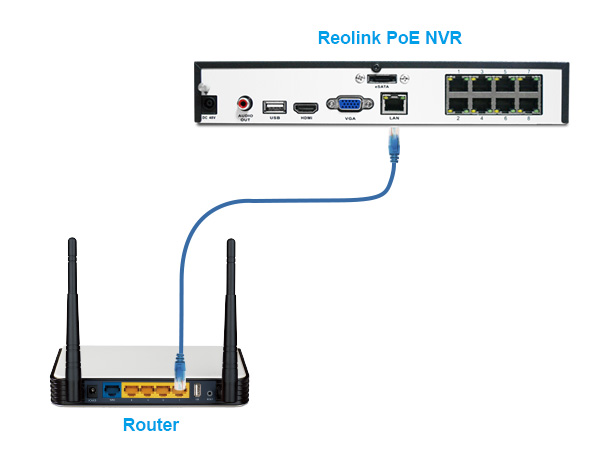
If a CCTV DVR or NVR don’t have a built-in WiFi support, then you have to run internet cable ( CAT 5 or CAT 6 Ethernet cable ) to connect your DVR or NVR to the internet via the router.

Of course, by using another WiFi router/access point as a wireless bridge, you could connect a CCTV DVR to your router wirelessly.
How Do You Set Up or Configure a CCTV DVR or NVR for Remote Viewing
To connect a DVR/NVR to the internet or configure a DVR/NVR for remote viewing, first and foremost, connect your DVR/NVR to your network router either via Ethernet cable or wirelessly.
Network–enabled DVRs could be configured for remote viewing. Port forwarding is the key to remote viewing and remote access. By forwarding ports (HTTP port and Server port) on your DVRs and your router, you punch a hole in your home network firewall and allow access to the video stream remotely from outside of your home network (also known as LAN).
Port forwarding works when you want to view live video feeds or footage on NVRs over the internet on web browsers like IE, FireFox or Google Chrome web browser.
Alternatively, you could use NVR viewing software, video surveillance software or ONVIF supported third-party video management software to view your NVRs remotely, such as Blue Iris, Milestones, or ZoomMinder.
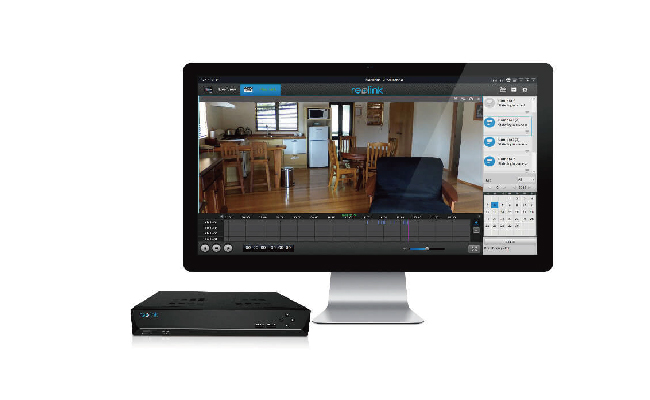
To view your NVR on a viewing software, video management software or mobile apps remotely, one of the simplest approaches is to connect the NVR to the internet and view footage remotely via account login or via UID, a unique ID number registered and integrated at the developer level, such as Reolink NVRs.
Depending on different models, users can use NVR’s IP address to log into the NVR viewing software.
View Reolink NVRs on Reolink Client or mobile phone app, normally, is effortlessly easy; all you need to do is to log in your NVR account (name and password) and access NVRs for remote viewing and video playback.
Reolink NVR is very handy and easy to use. Here is a great video that gives an overview of Reolink NVR and will help you take full advantage of it.
How to Connect Wireless IP Cameras to NVRs Wirelessly
Chances are you don’t have a wireless security camera system with an NVR with built-in WiFi capability.
While you have a PoE wired security camera system with a PoE NVR, more often than not, you are placing a wireless security camera in a remote location where you couldn’t or hard to run a network cable to your PoE NVR.
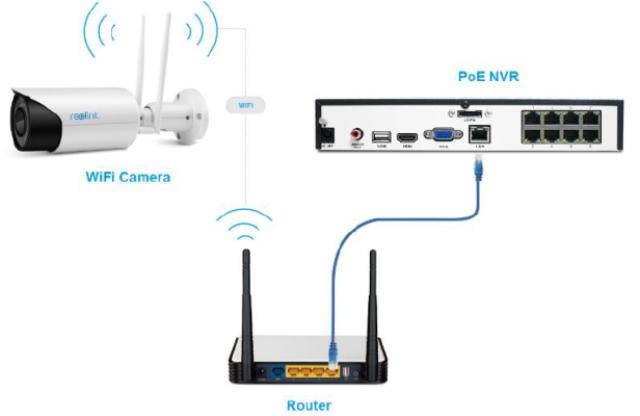
In such case, users could use your WiFi router act as a bridge to connect your WiFi IP cameras to your PoE NVR wirelessly without running network cables at all.
While doing so, make sure both of your wireless security cameras are connected to your router wirelessly and your NVR is connected to your router via Ethernet cable.

Search
Subscribe for the Latest Updates
Security insights & offers right into your inbox
