
10 Security Camera Installation Mistakes You Can Avoid
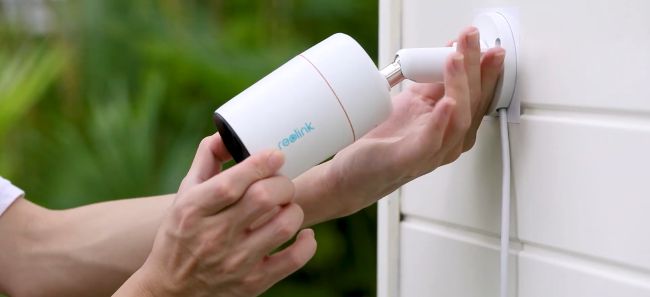
Most security camera installation mistakes don't reveal themselves until the moment you actually need the footage. A camera can look perfectly mounted, its LED blinking, streaming live video to your phone, and still fail you completely the night it matters. That's the pattern behind almost every list of security camera installation mistakes. In fact, the errors that hurt aren't the visible ones. They're buried in a settings menu or a storage drive nobody checked twice.
We went through where installers and DIY homeowners consistently trip up, from mounting height to whether the hard drive is even recording anything at all. Some of these mistakes cost you image quality while a few of them cost you the entire recording. Here's what to check before your next security camera installation mistake costs you the footage that actually mattered.
- 1. Mounting the Camera Too High
- 2. Skipping Dedicated Lighting (or Aiming It Straight at the Lens)
- 3. Betting Everything on Cloud Storage
- 4. Skipping the UPS or Battery Backup
- 5. Leaving the System on Default Recording Settings
- 6. Forgetting to Initialize the NVR's Hard Drive
- 7. Maxing Out Resolution and Frame Rate on Every Channel
- 8. Leaving Cables Exposed to the Weather and Tampering
- 9. Ignoring the IP Rating When Mounting Under Eaves
- 10. Pointing the Camera Past Your Own Property Line
- FAQs
- Conclusion
1. Mounting the Camera Too High "For Protection"
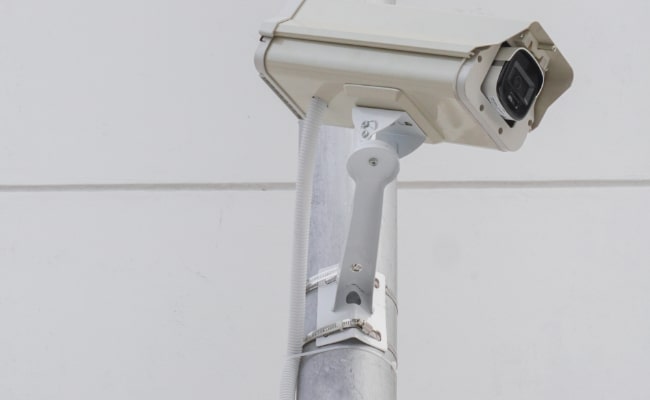
Cameras mounted 12 feet up or higher tend to record hairlines and shoulders, not faces, making the footage nearly useless for identifying anyone afterward. It's a common instinct: mount it high so nobody can reach it. But a camera that can't capture a usable face defeats the purpose of having one.
Most experienced installers land on 8 to 10 feet, angled downward toward the path someone would actually walk. That's high enough to avoid easy tampering, low enough to still catch a recognizable face at a front door or driveway.
SlashGear's rundown of installation mistakes makes a similar point: cameras tucked into hard-to-reach corners often cover the wrong spot entirely, since most break-ins happen at the front door, back door, or a ground-floor window, not wherever a bracket was easiest to bolt on.
Note: For the full breakdown on height, angle, and which entry points matter most, our guide to where to place home security cameras covers it room by room.
2. Skipping Dedicated Lighting (or Aiming It Straight at the Lens)
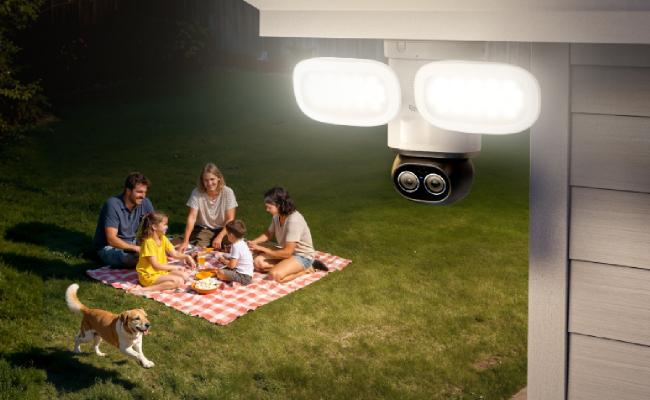
Night vision alone struggles past 30 to 40 feet. Even within range, a face lit only by infrared often comes out flat and hard to identify. Dedicated lighting fixes this, but only if it's aimed correctly. A porch light or floodlight pointed directly into the camera's field of view blinds the sensor instead of helping it, washing out the exact area you're trying to see.
Position the light so it falls across the scene from the side or from behind the camera, never straight into the lens. Cameras that build the light and sensor into one unit sidestep the aiming problem entirely. The Reolink Elite Floodlight WiFi pairs an adjustable 3,000-lumen spotlight (switchable between 3000K warm and 6500K cool white) with color night vision, so the light and camera always point the same direction by design.
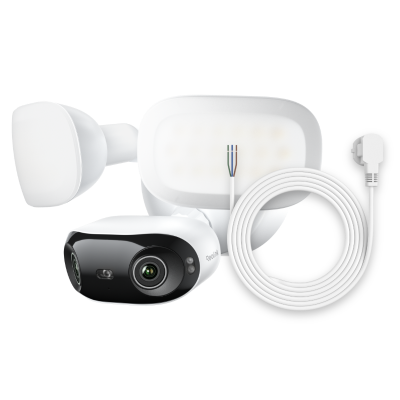
4K 180° Ultra-Wide Wired Floodlight Security Camera
3000-Lumen Dimmable Lighting, Adjustable Color Temperature, Local AI Video Search, Local Storage, Dual-Band Wi-Fi 6.
Either way, don't lean on a marketed night-vision range as a substitute for an actual light source. It's the difference between a grainy silhouette and a face you can describe.
3. Betting Everything on Cloud Storage

Cloud-only storage means your footage depends on a monthly subscription staying active and an internet connection staying up. Both of which can fail at exactly the wrong moment. Miss a payment or lose Wi-Fi during a break-in, and the incident you needed recorded simply isn't there. The mistake runs in both directions: some setups skip local storage to avoid buying a hard drive, while others skip cloud backup entirely and lose everything if the NVR itself is stolen or damaged.
The more resilient setup pairs both. A local hard drive in the NVR or DVR keeps continuous footage on-site with no subscription required. Cloud backup, even just for flagged motion events, protects you if the physical unit is destroyed or taken. Reolink's NVR systems, for instance, support onboard storage alongside optional cloud backup for specific clips, so you're not fully dependent on either one.
Storage is cheap enough now that hybrid setups aren't really a budget decision. A single 2TB to 4TB hard drive paired with cloud backup for flagged events only, covers most homes without the recurring cost of a cloud-only plan.
4. Skipping the UPS or Battery Backup
A wired camera system is only as reliable as the power grid it's plugged into. When the electricity goes out, so does everything else meant to protect the house. This could be the alarm panel, the motion-sensor lights, and the Wi-Fi router your cameras need to send an alert to your phone.
This is when a basic UPS (uninterruptible power supply) comes in. It's a backup power device that provides temporary electricity to connected equipment during power outages and protects against power interruptions and voltage fluctuations. It bridges that gap, keeping the NVR and networking gear running for anywhere from 20 minutes to a few hours depending on battery size, long enough to ride out a short outage or capture the start of a longer one.
Note: Our CCTV installation guide walks through wiring a UPS into a typical PoE setup if you're starting from scratch.
Battery-powered cameras sidestep the problem differently since they don't draw from the same circuit as the rest of the house. That's not a complete fix on its own as a battery camera still needs the NVR or app it reports to online. But the camera itself keeps recording through a blackout that would otherwise take out a wired unit.
5. Leaving the System on Default Recording Settings
Motion-only recording sounds efficient, but it can miss the crucial moments just before motion is detected. As a result, footage often begins after someone has already entered the frame, rather than capturing their initial approach. Most NVRs default to motion-triggered clips out of the box to save storage, and most installers never revisit that setting.
Continuous 24/7 recording avoids that gap entirely, and it's become far more practical than it used to be. Motion-only recording became the default because storage was expensive. Today, inexpensive hard drives and smart detection for people, vehicles, and animals make it easy to filter a full day of footage down to relevant events without losing the seconds that motion-only recording can miss.
If you're set on motion-only to save space, at least check whether your camera supports pre-recording, which buffers a few seconds before the trigger so you're not missing the actual moment of entry. It's a smaller fix, but it closes the biggest gap in the default setup.
6. Forgetting to Initialize the NVR's Hard Drive
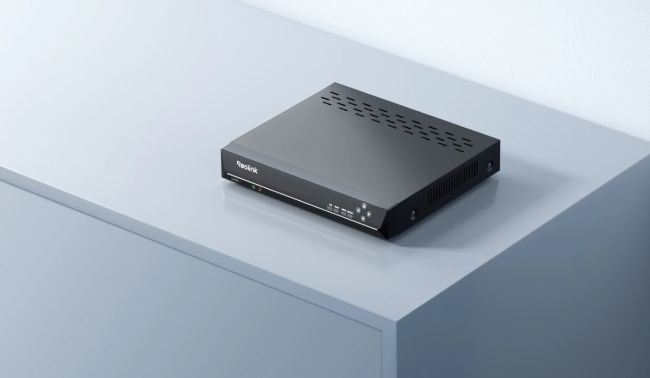
An NVR with an uninitialized hard drive is the surveillance equivalent of a mime: it looks like it's working, but it isn't capturing anything. Formatting the drive is a one-time step in the NVR's settings menu, separate from physically plugging the drive in. Skip it, and the system runs for months looking normal, right up until someone goes looking for footage that was never saved.
It's one of the sneakier security camera installation mistakes because live view, motion alerts, and remote access all work normally whether or not the drive is actually saving anything. Installers who handle dozens of systems a year still run into it on jobs where a previous installer, or a homeowner during a DIY setup, never opened the storage menu at all. The fix takes under a minute: open the NVR's settings, find the HDD or storage management section, and confirm the drive shows as formatted and active, not just detected.
If skipping this step sounds like a risk you'd rather avoid, kits like the Reolink RLK8-800B4 pair an 8-channel PoE NVR with a pre-installed, pre-formatted 2TB hard drive, so the system records as soon as the cameras connect. It costs more upfront than assembling an NVR and drive separately, but it removes this exact failure point entirely.
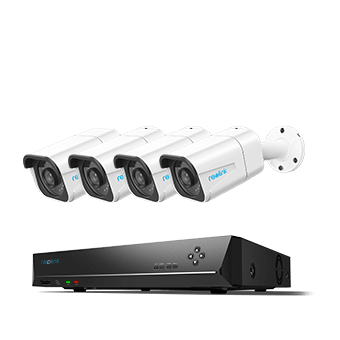
4K 8-Channel PoE Security System
4 pcs 4K Ultra HD Security Cameras; 2TB HDD 8-Channel NVR for 24/7 Recording; Person/Vehicle Detection; Plug & Play; 2 Network Solutions.
7. Maxing Out Resolution and Frame Rate on Every Channel
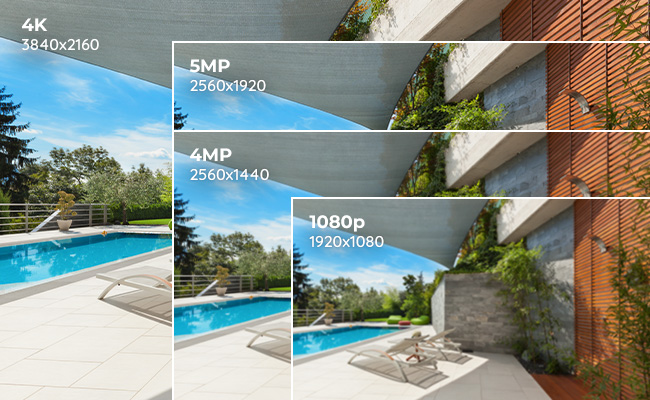
Recording every channel at maximum resolution and 30 frames per second fills a hard drive faster than most homeowners expect, sometimes cycling out old footage in days instead of weeks. A single 4K camera recording continuously at a high bitrate can easily use 50 to 150 gigabytes a day on its own, depending on scene activity and compression settings. Multiply that by four or eight channels, and a 2TB drive that should last weeks is full within days.
Frame rate is the easiest lever to pull first. Most break-ins and package thefts can be identified just as reliably at 15fps as at 30fps. It remains smooth enough to clearly capture people walking or vehicles passing, while roughly halving file size compared to 30fps at the same resolution. H.265 compression, which is standard on most modern NVRs, helps further by storing the same footage in roughly half the space the older H.264 standard needed, without a visible drop in quality.
The smarter approach is tuning by channel rather than applying one setting everywhere. A camera aimed at your front door earns the higher resolution and frame rate. A wide driveway view or a side yard with little foot traffic can usually run lower without losing anything you'd actually need to identify later.
8. Leaving Cables Exposed to the Weather and Tampering
A power or ethernet cable left running along an exterior wall is both a weather-exposure risk and the easiest way for anyone to disable your camera system in seconds. Cutting one cable takes less effort than picking a lock. Sun and rain also degrade exposed cable jackets over time, causing intermittent connection drops long before the cable fails outright.
Burying cable in conduit is the standard fix for wired systems. PVC conduit and metal conduit typically needs at least 18 inches and 6 inches of ground cover respectively, which keeps cables hidden and protected from casual damage. With PoE cameras, this is simpler than it sounds, since a single Cat5e or Cat6 cable carries both power and video instead of two separate lines.
Note: Our guide to running security camera wire covers burial depth, routing, and sealing entry points against water.
Wire-free cameras sidestep the problem entirely, since there's nothing running along the wall to cut or weatherproof. The Reolink Altas PT Ultra runs on battery and solar power with a rated 500-day battery life in typical use, so a driveway or shed camera can go up without any cable at all. The tradeoff is a battery to recharge periodically rather than a cable to bury, but for a spot far from power, that's often the simpler schedule to maintain.
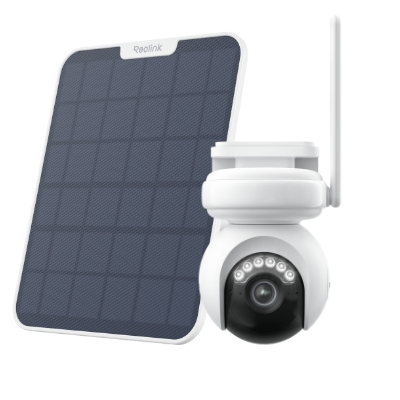
4K Battery-Powered PTZ Camera with Continuous Recording
👍 4K UHD video with continuous recording
👍 ColorX night vision in low light
👍 Pan, tilt, and automatic person tracking
👍 Local storage without monthly fees
9. Ignoring the IP Rating When Mounting Under Eaves
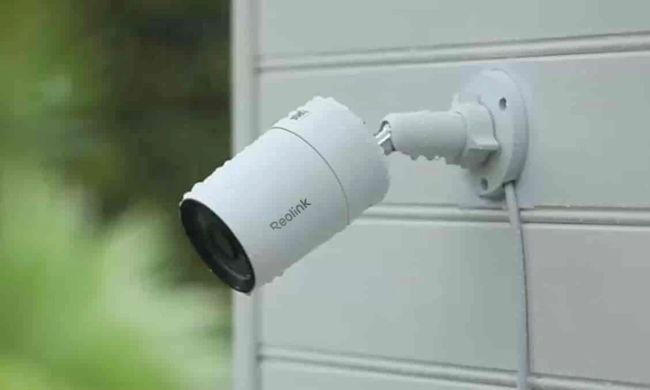
Mounting a camera under a shallow eave doesn't fully protect it from weather. Wind-driven rain still reaches the camera face at most angles, and direct summer sun on an unshaded wall can push internal temperatures high enough to affect battery life and image sensors. NerdWallet's rundown of installation mistakes backs this up: cameras exposed to direct sun or sustained rain tend to fail well before their rated lifespan, and battery-powered models take the hit fastest since heat degrades battery capacity on top of the usual wear.
The eave is still one of the better mounting spots on most homes as it offers partial shelter. If you're running wires, you can also run a straight path into the attic without an exterior cable run. Our roof camera guide breaks down which camera types suit different eave and roofline setups. Just don't treat "under the eave" and "waterproof" as the same thing: look for at least an IP65 rating, covering protection against dust and low-pressure water jets from any direction, before mounting anything outdoors long-term.
On a pan-tilt camera, it's worth checking whether a deep overhang can physically block part of its rotation, since the fascia gets in the way at certain angles. An offset or extension mounting bracket, positioning the camera a few inches out from the wall, usually clears it, the same fix Reolink's own roof camera guide above recommends for this exact scenario.
10. Pointing the Camera Past Your Own Property Line
Recording areas of your own property is legal in every US state, but the moment the frame captures a any part of your neighbor's property, you're in murkier legal territory. As Reolink's own guide to neighbor camera privacy rights explains, a fenced backyard or bedroom window hits a stricter legal standard than a driveway or front yard visible from the street, and audio recording runs on a separate set of rules from video, with several states requiring consent from everyone being recorded.
This comes up more often than expected with wide-angle or PTZ cameras aimed at a driveway, where a slight adjustment in angle sweeps in a chunk of the property next door. It's rarely intentional, but intent doesn't always matter once a neighbor notices their bedroom window in your app's live feed.
Most modern cameras include a privacy mask feature that blacks out or blurs a defined section of the frame while still recording everything else.
Pro Tip: Reolink's privacy and motion mask feature works this way: draw a box over the area you don't want recorded, and it stays obscured regardless of what happens in the rest of the shot. It's a five-minute fix for a problem that otherwise ends in an awkward conversation with a neighbor, or worse, a legal one.
FAQs
How do I install security cameras?
Start with placement before you touch a drill. Ideally 8 to 10 feet up, angled toward the path someone would actually walk, covering entry points like the front door or back door rather than wherever mounting is easiest. From there, installation splits by camera type. Wired PoE cameras run a single Ethernet cable back to an NVR for both power and video, so budget time for routing that cable through conduit or an attic run rather than leaving it exposed along a wall. Wire-free and battery models skip the cable entirely and pair to the app over Wi-Fi, trading a periodic recharge for a much faster install. Whichever route you take, the job isn't done once the camera has power. Start formatting the storage medium, set continuous rather than motion-only recording if storage allows, and confirm footage is actually saving before you consider the installation done.
What is the best height to mount a security camera?
For most homes, 8 to 10 feet above the ground is the sweet spot for outdoor cameras aimed at faces. It's high enough to avoid casual tampering, yet low enough to still capture a usable image of anyone approaching. Mounting higher mainly captures the top of someone's head, which isn't useful for identification. For a spot where tamper risk matters more than facial detail, like a shed or fence line, a higher mount paired with a wider field of view works better.
Should security cameras record all the time or only on motion?
Continuous 24/7 recording captures more than motion-only recording does, since it doesn't rely on a sensor triggering fast enough to catch the first moment someone enters frame. Storage used to be the argument for motion-only, but a 2TB to 4TB hard drive combined with smart detection features like person and vehicle recognition makes continuous recording practical for most homes, since the system can still filter footage down to the clips that matter.
Do I need a hard drive, or can I rely on cloud storage alone?
A local hard drive is worth having even with a cloud plan, since cloud-only setups fail the moment your internet drops or a subscription lapses. The most reliable setup pairs a local NVR or DVR hard drive for continuous footage with cloud backup for flagged events, so you're not fully dependent on either one staying available.
What resolution should I record at to avoid running out of storage?
Your highest-traffic camera, like one facing the front door, is worth keeping at full resolution and a higher frame rate, while lower-traffic cameras covering a driveway or side yard can usually run lower without losing anything you'd need to identify later. This per-channel approach uses noticeably less storage than maxing out every camera by default, and paired with H.265 compression, most homes can run 24/7 recording on a single hard drive instead of relying on motion-only settings.
Conclusion
If there's one priority to take from this list of security camera installation mistakes, fix the invisible failures first. A misjudged mounting height or a poorly aimed light is something you can walk outside and correct in an afternoon. An uninitialized hard drive, a lapsed cloud subscription, or a missing UPS only reveals itself the day you need the footage, and by then it's too late.
Start with storage and power, then work outward to placement and lighting. For the placement side, our full guide to where to place home security cameras covers positioning room by room.
Search
Subscribe for the Latest Updates
Security insights & offers right into your inbox