How to Install Wireless Security Cameras?
Installation of wireless security cameras is much easier than the wired ones. If you know the right steps to follow, you can install them on your own.
In this article, we will explain how to install wireless security cameras, taking you through the step-by-step procedure. Whether you want to install a single camera or a complete camera system, this guide can help you out.
We will also share some troubleshooting tips to solve installation and setup issues.

Reolink Spring Sale - Step Into Spring, Step Into Security!
Reolink Spring Sale is here! Grab top deals on security cameras, doorbells, and systems to keep your home safe this season.
Types of Wireless Security Camera
We can classify wireless security cameras into three types based on how they are powered and networked.
DC Power Wireless Security Camera
DC power wireless security cameras require DC power through an adapter that you need to connect to a nearby wall outlet. Because of the adapter, the cameras are not completely wireless and do not contain batteries. However, they offer continuous and longer performance.
Reolink E1 is a DC-powered Wi-Fi security camera. It works on dual-band Wi-Fi technology, which ensures stable connection and high speed. It records videos in 4MP to capture intricate details with optimal clarity.
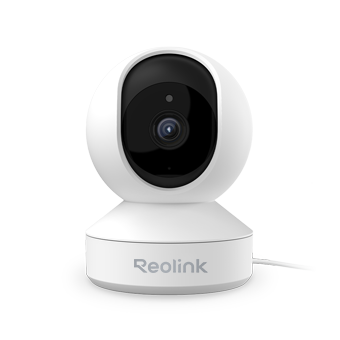
Affordable and Smart Wireless PT Home Camera
Indoor Camera Under $30; 355° Pan and 50° Tilt; 4MP Super HD; Two-Way Audio; Easy Setup with Dual-band WiFi. Crying Detection for Baby Monitoring.
Complete Wireless Security Camera
Completely wireless security cameras contain batteries that last for a long time. You only need to recharge them or connect them to a small solar panel. These are also called wireless portable cameras. There are two types: Wi-Fi cameras that connect to your Wi-Fi network and 4G LTE cameras, which require a SIM card to work.
Reolink Altas PT Ultra is a Wi-Fi 6 battery-powered camera that now features a 500-day long-lasting battery for extended performance. It offers a 360° wide view through its dual lenses and includes up to 10 seconds of pre-recording to capture key moments before motion occurs. With Reolink ColorX technology, the camera delivers all-day color vision, allowing you to see true 4K details even in low-light conditions.

Industry-leading 4K Continuous Recording Battery Camera
4K UHD Continuous Recording; ColorX Night Vision; Pan & Tilt; Automatic Tracking; All Recordings Stored Locally.
Wireless Security Camera System
A wireless security camera system consists of multiple cameras and a hub or NVR that controls all cameras. It is a complete system for larger areas.
Reolink RLK12-800WB4 has four Wi-Fi security cameras and one NVR. All these cameras offer 4K Ultra HD resolution for crisp and clear videos. It contains dual night vision, and you can select any of them you want. It’s a Wi-Fi 6 security camera system; you will get fast live streaming and a stable connection. The NVR with the system can support up to 12 cameras. It has 2TB built-in space, which can increase up to 16TB.
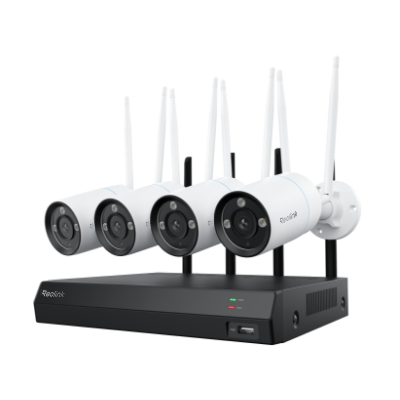
4K Security Kit with Next-Gen WiFi 6
4 pcs 4K Ultra HD Security Cameras; Dual-Band WiFi 6; 2TB HDD 12-Channel NVR for 24/7 Recording; Peron/Vehicle/Animal Detection; IP67 Weatherproof.
How to Install Wireless Security Cameras?
You can install wireless security on your own if you know the right steps. Secondly, you will need some tools to get the job done.
Things you need:
- Drill machine
- Screwdriver
- Level
- Marker
- Ladder
How to Install DC Power Wireless Security Camera?
- Select a suitable location to mount the security camera. Place the mounting template over the wall.
- Drill the holes according to the template.
- Install the mounting plate or camera and secure it using the screws.
- Now, you need to connect the power adapter to the camera. Then, insert the adapter in a nearby wall outlet. If the distance is long, you can also use the power extension cable given in the box.
How to Install a Complete Wireless Security Camera?
- These cameras can be installed almost anywhere. You can even install them on a tree. Select a suitable position.
- Place the mounting template and drill the required holes.
- Secure the camera or the mounting plate using screws.
- Once installed, turn them on and complete the setup.
How to Install Wireless Security Camera System at Home?
- Select suitable positions for all cameras. Keep in mind that if you have a DC-powered camera, you need to connect it to a nearby AC outlet.
- Place the mounting template on the wall or ceiling. Drill all the required holes. Do not secure the cameras at this moment because you need to complete the setup with NVR. After that, you can secure them using screws.
- Once the cameras are installed, it is time to install the NVR. You just need to place it in a suitable place. Power it using the power adapter.
Now, your cameras and the NVR are ready for the setup.
How to Set Up Wireless Security Cameras?
Once you have installed the camera, you can set it up using the mobile application. Let’s see how you can set up a Reolink wireless security camera.
- Turn on the camera. Insert a SIM card if it’s a 4G device.
- Open the Reolink application on your smartphone. Tap the “+” button at the top right corner.
- Scan the QR code at the back of the camera. You can also enter the UID number.
- Create a password for the device. Tap Next. You also need to name it. Enter the name and tap Next.
- Complete Device Initialization and tap Finish.
How to Set Up Wireless Security Camera System?
You need to connect all your Wi-Fi cameras to NVR first. You have to do this through the client application.
Here’s how you can set up a Reolink wireless security camera system.
-
Connect the DC adapter of your camera to a nearby outlet and turn it on.
-
Turn on the NVR by connecting its adapter. You can also connect the NVR to a monitor via HDMI/VGA.
-
Connect the cameras to the network port of the NVR via the given Ethernet cable.
-
Log in to your NVR. Go to Channel > Channel Management.
-
Turn on Auto Add. It will add the connected camera automatically to the NVR. If you have set a password on the camera earlier, click Modify and enter the password.

-
After connecting the cameras, click one camera on the screen. Click Sync to sync Wi-Fi info to the device. Once the connection is successful, click Cancel. Do the same with all connected cameras.
-
Remove the Ethernet cables from the cameras. Then, secure them at their positions. Now, they will be connected to the NVR via Wi-Fi.
Troubleshooting of Wireless Security Camera Installation
If you are struggling with the installation or setting up your wireless security camera, consider the following troubleshooting tips.
-
If your security camera is not turning on, there could be an issue with the adapter or AC outlet. Make sure the wall outlet is working fine. Then, check the adapter using a multimeter. In battery-powered cameras, there could be an issue with the battery.
-
Sometimes, the camera is installed outside the range of the Wi-Fi or at the edge. You might face frequent disconnection and speed issues.
-
If it’s a 4G camera, make sure to insert a compatible 4G SIM with a data plan. Cameras do not support all networks, and the countries are also limited.
-
Use the compatible mobile application according to the manufacturer. Follow the instructions according to the manual.
-
You can also try resetting the camera. It might solve various issues with the software and settings. Reset it to factory settings.
-
Contact customer support and explain the problem. They might give you a better solution or replace the product.
FAQs
1. What do you need to install wireless security cameras?
You need a drill machine, screwdriver, level, ladder, and marker. These are the general tools and things needed to install wireless security cameras.
2. How do I connect my outdoor security camera to Wi-Fi?
You can connect your outdoor security camera to Wi-Fi through the camera application. Install it on your smartphone and follow the steps according to the manufacturer. We have shared the step-by-step process of connecting Reolink outdoor security cameras to Wi-Fi.
3. How do wireless security cameras get power?
Wireless security cameras can be powered by a DC adapter, which is connected to a nearby AC outlet. But if they have a built-in battery, you need to charge them, or you can connect them to a small solar panel.
Conclusion
People prefer wireless cameras because they are easy to install, and there is no need to spend extra money on wires. You can select a Wi-Fi DC-powered camera, 4G LTE camera, or complete wireless camera system. We have shared the step-by-step process of how to install wireless security cameras. Now, you can install these cameras on your own.
Search
Subscribe for the Latest Updates
Security insights & offers right into your inbox