Doing Time Lapse On Trail Camera: A Comprehensive Guide
When it comes to monitoring wildlife, capturing breathtaking landscapes, or surveying a specific area's activities, trail cameras prove to be invaluable tools for professionals and enthusiasts alike.
One of the most captivating features of modern trail cameras is the time-lapse function. In this article, we will dive deeper into understanding what time-lapse on a trail camera is, how to do time-lapse and the best trail camera recommendation.
What Is Time Lapse on Trail Camera
Time-lapse is a photography technique where a series of images are captured at specific intervals and played back at a faster speed to create a video.
This technique allows people to observe slow, progressive changes in a short amount of time. By incorporating time lapse into a trail camera, it becomes possible to capture the subtle and gradual changes in the environment or observe wildlife behavior, which would be otherwise difficult to perceive in real-time.
When a trail camera is set to time-lapse mode, the trail camera will automatically capture images at the pre-set intervals, regardless of whether there is motion or not. These individual photos are then compiled together to create a time-lapse video that presents an accelerated view of the recorded events.
Trail cameras with the time-lapse function often allow users to customize various settings, such as the frequency of capturing images and the duration of time-lapse mode. Depending on the user's preference, the camera may be set to capture images every few seconds, minutes, or even hours, with the option to span days, weeks, or months at a time.
How to Do Time Lapse on Your Trail Camera
Here is a step-by-step guide on how to set up and utilize time-lapse mode on your trail camera.
1. Find the time-lapse mode
The first thing is to make sure your trail camera has the ability to capture time-lapse images.
Most modern trail cameras come equipped with this feature, but it's important to double-check your specific model. You can look for the specifications or user manual, or contact the manufacturer to confirm time-lapse functionality.
2. Put your trail camera in a better place
The location of your trail camera plays a crucial role in the success of your time-lapse project. Make sure you place the camera in an area with an unobstructed view, where it can capture images of wildlife without interference. Also, consider the position of the sun to avoid glare that may result in overexposed images.
Meanwhile, you should position and mount the trail camera securely. Ensure the camera is level, properly aimed, and tightly fastened to avoid any unwanted movement that may disrupt the time-lapse.
3. Customize the camera settings
Access the settings menu on your trail camera and navigate to the time-lapse function. Once you locate the time-lapse feature, enable it and proceed with the setup.
The two most important settings are the interval and the duration. The time interval typically ranges from a few seconds to multiple hours. You can select a shorter interval for capturing fast-moving action or weather changes, while a longer interval may be suitable for a more extensive study of animal behavior.
The duration determines how long the time-lapse photography will last. You can set the camera to shoot continuously or choose a specific time frame during which the camera will capture images. This is especially useful if you aim to observe animal behavior during specific parts of the day.
4. Test the setup
Before leaving the camera to record, take a moment to test the time-lapse function. Initiate the time-lapse mode and observe if the camera takes photos at the set interval. This will help you identify and fix any issues before starting the actual recording process.
5. Post-processing
Many trail cameras can automatically produce a time-lapse video once you set it up. And then you can further process the video by adding music or cutting off unwanted frames.
But if your trail camera can't convert time-lapse images to a video, you can retrieve the memory card and transfer the images to your computer. Utilize video editing software or specialized time-lapse software to assemble the images into a coherent video and adjust the playback speed to get the desired effect.
Best Trail Camera with Time Lapse Recommendations
There are a variety of trail cameras on the market, but some stand out for their exceptional features and performance. Here are some of the best trail cameras with time-lapse capability for you to choose from.
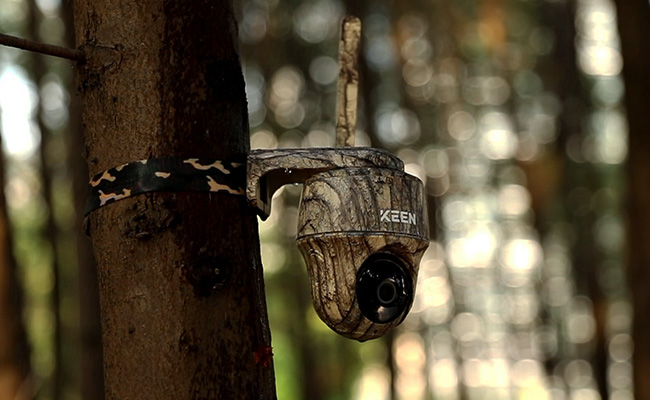
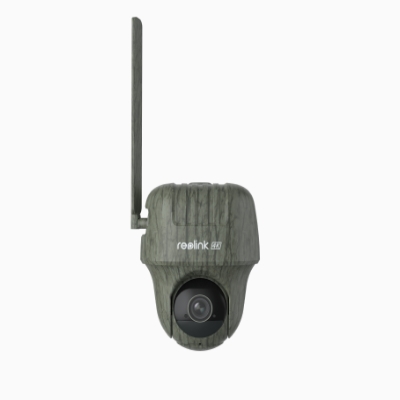
Best 4G 360° live streaming trail camera - Go Ranger PT
Go Ranger PT is a 4G battery trail camera designed for the wild. It can be placed anywhere outdoors and blends perfectly into the environment with camouflage skin.
This 4G trail camera can record 4K 8MP HD videos and rotate horizontally to show you a 360° view. Also, it has a fast trigger speed and no-glow IR LEDs for you to better observe animals' behaviors day and night.
Most importantly, Go Ranger PT has a time-lapse mode with various intervals, making it a great option for capturing time-lapse footage of wildlife.
4K 4G LTE Wildlife Camera with 360° All-Around View
4G LTE Network, 4K 8MP Ultra HD, No-Glow IR LEDs, Person Detection, Animal Detection, Two-Way Audio, Battery/Solar Powered.
Smart dual-lens 4G battery camera - Reolink TrackMix LTE
If you want to get more details or have a closer look at the wildlife, the wireless battery camera Reolink TrackMix LTE can definitely meet your needs.
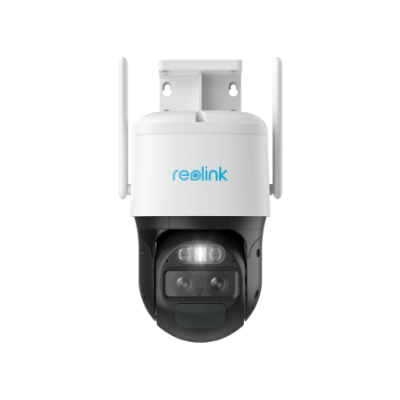
2K Dual-Lens PTZ Camera with Motion Tracking
4K 8MP UHD, Wide-Angle & Telephoto Lenses, Pan-Tilt-Zoom, Auto-Tracking, Person/Vehicle Detection, 4G LTE Network, Two-Way Audio, Time-Lapse.
This 4G camera can pan and tilt to offer you a 360° wide view wherever you place it. It has a wide-angle lens to give you a broad overview and a telephoto lens to show you a clear closeup of the moving object, including an animal.
When you set time lapse, only the camera's wide-angle lens will shoot images during certain intervals. So you won't worry about the change of perspective while viewing the time-lapse video.
The Benefits of Trail Cameras with Time-Lapse
Trail cameras with time-lapse functionality offer many benefits to users across various fields. With high resolution and discreet appearance, time-lapse trail cameras are becoming a sought-after tool for observing, understanding, and preserving the natural world.
High-resolution images
Time-lapse trail cameras often come with high-resolution image sensors that capture crisp and detailed images. These high-quality images make it easier to identify specific animals, differentiate among species, and study intricate behavioral patterns.
Blend with the environment
Time-lapse trail cameras are designed to be inconspicuous and blend in seamlessly with their surroundings. This allows them to capture truly candid moments that are not influenced by the presence of humans or the camera itself. The natural appearance of these cameras also reduces the risk of theft or vandalism.
Monitoring Wildlife Activity
Time-lapse mode can be used to monitor daily, seasonal, or yearly activity patterns of animals in their natural habitat. These patterns may include migration, feeding, and mating behaviors, as well as changes in population dynamics.
Simplifying Data Analysis
Time-lapse videos generated by trail cameras make it easier for researchers and wildlife enthusiasts to analyze data, as they provide a condensed overview of animal activity in the area. It eliminates the need to sift through thousands of individual images, saving both time and effort while still offering valuable insights.
Surveillance and Security
Trail cameras with time-lapse functionality can also be employed for monitoring remote properties, construction sites, or locations prone to illegal activities, such as trespassing, poaching, or vandalism.
Bonus Tips on Doing Time-Lapse on Trail Camera
To ensure you get stunning time-lapse videos, it is crucial to consider certain aspects such as location, storage space, and battery life. Here are some bonus tips to keep in mind when doing time-lapse photography with a trail camera.
Find the best location
The location of your trail camera is absolutely critical whether it's used for monitoring animals or capturing time-lapse footage.
You need to find a spot that offers an unobstructed view of the scene you are trying to capture. If you want to observe wildlife activities, you can place the camera where animals tend to appear, such as near a watering hole, food source, etc.
Meanwhile, make sure that you angle the camera correctly, and that it is mounted securely to prevent any movement. Otherwise, the trail camera will be shaking due to storms or impacted by animal's behaviors.
Don't ignore the environment and lighting conditions. You'd better avoid pointing the camera directly into the sun or other bright lights, as this can cause overexposure.
Keep the storage capacity in mind
When doing time-lapse photography, the trail camera will capture a large number of still images over time, which can take up a great deal of storage space. Thus, it's important to make sure your trail camera has enough amount of storage space.
Check your camera's settings to see how much footage you can store and adjust the time-lapse interval accordingly. A shorter interval will capture more footage but will also use up more space.
If you decide to capture long-term events, you should consider using a high-capacity SD card like 128GB or 256GB, or uploading your images to the cloud.
Pay attention to the battery usage
Most trail cameras are powered by batteries. Time-lapse photography can drain your camera's battery quickly, especially if you're using a shorter interval or recording for an extended period.
Before you set up your camera, make sure the battery is fully charged, or consider using a battery pack to ensure the trail camera has enough power.
Alternatively, you can invest in a solar-powered trail camera and install a solar panel near it. With a solar panel, your trail camera can get non-stop power as long as there is sufficient sunshine. Meanwhile, you can save time charging the camera or replacing the battery with a new one.
It's also a good idea to check your camera's battery level regularly and adjust the interval or recording time as needed to conserve power.
Conclusion
Time-lapse photography on trail cameras opens up a whole new world of possibilities for wildlife observation and research. With proper planning, setup, and patience, you can create captivating videos that provide invaluable insights into the lives of animals and their ecosystems.
Share with us if you ever used a trail camera to shoot wonderful time-lapse videos. Or if you have any questions, feel free to leave them in the comment below.
Search
Subscribe for the Latest Updates
Security insights & offers right into your inbox