Reolink Argus 3 Pro Review: Buy It or Get the 4 Pro?
As one of Reolink's star products, the Argus 3 Pro stands out for its innovation and reliability. From monitoring daily movements to interacting with the person via the camera, the Argus 3 Pro has some impressive features.
This article will review some of the main functions of this camera and explore if this Reolink wireless security camera lives up to the hype.
What is the Argus 3 Pro

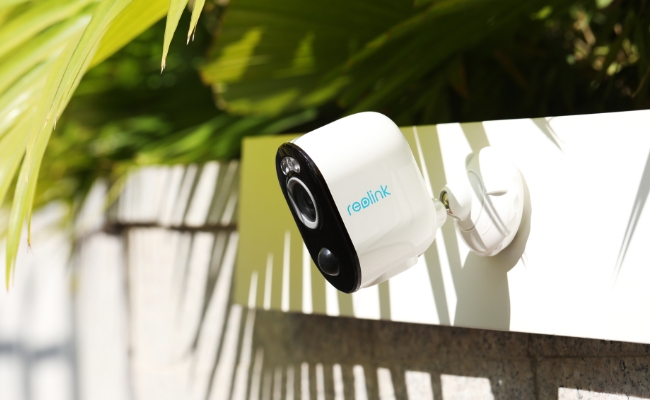
The Reolink Argus 3 Pro is a wire-free, solar-compatible security camera built for spots where running a cable isn't an option. This could be a shed, a fence line, or a detached garage. In preparing this review, we set up and tested the Argus 3 Pro ourselves, then cross-checked our findings against real owner feedback and independent reviews.
Important Update: Reolink's Argus lineup has since grown to include the Reolink Argus 4 Pro, the next generation in the series with a 180° dual-lens view and full 4K resolution. See "How the Argus 3 Pro Compares to the Argus 4 Pro" further down in this review.
Key Specifications
Pros
- 2K Super HD (2560 x 1440) color night vision with two built-in spotlights, no subscription required for local recording
- AI person, vehicle, and pet detection with adjustable exclusion zones, which community feedback says meaningfully cuts down false alerts
- Dual-band 5GHz/2.4GHz Wi-Fi for noticeably faster clip downloads than earlier Argus models
- Wire-free, solar-panel-compatible design that owners describe as "rock solid" with consistent sunlight
- Local microSD storage up to 512GB, plus optional Reolink Cloud, so it works with or without a monthly plan
Cons
- Motion-triggered recording only, no continuous 24/7 as a standalone. Pair it with a PoE camera if you need round-the-clock recording
Best for: Homeowners or renters who want budget-friendly, wire-free color night vision. Also a great choice for anyone who doesn't need the widest possible field of view or continuous recording.
2K 100% Wire-Free Spotlight Camera
2K 4MP Super HD, Battery/Solar Powered, Person/Vehicle Detection, 5/2.4 GHz Dual-Band WiFi, Color Night Vision, Two-Way Audio.
Unboxing Argus 3 Pro
Let's start with opening the product box of the Reolink Argus 3 Pro, and we find these items inside:
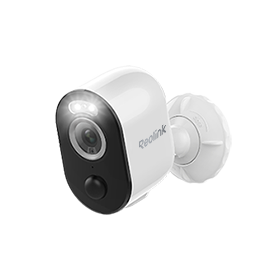
- Argus 3 Pro Camera: This camera is very compact and sleek in design.
- Security Bracket and Screws: These tools are for installation and mounting on the wall.
- Stand Bracket: This bracket can hold the Argus 3 Pro on the desk, shelf, or other indoor spots.
- Strap: This strap helps you mount the camera in places where visible holes cannot be drilled.
- Mounting Template: It takes the guesswork out of where to place those screws for a secure fit.
- USB Cable: This is for the regular charging of the battery.
- Quick Start Guide: For those who prefer a roadmap, there's a quick start guide. It's a straightforward companion that'll help you get the Argus 3 Pro up and running in no time.
- Surveillance Sticker: This unmistakably indicates that the security camera is actively in operation.
- Reset Needle: This needle is typically used to access a small reset button on the camera.
Setup and Installation of Reolink Argus 3 Pro
Setup
We set up the Argus 3 Pro via the Reolink app. Thanks to the clear instructions, we connected the device to our Wi-Fi within a few minutes. During the initial setup, you'll perform tasks such as adding the camera to the Reolink App, configuring Wi-Fi settings, scanning the QR code, creating a username and password, etc. By the way, we charged the camera for several hours before the initial configuration.
Installation
We installed the Argus 3 Pro on the wall using the security bracket. Apart from the tools in the product box, some necessary tools include a hammer, an electrical drill, and a screwdriver. And the whole installation process is simple. Here are some significant steps we've taken:
- Place the mounting template where we intend to install the camera and indicate the spots for drilling holes.
- Drill holes and screw the backplate to the wall.
- Attach the other part of the bracket to the plate and turn the bracket clockwise to lock it firmly.
- Screw the camera to the bracket and lock it in position.
Note: We installed the camera about 2 meters above the ground.
Reolink Argus 3 Pro's Key Features
Here, we've tested some of the critical features of the Argus 3 Pro.
Video Quality
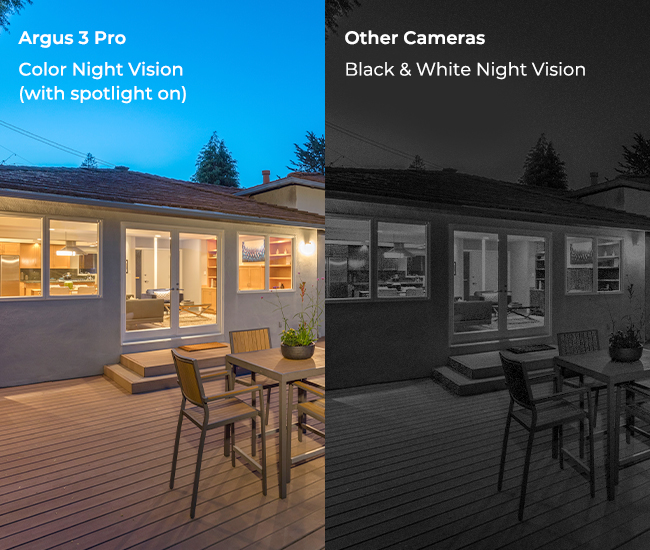
According to the specs, this camera boasts 4MP (2560 x 1440) resolution. When testing, we were impressed by its clarity during the day. The built-in spotlights are also bright enough to bring vivid colors to the night.
How Long Does the Argus 3 Pro's Battery Actually Last?
The Reolink Argus 3 Pro runs on a 6,000mAh rechargeable battery, and how long it lasts depends entirely on how often it records. Our own unit lasted about two weeks on a single charge with everyday motion triggers. Pairing it with the Reolink Solar Panel removes the recharging cycle almost entirely.

One owner in Reolink's Reddit community described three Argus 3 Pro units on solar as "rock solid reliability"" for over two years.
Pro Tip: Pair the Argus 3 Pro with the Reolink Solar Panel for maintenance-free charging, but plan on indoor charging if your installation site sees extended sub-freezing temperatures.
Recording Modes
The recording mode for the Reolink Argus 3 Pro is motion-triggered, driven by a PIR motion sensor that detects body heat rather than general movement. When something warmer than its surroundings passes through its field of view, the sensor tells the camera to start recording. This is what "motion-triggered recording" means in practice: the Argus 3 Pro stays in standby and only wakes up to record when its PIR sensor detects that kind of heat signature, which is also what makes long battery life possible on a wire-free camera.
In our testing, sensitivity was high enough to trigger in complete darkness, which drained the battery faster until we tuned it down in the app. It's also worth knowing that a PIR sensor reacts a little differently depending on how fast something moves. For example, a person walking toward the frame is typically picked up almost instantly, while a fast-moving subject like a passing car may already be partway across the picture by the time recording kicks in. If you're covering a driveway with fast-moving traffic, mount the camera to face oncoming vehicles head-on rather than across the street for the fastest pickup.
How Much Local and Cloud Storage Does It Offer?
The Reolink Argus 3 Pro supports local microSD storage of up to 512GB, so it can reliably work without a subscription. That being said, Reolink Cloud is also available depending on your region if you'd rather keep an off-device backup.
Important Note: Reolink Cloud plans and pricing can change from time to time, so check the current options directly on Reolink Cloud's site rather than relying on a fixed figure here.
Does It Work With Alexa and Google Assistant?
The Reolink Argus 3 Pro is compatible with Google Assistant and Amazon Alexa. You can integrate this camera into your home automation setup. However, you will still need a Google Home Hub or an Amazon Echo.
How the Argus 3 Pro Compares to the Argus 4 Pro

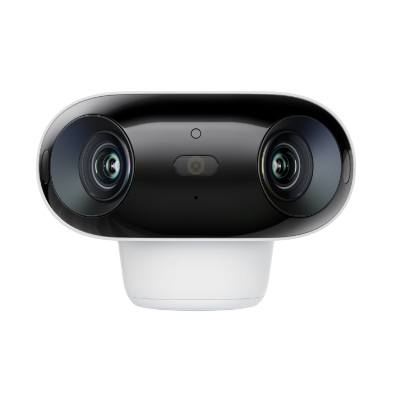
The Reolink Argus 4 Pro is the next generation in the Argus lineup, launched in mid-2024 with a wider dual-lens field of view, full 4K resolution, and spotlight-free ColorX night vision. Here's how the two compare, and when each one makes more sense.
Consider the Reolink Argus 4 Pro instead if:
- You want a single camera to cover a wide driveway or yard without blind spots (180° vs. 122°)
- You want 4K clarity and Reolink's spotlight-free ColorX night vision
- You want the newest generation in the Argus lineup, with updated Wi-Fi 6 connectivity
4k 180° Wire-free Color Night Vision Camera
4K UHD 180° Blindspot-free View; Color Vision Day and Night; 30% More Battery Life; Dual-band Wi-Fi 6; Smart detection.
Consider a wired option if:
- You need true 24/7 continuous recording. For that, a PoE camera like the Reolink RLC-810A remains the more reliable fit; community feedback consistently favors wired over battery power for uptime-critical spots
None of that makes the Argus 3 Pro a lesser choice on its own terms. It's still a capable, budget-friendly pick for wire-free coverage.
Important Note: For the complete feature-by-feature breakdown, see Reolink's Argus 4 Pro vs Argus 3 Pro comparison guide.
FAQs
What is the video quality of the Reolink Argus 3 Pro?
The Reolink Argus 3 Pro offers video footage at 4MP (2560 x 1440) resolution, with excellent color detail both day and night thanks to its built-in spotlights.
Does Reolink Argus 3 Pro require a subscription?
No. The Argus 3 Pro doesn't require a subscription if you store video locally on a microSD card, up to 512GB. Reolink Cloud is also available if you'd rather store footage off-device, starting with a free 7-day, 1GB plan.
What is the difference between the Reolink Argus 3 Pro and the Argus 4 Pro?
The Argus 4 Pro is the current-generation successor, with a wider 180° dual-lens view versus the Argus 3 Pro's 122°, full 4K resolution versus 4MP, and spotlight-free ColorX night vision.
How long does the Reolink Argus 3 Pro's battery last?
Battery life depends on how often the camera records. Our own testing saw about two weeks per charge under everyday use, and pairing it with a Reolink Solar Panel can maintain a continuous charge with a few hours of daily direct sunlight.
How much does the Reolink Argus 3 Pro cost?
Pricing varies by region and retailer. Check the product listing below for current pricing, or compare it with the Reolink Argus 4 Pro, the newest camera in the Argus lineup, if you want the latest generation.
Does the Reolink Argus 3 Pro work with a solar panel?
Yes. The Argus 3 Pro is compatible with the Reolink Solar Panel, which can maintain a continuous charge with consistent daily sunlight. Solar charging pauses below about -20°C (-4°F), so extremely cold installations may still need occasional indoor charging.
Conclusion
The Argus 3 Pro was never the flashiest camera in the Argus lineup, and it still isn't. What it does well is watch the corners of your property that don't have a power outlet nearby, without asking for a subscription to do it. If that's the job you need done, it's always ready to perform. But, if you want Reolink's newest hardware instead, the Reolink Argus 4 Pro is just one click away.
Search
Subscribe for the Latest Updates
Security insights & offers right into your inbox