How to Wire Solar Panels: A Complete Step-by-Step Guide

Wiring is one of the crucial aspects to take care of while installing the solar panel connection because it can profoundly impact performance and efficiency. We have formed this guide for all households still unaware of the process.
Keep reading; the forthcoming content will show you how to wire a solar panel and give you an overview of its essential components, requirements, etc.
Overview of Solar Panel Wiring
Although solar panels are needed to generate electricity, they can not power your house alone. Instead, you need multiple other devices, like an inverter or battery, to transfer the energy from the solar panel to the areas required.
Hence, solar panel wiring refers to connecting solar panels with all the other essential components. Proper wiring ensures that the electrical output is managed correctly and efficiently.
Components of Solar Panel System
Some of the essential components of solar panel systems include:
- Solar panels: Large dark-colored plates with photovoltaic cells that convert sunlight into direct current.
- Inverter: Converts direct current into alternate current to adhere to the compatibility issues of grid systems.
- Charge controller: Responsible for regulating voltage and current to prevent overcharging.
- Batteries: Powerhouses that store energy for later usage.
- Wiring connectors: Wires, nuts, bolts, and necessary tools connect all the watch components.
Types of Solar Panel Connections
There are two significant types of solar panel connections discussed as follows:
- Series connection: These connect panels end to end. The configuration increases system voltage and maintains the current Series to match the inverter requirements.
- Parallel connection: Under this, the panels are connected with all the positive terminals conjoined together. Similarly, the negative terminals are joined to increase the system's current while the voltage remains unchanged. The parallel connections help improve the system's current capacity.
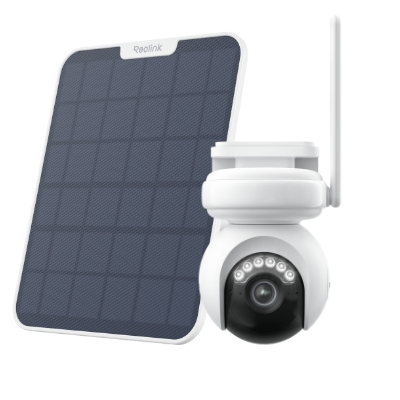
Solar panels are compatible with security cameras. For instance, the Reolink Altas PT Ultra can be charged using a solar panel.
Industry-leading 4K Continuous Recording Battery Camera
4K UHD Continuous Recording; ColorX Night Vision; Pan & Tilt; Automatic Tracking; All Recordings Stored Locally.
Wiring Requirements for Solar Panels
Wiring solar panels is a process that has a particular set of requirements you need to fulfill, including all of the following:
- Voltage: Refers to the pressure from an electrical powerhouse that pushes the electricity. A series connection increases the total voltage, while a parallel connection obtains the same voltage but with an increased current.
- Electric current*: Current refers to the flow of charge. It is measured in amperes, which is critical for determining the appropriate wire gauge. Series connections maintain the same current, while parallel connections increase the total current.
- Power: Power is the rate at which energy is transferred and measured in watts. It is calculated as the product of voltage and current.
- String size: This refers to the number of solar panels connected in series or parallel. It impacts the system's overall performance and keeps current within safe limits.
How to Wire Solar Panels in Series
Let's delve into a step-by-step guide about wiring the solar panel in Series with minimum effort.
1. Gather the material
In the first step, you must gather all the material needed for the installation. It includes the following checklist:
- Solar panels
- Wiring MC4 connectors
- Wire that's compatible with the system.
- Insulation tape
- Wire cutters and strippers
- Voltage tester
2. Installation of the solar panels
Solar panels are the first thing to install in the wiring system. Place your panels or the panel stands on a surface directly exposed to the sun. Make sure the angle is the same as sunshine falling on the ground. This way, you can maximize the energy generation.
3. Determine the series configuration
The following identifies the positive and negative terminals of the solar panels, denoted by + and -, respectively. If you cannot find it, consider getting help from the package box or asking your seller for such information.
4. Connect the panels
Start with the panel first and connect the positive terminal to the negative terminal using the wiring and connectors. Keep going until all the panels in the Series are connected end-to-end.
5. Secure and insulate connections
Protect the connections using insulation tape or cable glands. In addition, ensure that all the connections are solid and well-insulated to prevent short circuits or weather damage.
6. Connect to the charge controller or inverter
Now, connect the first panel's free positive terminal with the last panel's negative terminal. It will input the terminals of the charge controller or inverter.
7. Test the system
Use a voltage tester to check the output voltage. Remember, the series-connected panels must match the system's requirements to function correctly.
8. Finalize the installation
Secure all the wires and connections to prevent movement and damage. Double-check all the connections for proper insulation and tightness.
How to Wire Solar Panels in Parallel
Here is how you can wire solar panels in parallel.
1. Gather all the material
At the first place, make sure to obtain all of the following material:
- Solar panels
- Wiring connectors
- Insulation tape
- Appropriate wiring
- Wire cutters
- Voltage tester
2. Install the solar panel
Mount your solar panels in a clean and dry place. Make sure that the angle is directly opposite the sun. Plus, there must not be any hurdles between them that can block sunlight.
3. Identify terminals
Locate the positive and negative terminals. Now, connect all the positive terminals to the negative terminals.
4. Connect the wiring positive and negative terminals
Using the appropriate connectors or join all the positive terminals of the panel. Ensure that the connection is solid and insulated. Similarly, all the negative terminals must be connected using the connectors.
5. Combine wires
Group the positive and negative wires together. To organize the connections, you can use junctions or terminal blocks.
6. Connect to charger
Attach the combined positive wires to the positive input terminal and the combined negative wire to the negative input of your controller.
7. Test the system
Use the voltage tester to verify that the output matches your system's requirements and that it functions correctly.
How to Wire 12v Solar Panels to 24v Batteries
The section explains how to wire two solar panels together:
- Gather all the essential materials like 12V solar panels, 24V battery bank, compatible charger, wiring connectors, wire, insulation tape, and tools.
- Next, mount the solar panel for optimal sunlight exposure. You can place them on the roof or any unshaded area.
- Connect the positive and negative terminals to the charge controller's output.
- Wire the charge controller's output to the positive and negative terminals of the 24V battery bank.
- Use a voltage tester to confirm that the system outputs the correct 24V and operates appropriately.
Tips for Connecting Solar Panels to House Wiring
Here are some practical tips about how to wire solar panels to house:
- Select the correct wire to handle current efficiently and minimize voltage drop.
- Ensure the solar panels are connected to the dedicated circuit breaker for safety and system isolation.
- Choose an inverter compatible with the solar panel voltage and power requirements.
- Align and group the components correctly. This will help prevent electrical faults. If you can not handle the task, leave it to professionals.
- Adhere to the local electrical codes and regulations for installation.
FAQs
How should solar panels be wired?
Solar panels can be wired in Series as the voltage increases. You can also wire them in parallel to increase the current. At the same time, the series wiring connects the positive to the negative terminal, and the parallel wiring connects all positives and negatives.
Can I wire solar panels myself?
Yes, you can do the task all by yourself. All you need is the proper information and tools that we discuss above. However, if you are someone who has never done any electrical task before, we recommend leaving the task to professionals.
Is it better to wire solar panels in Series or parallel?
It depends upon your needs and preferences. While the series wiring is ideal for increasing voltage, parallel wiring enhances current. Hence, what works better for you depends upon your goals.
Conclusion
Knowing the correct way to wire solar panels is essential to ensure a constant and efficient performance. You can wire it in Series and Parallel wiring, as discussed above. Also, make sure to take care of a few things, like choosing the correct wire, implementing each step carefully, and adhering to local electrical codes to ensure optimum performance.
If you find the content above helpful, share it with your friends and family. Also, let us know your thoughts in the comment section below.
Search
Be in the Know
Security insights & offers right into your inbox

