How to Remove Doorbell Camera: A Step-by-Step Guide

Home security has been taking to doorbell cameras. Yet, you might have to uninstall a mounted doorbell camera at some point, whether you’re switching out the old one for a brand new one or calling it quits.
You need to remove a doorbell camera carefully so that you don’t damage it or your home in the process. In this guide, I’ll show you the step by step process for how to remove doorbell camera of different brands and models.
Don't miss out on Reolink's Holiday Sales and find the perfect replacement for your old doorbell camera!

Reolink Spring Sale - Step Into Spring, Step Into Security!
Reolink Spring Sale is here! Grab top deals on security cameras, doorbells, and systems to keep your home safe this season.
Why Need to Remove a Doorbell Camera?
There are a few common reasons you may need to remove an existing video doorbell camera:
- Upgrading to a new doorbell camera: You may want to upgrade to a newer model with better features and image quality. Removing the old doorbell camera is necessary before installing the replacement.
- Relocating the doorbell camera: You might decide to move the doorbell camera to another entry point in your home for better visibility. Taking down the current one to reinstall elsewhere is required.
- Discontinuing use: Perhaps you no longer want or need a smart doorbell camera. Removing it completely gets rid of the unused device.
- Repairing issues: A non-functioning camera requiring troubleshooting or replacement needs removal first. This allows you to fix any underlying installation problems.
- Moving homes: When moving out of your home, you’ll need to remove the doorbell camera to take it with you or restore the entry area.
No matter the reason, removing a wall-mounted doorbell camera correctly prevents damage and makes way for new installation.
How to Remove Doorbell Camera
Removing most installed video doorbell cameras involves similar steps. However, always check your device’s manual for specific removal instructions, too. Below is an overview of how to remove doorbell camera from wall:
Step 1: Turn Off Power
For removing Ring doorbell, start by turning off the power to the doorbell camera at the breaker box. This ensures no electrical current is flowing to the device for safety.
Locate the correct circuit breaker controlling power to the doorbell, usually labeled, and switch it to the “Off” position.
Step 2: Disconnect Wires
With the doorbell camera power off, disconnect any attached wiring. This usually includes wires connecting to an internal doorbell and a power source cable.
- For wired models, detach the low-voltage wires leading back to the internal doorbell. There are typically two wires inserted into terminals or ports on the back of the camera. Carefully release them from their connection points using needle-nose pliers.
- For battery-powered models, there may only be a power cable you need to unplug from the external outlet. Make sure to release wires gently without damaging ports. Also, take photos showing the original wiring setup to help when reinstalling or replacing the camera.
Step 3: Unmount the Camera
Following any final steps in your manual, such as removing a security screw, you can now detach the doorbell camera fixture from the wall or entry point.
Use an appropriate drill bit to remove any screws fastening the mounting plate or backplate to the wall if they don’t detach by hand. Take care not to strip screw heads.
Finally, firmly but gently remove Ring doorbell from the wall mount. Be careful not to damage wires threaded through the wall cavity. With wiring disconnected and hardware unmounted, you have successfully removed the doorbell camera!
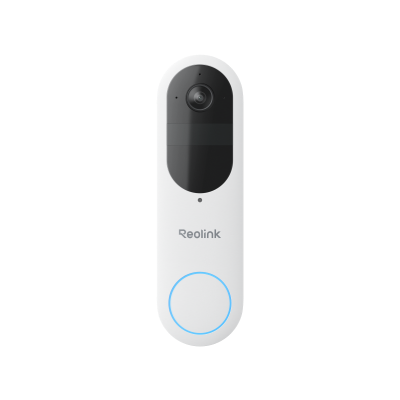
How to Remove Reolink Doorbell Cameras
Reolink makes reliable and feature-packed video doorbell cameras for increased home security. Their easy installation also makes dismantling Reolink doorbell cameras straightforward if needed. Here are the steps to safely remove a Reolink doorbell camera:
Step 1: Power Off Camera
Start by switching off the doorbell camera power from the breaker box, as with any standard doorbell camera. Locate the correct circuit breaker and turn it to the “Off” position.
Step 2: Press Reset Button
Reolink doorbell cameras have a reset button internally that releases the device from the wall mount when pressed. Locate the small hole on the underside of your Reolink doorbell camera close to the wall. Then, take the thick reset needle tool provided in your original camera box.
Insert the reset needle into the hole and press the button behind the camera firmly. You’ll feel a click when successful.
Step 3: Remove From Mounting Plate
After pressing the reset button, the Reolink camera can be released from the mounted bracket on the wall.
Gently pull the top of the doorbell camera away from the wall, angling the bottom outward. The device will detach safely from the mounting plate.
Removing Tips for Other Doorbell Camera Brands
While the general process is similar across devices, some smart doorbell cameras have extra model-specific steps for removal. Here are some key tips for safely dismantling other major brands:
Ring
Follow these simple steps and tips to remove the Ring doorbell:
- Remove the faceplate cover first before accessing ports or wires
- Locate a manual removal pin inside the camera to press before lifting the device off the bracket
- Take out any screws fastening the baseplate to the wall before prying the camera away
Nest
Here are some tips if you want to know how to remove Nest camera doorbell:
- Power down the camera by pressing the setup button for 10+ seconds
- Detach wall plate adapter cables before removing the camera
- Use the included removal key tool to rotate and release the camera from the bracket
Vivint
If you are looking for how to remove Vivint doorbell camera, follow these tips:
- Access removal screw underneath logo emblem on camera face
- Press and hold the setup button for 5+ seconds to power off before the removal
- Pull the bottom of the camera firmly away from the wall mount once the screw has detached
Carefully following manufacturer removal guidance protects your camera and home exterior while taking down devices.
Perfect Replacement for Your Old Doorbell Camera
Once you’ve safely removed your outdated or faulty video doorbell, it’s time to upgrade! The Reolink Video Doorbell Battery provides the ultimate smart security for front door monitoring.
This innovative WiFi doorbell captures crisp 2K video with a head-to-toe field of view. The swivel design presents a full head-to-toe perspective of visitors at your doorstep. It also detects people, vehicles, and packages with intelligent alerts on your phone.
Powered by a rechargeable battery, the Reolink doorbell wirelessly connects to your home’s 5/2.4GHz dual-band WiFi for seamless live viewing.
Smart 2K Dual-Band Wi-Fi Battery Doorbell
2K 4MP Head-to-Toe View; Person/Vehicle/Package Detection; Works with Reolink Home Hub & Wi-Fi NVR; 5/2.4GHz Dual-Band Wi-Fi.
FAQs
How do I remove an existing doorbell?
Removing an existing doorbell involves switching off power, disconnecting any wiring, loosening mounting screws, and gently prying the device off its wall plate. Refer to manufacturer removal instructions for extra model-specific steps.
What tool do you need to remove a doorbell?
Basic tools for removing most doorbell cameras include a power drill with bits to detach wall mounting screws and needle-nose pliers to disconnect wires from terminals. Some cameras also come with a specialized removal tool, such as a pin or key, to aid the dismantling process.
How can I disconnect my doorbell?
To fully disconnect a doorbell camera, you’ll need to power it off, detach any cabling and wires from power outlets or internal doorbells, remove fastening hardware like screws, and finally lever the device off its mounted wall bracket. Follow all manufacturer guidance for complete removal.
Conclusion
Removing an installed doorbell camera is straightforward when you carefully follow device-specific and general guidelines. Common steps include powering off the camera, disconnecting wires, taking out mounting screws, and gently prying the unit from its wall plate. Just remember never to forcibly detach a camera before powering down and releasing wires. This prevents electrical risks and damage.
Search
Subscribe for the Latest Updates
Security insights & offers right into your inbox