
Reolink Lumus Review 2026: Is This the Best Budget Spotlight Camera?
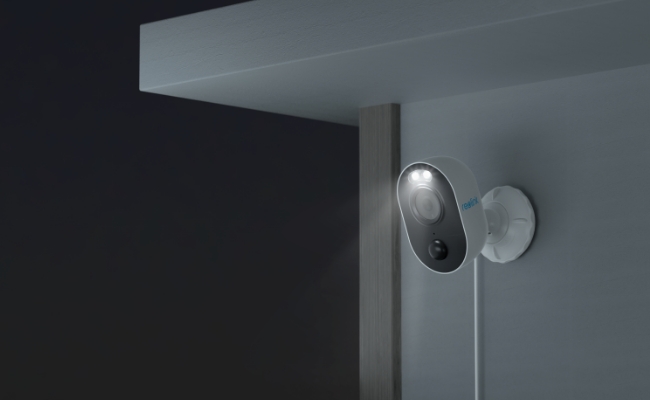
The Reolink Lumus is engineered to bring high-end outdoor security features—like motion-activated color night vision and local smart detection—into an affordable, wallet-friendly package. While many budget cameras lock their best features behind a monthly paywall, the Lumus focuses heavily on standalone capability and local storage privacy.
In preparing this comprehensive review, we analyzed cross-referencing real-world user data with manufacturer specifications to evaluate how this budget spotlight camera performs in everyday environments
Reolink Lumus: Pros & Cons Summary
Best For: Homeowners or renters seeking an affordable, plug-in security camera to illuminate and monitor a precise outdoor zone (like a front porch or driveway) without a monthly subscription.
Pros
- True 2K 4MP Quad HD resolution delivers crisp facial details in daylight.
- Dual integrated spotlights activate instantly on motion for full-color night vision.
- On-device AI person/vehicle/animal detection is included with zero ongoing subscription fees.
- Flexible dual-band Wi-Fi (2.4/5 GHz) ensures stable video bitrates even at longer distances.
Cons
- Continuous Plug-In Power: Requires access to an outdoor electrical outlet; for 100% wire-free locations, consider a Reolink battery-powered alternative.
- Fixed Field of View: Provides ultra-wide static coverage; users requiring dynamic 360-degree tracking should look toward the Reolink TrackMix or Argus PT series.
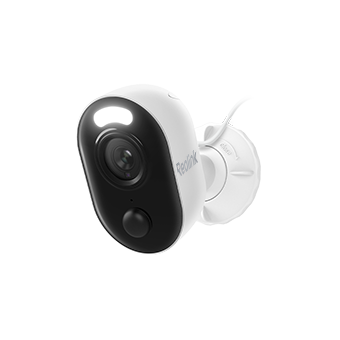
Outdoor WiFi Security Camera with Motion Spotlight
Bright, Motion-Activated LED Spotlight, Instant Siren Alarm, and Remote 2-Way Audio; 2K 4MP and Full Color Night Vision.
What Is Reolink Lumus?
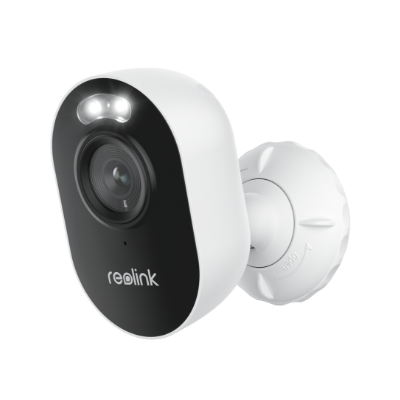
Reolink Lumus is a compact plug-in Wi-Fi security camera designed for both indoor and outdoor use. It captures 2K 4MP Quad HD video and combines AI-powered person, vehicle, and animal detection, full-color night vision, and motion-activated spotlights to provide reliable 24/7 home security. Since it uses plug-in power, Lumus supports continuous operation without the need for battery recharging.
How to Install and Set Up the Reolink Lumus?
Setting up the Reolink Lumus takes less than 15 minutes and involves securely mounting its weather-resistant bracket to a flat surface, connecting to continuous plug-in power, and syncing the hardware to your smartphone via a 2.4 and 5GHz Wi-Fi connection.
Follow this optimized process to ensure your budget spotlight camera is anchored safely and connected properly.
Phase 1: Physical Mounting & Cable Alignment
-
Step 1: Choose and Clean the Surface: Select an optimal installation point roughly 8 to 10 feet off the ground to capture face-level footage while keeping the camera housing out of an intruder's reach. Wipe away any dirt or cobwebs from the siding, brick, or under-eave area.
-
Step 2: Mount the Bracket Base: Use the bracket as a physical stencil to pencil-mark your screw layout. Drill small pilot holes. (If mounting to brick or concrete, hammer the included plastic wall anchors flush into the holes first). Drive the mounting screws in firmly to lock the bracket base to the wall.
-
Step 3: Track the Power Cable: Run the integrated tail cable safely along your wall trim.
The Reolink Lumus comes equipped with a power cable connected to its DC adapter. Make sure your mounting point sits within this distance from a covered outdoor outlet or an indoor outlet accessed via a drilled wall-hole.
- Step 4: Snap and Position the Camera: Lock the camera head firmly into the mounting bracket socket. Adjust the swiveling neck assembly to angle the lens toward your primary monitoring zone, then hand-tighten the retention collar to hold it in place.
Phase 2: Digital Configuration via the Reolink App
-
Step 5: Launch and Scan: Download the free Reolink App from the Apple App Store or Google Play Store. Open the app, tap the "+" (Add Device) icon in the top right corner, and scan the unique QR code located on the bottom base of your Lumus camera.
-
Step 6: Sync to the Right Wi-Fi Band: Follow the on-screen prompt to input your home network’s name (SSID) and password.
-
Step 7: Finalize Settings: Once you hear the "Connection to the router succeeded" voice prompt, use the app to name your camera, select a localized time zone, and draw your Customizable Detection Zones to filter out public roadways or rustling bushes.
Reolink Lumus: Key Features Breakdown
Video Quality: Clear 2K Resolution by Day, Vivid Color by Night
The Reolink Lumus utilizes a 2K 4MP image sensor that delivers sharp, high-contrast daylight footage and transitions into full-color night vision when its built-in spotlights are triggered.
In bright daylight conditions, the 2K resolution sensor shines. It provides natural color balancing without the oversaturation common in budget hardware, allowing you to clearly distinguish facial features and clothing styles.
When the sun sets, the camera leverages its dual LEDs to replace grainy, traditional black-and-white infrared footage with true color night vision. The color accuracy is bright enough to identify the exact color of an oncoming vehicle or a visitor's clothing at night. If you prefer a more discreet setup, you can easily toggle the spotlights off in the Reolink app to use standard black-and-white infrared night vision instead.
Smart AI Detection: Fewer False Alerts
On-device AI processing distinguishes between people, vehicles, and pets, cutting out up to 90% of the false motion alerts caused by wind, shadows, or rain.
Basic motion sensors trigger an alert for any pixel change on screen, which often leads to phone fatigue from falling leaves or passing headlights. The Lumus solves this by computing smart object detection directly on the camera hardware.
According to user reports aggregated from Amazon reviews, the person and vehicle tracking algorithms are highly accurate. Homeowners can also map out Customizable Detection Zones via the app, letting you block out busy public sidewalks and only receive alerts if someone steps onto your actual property.
Tip: For the cleanest performance, use the app to lower the motion sensitivity slightly if your camera faces high-contrast foliage or trees that sway frequently in heavy winds.
Local Storage & Private Management
The Lumus stores data locally on a microSD card (up to 512GB), completely bypassing the need for an expensive monthly cloud storage contract.
Unlike major competitors that lock recorded history behind a paywall, Reolink design structures focus on consumer choice. You can set the camera to record continuously, on a customized schedule, or exclusively during motion-triggered events to save space.
If someone attempts to steal the camera housing itself, you can easily back up your clips automatically to a secure local Reolink NVR or an off-site personal FTP server.
Specs Breakdown
Real-World User Feedback on Reolink Lumus
According to the Modern Castle's hands-on review, the Reolink Lumus delivers premium features at a budget price, making it one of the strongest value options for homeowners who want a plug-in Wi-Fi security camera with built-in lighting. The reviewer particularly praised its image quality, AI detection, and ease of setup.
1. Sharp 2K Video Quality Day and Night
During testing, Modern Castle found that the Lumus produced clear, detailed 2K footage in daylight, with natural color reproduction and enough clarity. At night, the built-in spotlight automatically switched the camera to color night vision, producing much brighter and more detailed footage than traditional black-and-white infrared cameras. Users can also choose between color and infrared night vision depending on their preference.
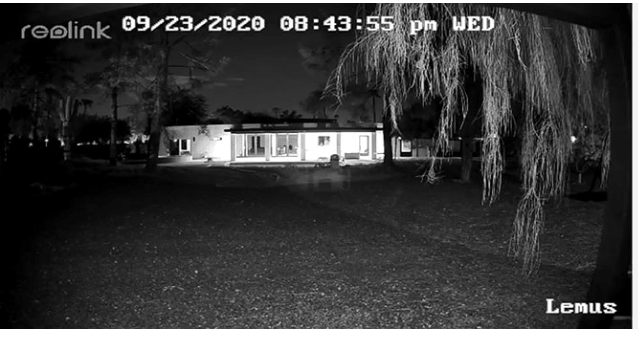
Image Source: ModernCastle
2. Bright Motion-Activated Spotlight
One of the review's highlights was the integrated LED spotlight. Modern Castle noted that the spotlight is bright enough to illuminate a driveway or front yard, helping both to improve nighttime video quality and deter potential intruders. Brightness can be adjusted within the Reolink app to match different environments.
3. Reliable AI Detection
The reviewer found that the Lumus's person, vehicle, and pet detection helped reduce unnecessary notifications compared with basic motion detection. Modern Castle also recommends spending a few minutes configuring detection zones and sensitivity during setup to further minimize false alerts in everyday use.
4. Quick and Beginner-Friendly Setup
Modern Castle reported that installation took only a few minutes. After mounting the camera, users simply scan the QR code in the Reolink app, connect to either 2.4 GHz or 5 GHz Wi-Fi, and complete the guided setup process. The app also makes it easy to customize motion zones, notifications, and recording settings.
Reolink Lumus vs. Lumus Pro: What's the Difference?
The Reolink Lumus Pro is a massive generational upgrade over the original Lumus, moving from a standard 2K resolution up to 4K UHD clarity. It also replaces the older antenna with next-generation Wi-Fi 6 technology and introduces seamless Bluetooth-assisted setup.
-
Choose the Original Lumus if: You have an older home router, only need targeted close-range monitoring over a small porch entrance, and want a dependable, budget-friendly security camera that gets the job done without extra frills.
-
Upgrade to the Lumus Pro if: You are installing the camera to monitor an expansive driveway or front yard, utilize a modern Wi-Fi 6 router, need maximum clarity for long-distance detail identification, or plan to build a larger home eco-system using the Reolink Home Hub.
Buyer Decision Table: Is the Lumus Right for You?
The right camera choice depends entirely on your property's physical layout and your specific recording needs. Use this quick reference framework to make your final call with confidence:
Best for
- Budget-conscious homeowners
- Front door and driveway monitoring
- Users wanting local storage
- DIY installation
- Plug-in cameras with continuous power
Less suitable for
- Large properties requiring long-distance identification
- Users expecting floodlight-level illumination
- Those who prefer an extremely simple mobile app
- Situations where PoE wiring is available and maximum image quality is the priority
FAQs
How to set up a Reolink Lumus camera?
Setting up the Reolink Lumus takes just a few minutes and requires only a power outlet and a Wi-Fi connection.
- Plug the Lumus into a power outlet using the included 5V power adapter.
- Download and open the Reolink App on your phone.
- Scan the QR code on the camera to add it to your account.
- Connect the camera to your 2.4 GHz or 5 GHz Wi-Fi network and follow the on-screen instructions.
- Mount the camera in your desired location and adjust settings such as motion detection, spotlight, recording schedule, and notification preferences.
Does the Reolink Lumus record 24/7?
Yes. As a plug-in Wi-Fi camera, the Reolink Lumus supports 24/7 continuous recording when using a compatible microSD card or a Reolink NVR. You can also choose motion-triggered recording if you want to save storage space. Continuous recording can be enabled through the Reolink App or Client by configuring the recording schedule.
Conclusion
If your property layout allows for simple plug-in connectivity, the Lumus delivers structural value that rivals significantly more expensive competitors. It successfully stands its ground as a robust visual deterrent, proving that reliable home protection, accurate notification filtering, and true-to-life night coloring do not require an ongoing subscription.
Search
Subscribe for the Latest Updates
Security insights & offers right into your inbox