Synology Surveillance Station Cameras: Setup Steps & Alternatives
Looking for a centralized video monitoring system with the Synology Surveillance Station?
I guess you’ve got Synology Surveillance Station cameras across brands to hook up, or plan to do so in the future, right? Now learn the steps below, and set up your security camera system in a breeze!
Your answer is No?
Then you may want to take a look at the Synology Surveillance Station alternatives, which offer FREE services for up to 16 cameras’ video backup, file storage, intranet streaming, photo storage, and whatever in-depth features you may expect from the Synology Surveillance Station setup.
What Cameras Work with Synology Surveillance Station?
Officially Supported Cameras
Synology Surveillance Station works with a wide range of IP cameras listed in Synology’s official compatibility database. These cameras are tested and verified to ensure stable performance and full feature support within the Surveillance Station platform.
The compatibility list includes models from major security camera brands such as Synology's own line, Reolink and others. Cameras in this category typically offer seamless integration, including live view, recording, motion detection, and event notifications without additional configuration.
ONVIF-Compatible Cameras
In addition to officially certified models, Synology Surveillance Station also supports cameras that follow the ONVIF standard.
ONVIF-compatible cameras allow broader integration across different manufacturers, making it easier to build a flexible surveillance system. Even if a camera is not listed in Synology’s official compatibility list, it can often still be added through ONVIF protocols.
However, feature availability may vary depending on the camera model, and some advanced functions may not be fully supported compared to officially verified devices.
How to Set up Reolink Cameras to Synology Surveillance Station?
Prerequisites
Before getting started, log in to your device using the Reolink App or Reolink Client to enable the required ports.
Reolink App: Go to Device Settings → Network → Advanced to open the necessary ports for your device.
Reolink Client: Go to Device Settings → Network → Advanced → Server Settings to enable the required ports. After making changes, make sure to click Save to apply your configurations.
1. How to Add the camera via ONVIF Protocol?
-
Log in to Synology Surveillance Station, go to IP Camera, and click Add. Choose to add a camera from the LAN using the ONVIF protocol.
-
Select your camera from the device list and click Next.
-
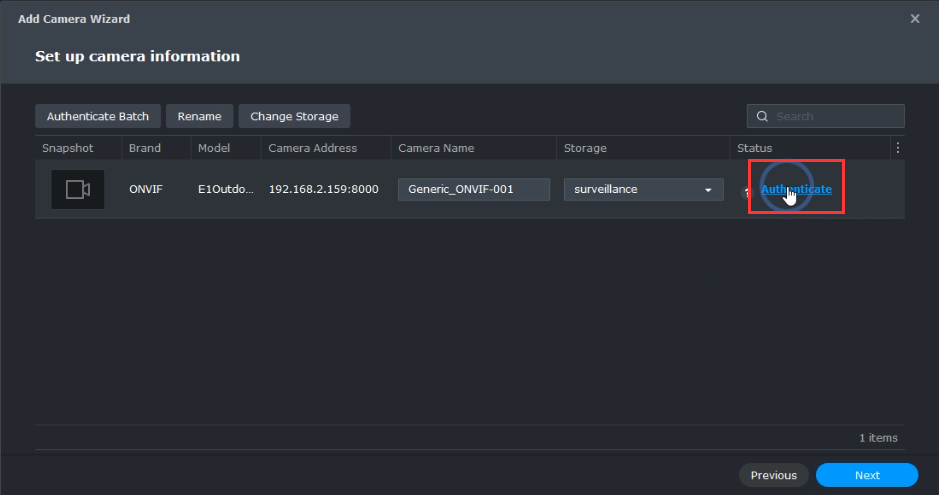
Click Authenticate, then enter your camera’s username and password. Make sure the ONVIF port (default: 8000) matches your camera settings. Click Authenticate again to continue.
-
Once the camera status shows a green icon, click Next.
-
Select Quick Setup, click Next, and then click Done to complete the setup.
2. How to Add the camera via Reolink protocol?
-
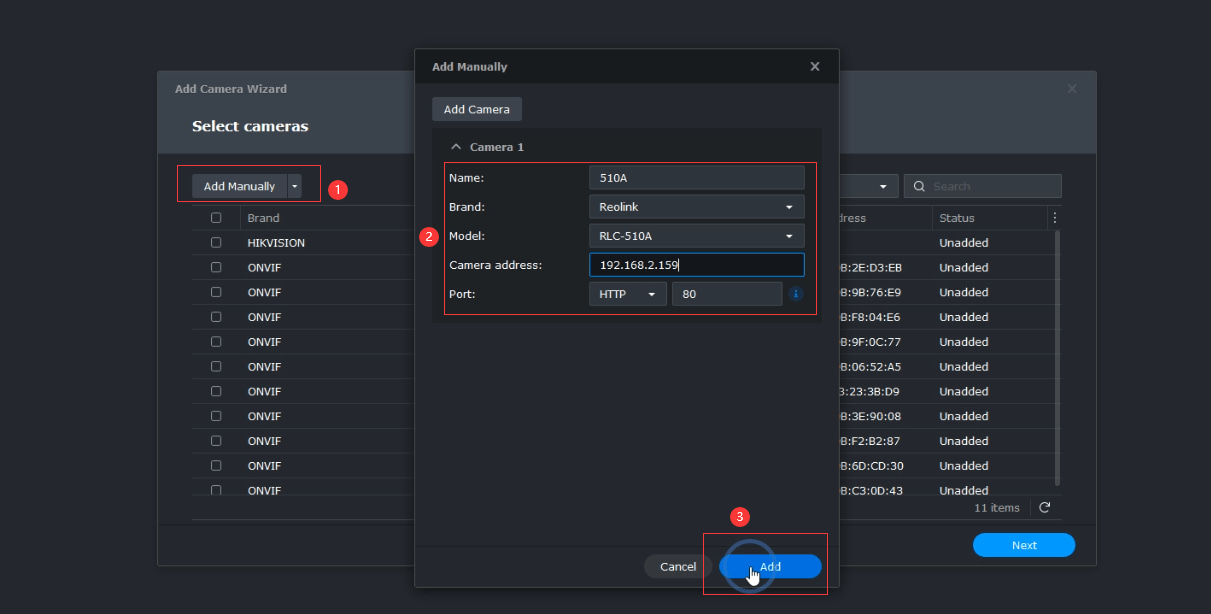
In Synology Surveillance Station, click Add Manually. Enter a camera name, select Reolink as the brand, choose your camera model, and enter the camera's IP address. Ensure the HTTP port matches your camera settings (default: 80), then click Add.
-
Select the camera you just added and click Next.
-
Click Authenticate, enter your camera's username and password, and then click Authenticate again.
-
When the camera status displays a green icon, click Next.
-
Select Quick Setup, click Next, and then click Done to finish the setup.
3. How to Add the camera via RTSP URL?
-
In Synology Surveillance Station, click Add Manually. Enter a camera name, select User Define as the brand, and enter the RTSP URL in the following format: rtsp://username:password@camera_ip_address:554/Preview_01_main. Then click Add.
-
Select the camera you just added and click Next.
-
Once the camera status shows a green icon, click Next.
-
Select Quick Setup, click Next, and then click Done to complete the setup.
You have now successfully added your Reolink camera to Synology Surveillance Station. To view the live stream, go to Live View in Surveillance Station.
Here is a video that shows how to add your cctv cameras to the Synology Surveillance Station.
Best Camera for Synology Surveillance Station
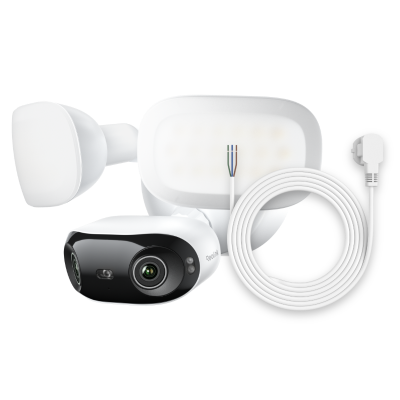
Reolink Elite Floodlight WiFi
The Reolink Elite Floodlight WiFi is an excellent choice for homeowners who want both surveillance and active deterrence. Combining high-resolution video with powerful floodlights, it provides clear footage around the clock while helping to discourage intruders. Its Wi-Fi connectivity makes installation straightforward, and its support for ONVIF allows seamless integration with Synology Surveillance Station. Once connected to a Synology NAS, users can enjoy centralized recording, remote monitoring, and flexible storage management without relying on cloud subscriptions.
4K 180° Ultra-Wide Wired Floodlight Security Camera
3000-Lumen Dimmable Lighting, Adjustable Color Temperature, Local AI Video Search, Local Storage, Dual-Band Wi-Fi 6.
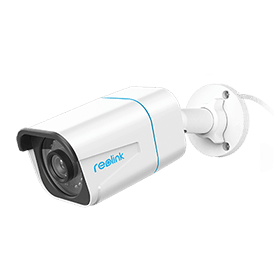
Reolink RLC-810A
The Reolink RLC-810A is one of the best PoE cameras for Synology Surveillance Station. Featuring 4K Ultra HD resolution and smart person and vehicle detection, it delivers sharp video quality and reliable security monitoring. The PoE design ensures a stable network connection and continuous recording, making it ideal for users who prioritize dependable 24/7 surveillance. With support for ONVIF and Synology Surveillance Station, the RLC-810A can be easily added to a NAS-based security system for efficient video storage and management.
4K PoE IP Camera with Person/Vehicle Detection
Smart Person/Vehicle Alerts; 4K UHD Day; Night; 100ft Night Vision; Time Lapse; IP66 Certified Weatherproof; Audio Recording.
Editor’s Note: The wireless battery-run cameras couldn’t work with Synology Surveillance Station, which is a pity to the Synology solution. That’s because the software is constantly connected to the Synology Surveillance Station cameras, which will drain the battery life in a few hours.
FAQs
1. How many cameras can you add to a Synology Surveillance Station?
If you need to add more cameras, Synology provides Surveillance Device License Packs in bundles of 1, 4, or 8 licenses. Each pack comes with a license key that allows you to activate the same number of additional surveillance devices.
2. Are Reolink cameras compatible with Synology Surveillance Station?
Yes, many Reolink PoE and WiFi cameras are compatible with Synology Surveillance Station through ONVIF, Reolink protocol, or RTSP. However, battery-powered Reolink cameras are not supported because Surveillance Station requires a continuous connection for monitoring and recording, which would quickly drain the camera's battery. For the best experience, use wired or plug-in Reolink cameras with your Synology NAS.
Conclusion
Setting up your security camera system with Synology Surveillance Station is a seamless process, especially when utilizing compatible cameras like Reolink. By following the outlined steps for adding cameras via ONVIF, Reolink protocol, or RTSP URL, you can easily integrate various surveillance options into your home.
Search
Subscribe for the Latest Updates
Security insights & offers right into your inbox