What Is My DNS Server? How to Check and Understand It
People often type “what is my DNS” or “check my DNS” when pages load slowly or security looks weak. These words point to one core idea. Every device needs a Domain Name System (DNS) server to get from a web name to a web address. We’ll explain what a DNS server is and why it matters. You’ll learn how to find it on your devices. Plus, we’ll show you how to change it to improve your internet.
What Is My DNS Server?
Think of a DNS server as a phone book that never goes out of date. It turns a human-friendly name, like example.com, into the number your browser needs—an Internet Protocol (IP) address. Your computer sends the request, the DNS server answers, and your browser then talks straight to the website’s real machine. Without this step, you would need to remember strings of numbers for every site you visit.
Why Should I Know My DNS Server IP?
You now know that a DNS server sits between you and every website. Yet many people have never checked which server they use. A quick look at that address offers clear gains. Main reasons to know your DNS server:
- Faster browsing: A fast DNS server sends back answers in a blink. Slow servers can add seconds to each new page. Seeing your server lets you swap to a quicker one if needed.
- Better uptime: Some public DNS services live in many data centers worldwide. They stay online even if your local network stumbles. Knowing your present server helps you compare its record with those of stronger options.
- Improved security: Modern DNS providers filter known harmful domains. If you use the default server from your Internet Service Provider (ISP), you may not get that extra shield. Once you know your server’s IP, you can move to a safer choice.
- Parental or workplace controls: Some DNS services block adult content or social networks on request. A small office can point all computers to such a server in minutes. First, you must identify the current server.
- Simple troubleshooting: When a site fails, the cause is often a broken DNS link. By checking the server address, you can see if the device points to an old or dead resolver. This short check can avoid long phone calls to support.
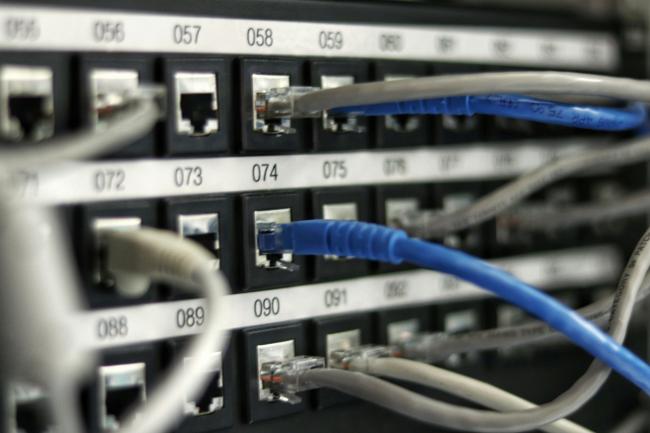
How to Check My DNS Server?
You can view your DNS server on any modern system. The steps differ, yet each path takes one or two minutes. Below you will find a short bridge, then guides split by device. Pick the one you own.
On Windows
- Press Windows + R.
- Type cmd and hit Enter to open Command Prompt.
- Type ipconfig /all and press Enter again.
- Look for DNS Servers. You may see one or two IPs. Those are your servers.
- Close the window when finished.
For a menu route:
- Open Settings > Network & Internet > Status.
- Click Properties next to your active link.
- Scroll down to DNS servers.
Each route shows the same numbers, so use the one you like.
On macOS
- Click the Apple menu.
- Open System Settings.
- Choose Network in the sidebar.
- Select Wi-Fi or Ethernet, then press Details.
- Click the DNS tab. You will see IPv4 and IPv6 addresses. Those are your DNS servers.
On iPhone/Android
Phones also store DNS data, though they hide it under Wi-Fi settings. While on mobile data, you usually use the carrier’s own DNS, which most phones will not show unless you install special apps. Still, you can always see or change the DNS for any Wi-Fi network.
iPhone (iOS 16 and later)
- Go to Settings > Wi-Fi.
- Tap the small i next to your current network.
- Find Configure DNS. It likely reads Automatic.
- Tap it, choose Manual, and the current DNS entries will appear. You can add or remove IPs here.
Android (menus vary, but general steps stay alike)
Many people search “what is my DNS server Android”. The steps below give a simple answer.
- Open Settings > Network & Internet > Internet.
- Tap your connected network.
- Hit the Edit icon or look for Advanced options.
- Scroll to IP settings. Change from DHCP to Static to reveal DNS 1 and DNS 2.
- The shown numbers are your DNS servers. You can change them right here.
Via online tools
If you do not wish to dig into system menus, open a browser and visit a DNS leak tester or resolver check site. These pages run a small script that forces your device to look up a special domain name. They then show the public IP of the resolver that performed that lookup. Note that if your router acts as a relay, the site will show the router’s IP. Yet this still helps confirm if requests leave your house through a local or public resolver.
How to Change My DNS Server Address?
You may want to swap DNS servers for more speed, extra privacy, or extra security. The process is safe, and you can always switch back.
Before the list of steps, know that you have two main choices. You can change DNS on each device, or you can set a new DNS on the router. A router-level change covers every phone, tablet, or computer that joins your network. Steps to change DNS and common addresses:
Pick a service
- Google Public DNS: 8.8.8.8 and 8.8.4.4
- Cloudflare DNS: 1.1.1.1 and 1.0.0.1
- OpenDNS: 208.67.222.222 and 208.67.220.220
- Quad9: 9.9.9.9 and 149.112.112.112
Windows
- Open Settings > Network & Internet > Change adapter options.
- Right-click your active interface, then choose Properties.
- Double-click Internet Protocol Version 4 (TCP/IPv4).
- Choose Use the following DNS server addresses.
- Enter the primary and secondary IPs. Click OK.
macOS
- Open System Settings > Network.
- Pick the current interface, click Details, then DNS.
- Press the + to add new servers.
- Remove any you do not want. Hit OK, then Apply.
iPhone
- Settings > Wi-Fi, tap the i icon.
- Tap Configure DNS > Manual.
- Enter new servers with Add Server. Remove others. Tap Save.
Android
- Settings > Network & Internet > Internet.
- Tap the network, then Edit or Advanced.
- Switch IP settings to Static.
- Enter new DNS 1 and DNS 2. Save.
Router (brand menus differ, but concept holds)
- Enter the router’s IP (often 192.168.1.1) into a browser.
- Sign in with your admin password.
- Look for a page named Internet, WAN, or DNS.
- Replace the existing DNS entries with new ones.
- Save and reboot the router so every device gets the new settings.
How to Find Your Security Camera’s DNS Settings?
Smart cameras need DNS for cloud alerts, mobile view, and firmware updates. A wrong DNS can break those features even when the local video feed looks fine. When motion triggers, security cameras must talk to a server to send the alert. It also reaches out for new firmware files. Both tasks rely on fast, correct name lookups. A slow or blocked DNS stops these calls. That is why you want a stable, secure server.
Steps on common security cameras:
- Open the compatible app and tap the gear icon under the live view.
- Scroll down to Network Settings, then tap Advanced.
- Under DNS, you see current servers. If you only see “Auto,” the camera uses the router’s DNS.
- Turn Auto off to unhide the fields.
- Type a primary and secondary server, such as 1.1.1.1 and 8.8.8.8.
- Tap Save, and the camera will reboot.
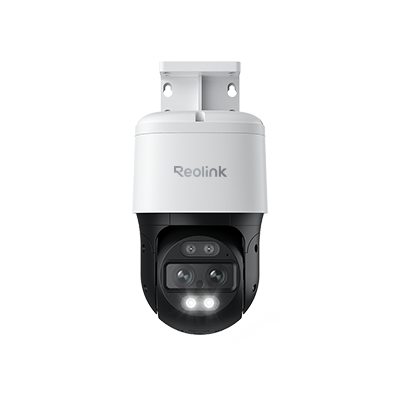
4K Dual-Lens PTZ Camera with Dual Tracking
4K 8MP Ultra HD, Wide & Telephoto Lenses, Pan & Tilt, Auto-Tracking, Person/Vehicle Detection, Power over Ethernet, Two-Way Audio.
FAQs
How do I find my DNS server?
You can find the DNS server on any computer by opening a command tool and running one quick command. On Windows, type ipconfig /all; on macOS, use networksetup -getdnsservers. Phones place DNS under Wi-Fi settings. You open the network’s details, look for DNS lines, and read the listed IP addresses. These steps work without extra software and take less than a minute.
What is a DNS server on my WiFi?
A DNS server on your WiFi is the system that turns site names into IP addresses for every device on your network. Your router often forwards requests to a resolver. This may be your Internet provider’s default server, or a public choice you set. All phones, tablets, and laptops that join the WiFi rely on this same resolver unless they have their own manual DNS settings.
Is 8.8 8.8 the best DNS?
8.8.8.8 is part of Google Public DNS. Since it is fast, free, and big therefore many users refer to it as the best. However, your location, the need to protect your privacy, or the need for a filter may make you choose Cloudflare 1.1.1.1, Quad9 9.9.9.9, or OpenDNS 208.67.222.222. The best outcome is achieved when you test every service, benchmark its speed, and check the privacy commitment of the provider.
How do I fix a DNS server problem?
Begin by restarting your entire device and router, as things often resolve themselves with a simple reboot. If the pages still will not load, check the DNS settings in the network settings and set it to use a well-known DNS resolver such as 1.1.1.1 or 8.8.8.8.
Conclusion
A DNS server guides every web trip from a name to an address. By learning what my DNS is and how to check my DNS, you claim control over speed, safety, and ease of repair. You now know how to see your DNS on Windows, macOS, iPhone, Android, and even a Reolink Argus 4 Pro camera. You also know how to swap the server for one that fits your needs.
Search
Subscribe for the Latest Updates
Security insights & offers right into your inbox