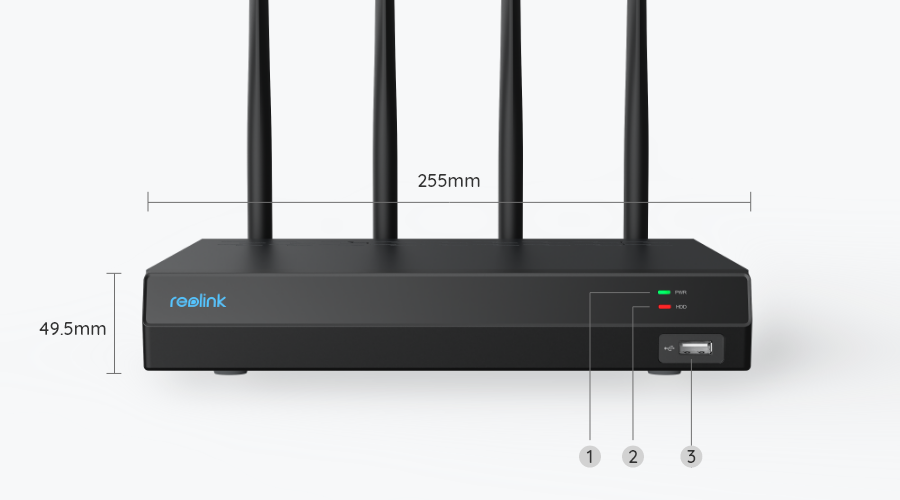
12-Channel Wi-Fi 6 NVR Recorder for 24/7 Local Recordings
12 Channels with Max. 16MP Resolution
5/2.4 GHz Wi-Fi with Wi-Fi 6 Supported
Pre-installed 2TB HDD
Without PoE Ports
Connect your Reolink cameras to the all-powerful Wi-Fi 6 NVR with built-in 2TB HDD for centralized management, all-round surveillance, 24/7 recording and more. With a wireless connection, everything is under your full control!
12-Channels
Wi-Fi NVR Recorder
5/2.4 GHz
Wi-Fi Connection
Up to 16TB
Storage Capacity
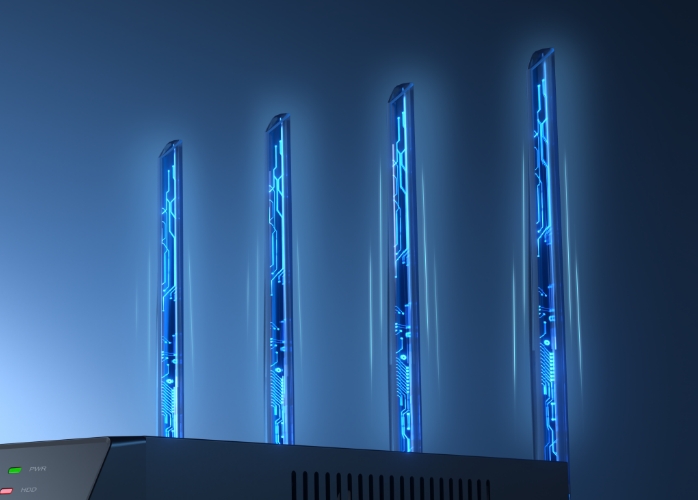
Four external high-gain antennas enable the outstanding signal strength of the RLN12W, which covers an area of up to 1,000 square meters*. No corner is left out!
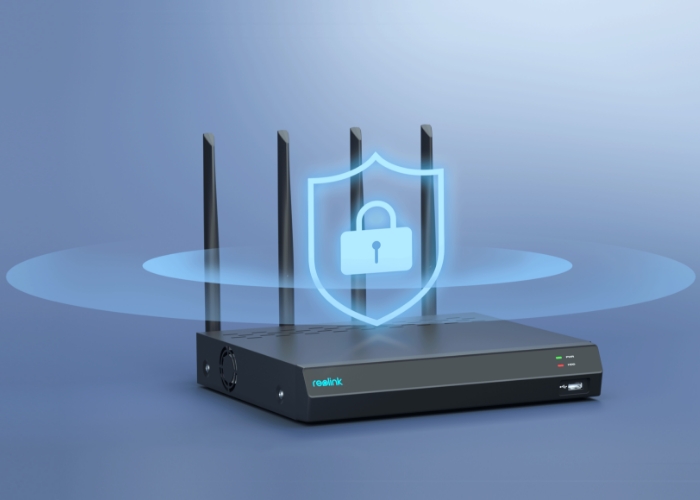
Wi-Fi 6 uses the latest WPA 3 encryption to protect your data and privacy, making your wireless network transmissions more secure and reliable.
Wi-Fi 6 with 1024-QAM offers up to 25% faster transfer rates compared to the standard Wi-Fi 5. Technologies such as OFDMA and MU-MIMO further contribute to higher network efficiency. All this ensures a smoother live view.
BSS coloring technology improves network immunity, even in network environments with multiple devices, so you can enjoy stable UHD video streaming at all times.
The NVR RLN12W supports 24/7 recording. It can work independently without the use of Internet, completely offline. The recorded videos are securely stored locally on a 2TB HDD (upgradable to 16TB) without worrying about data loss or data leakages.
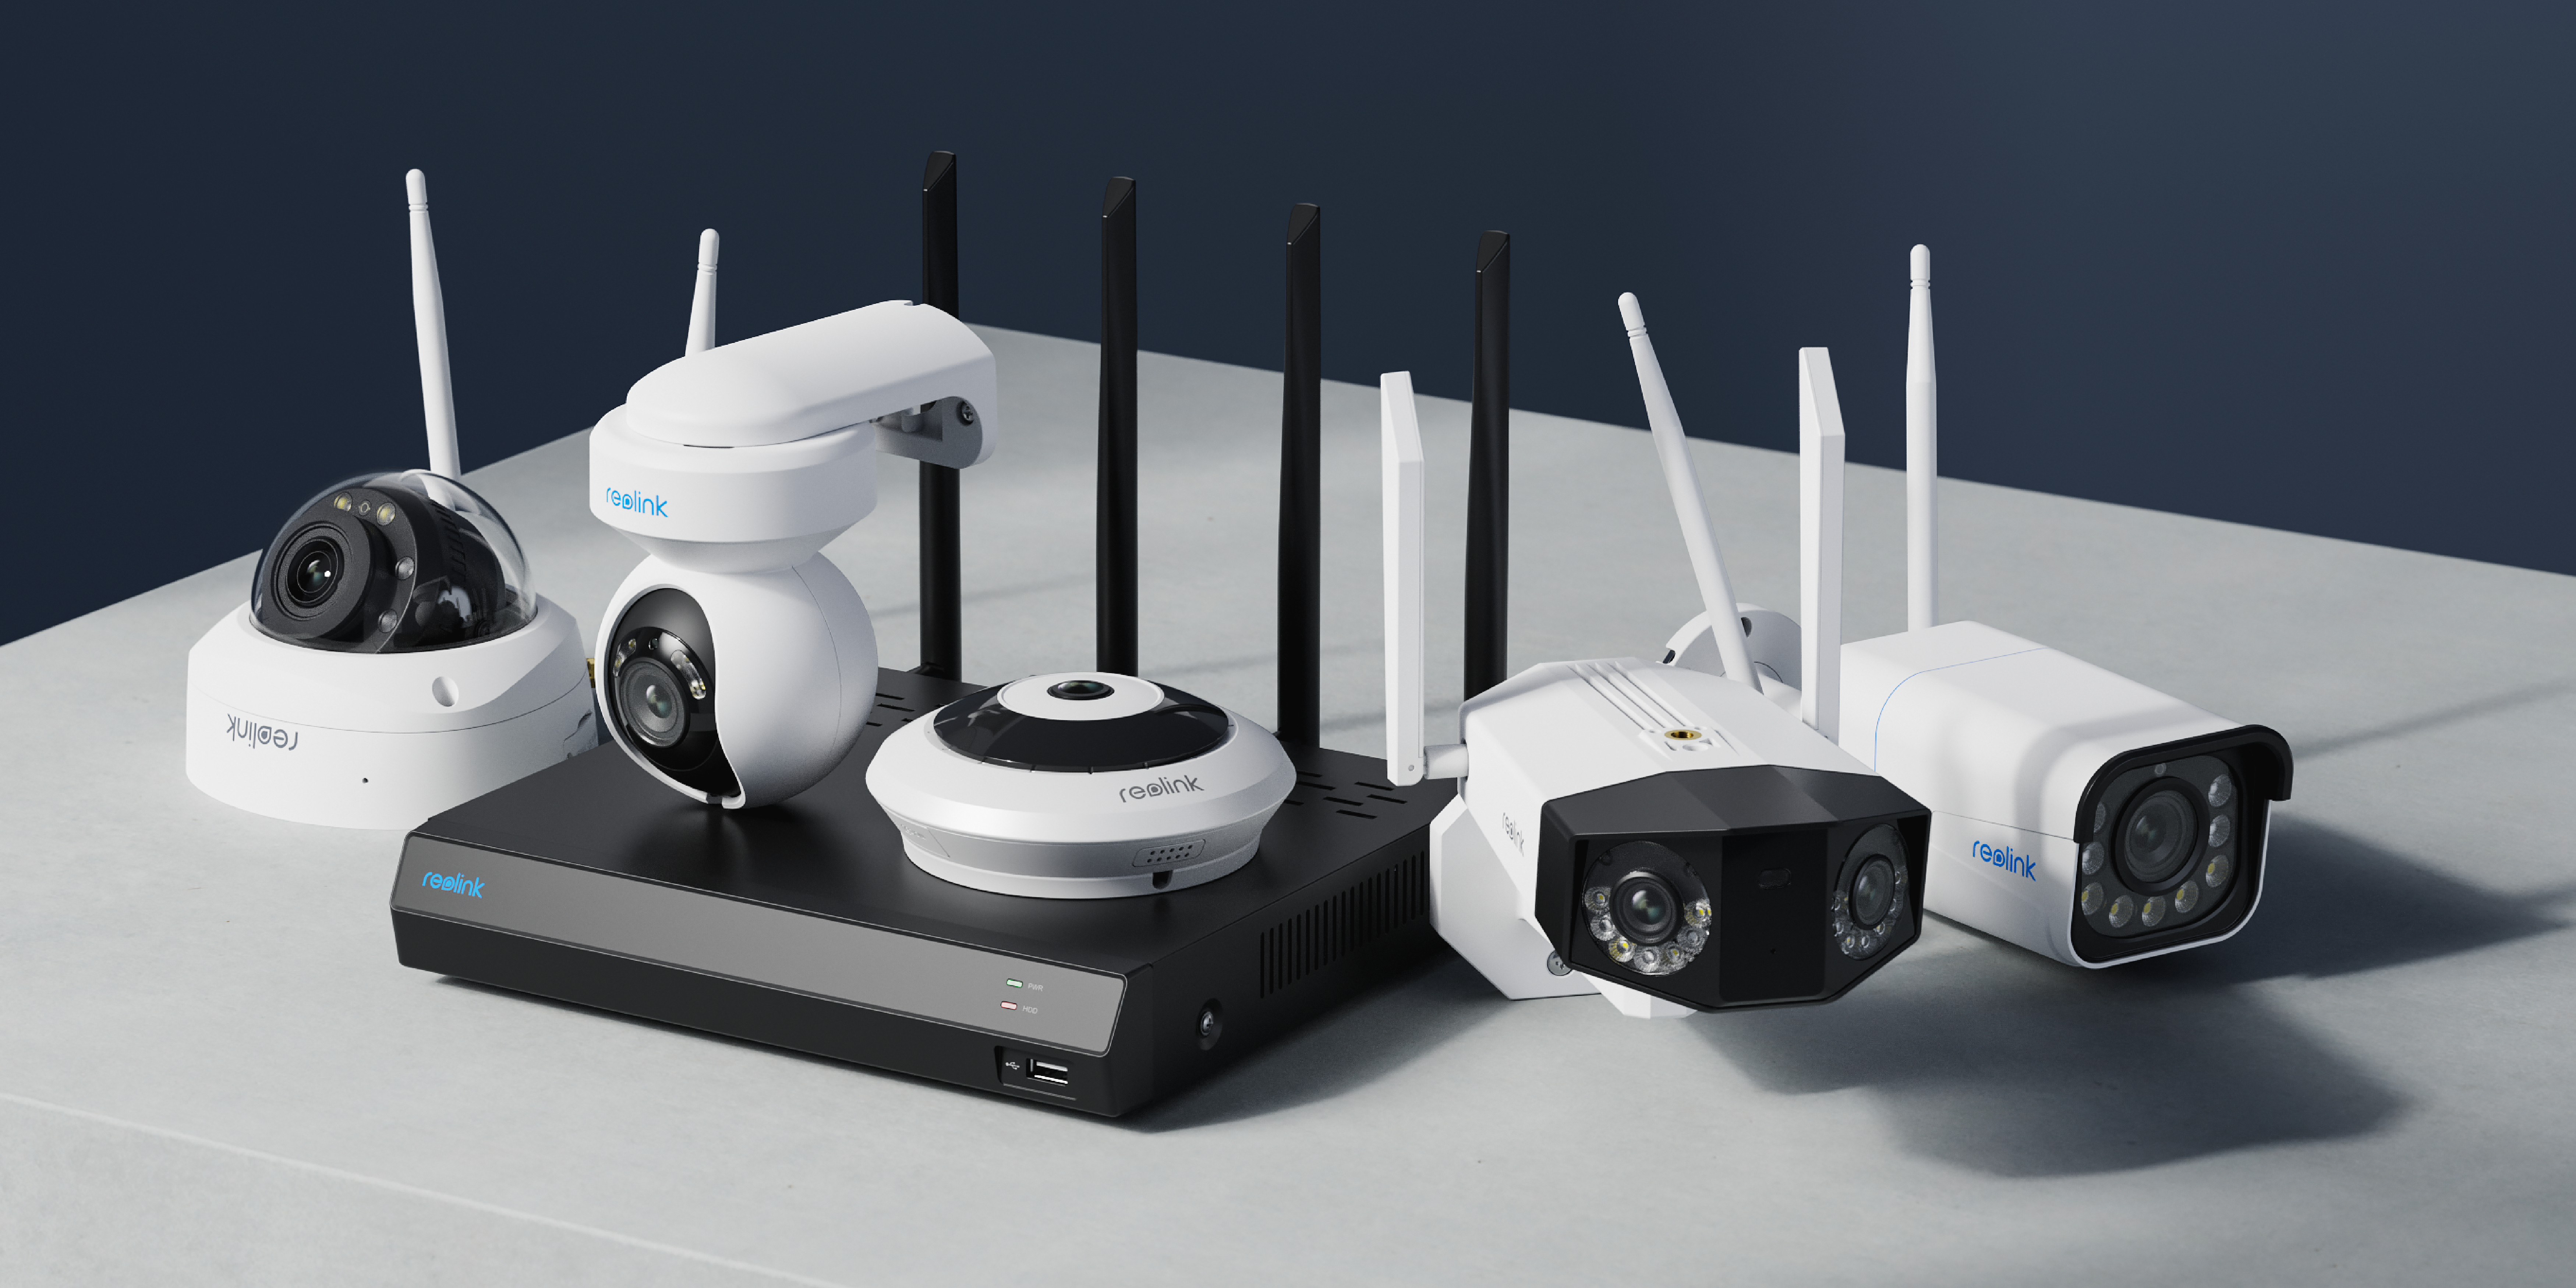
This NVR is compatible with various Reolink IP cameras including plug-in Wi-Fi, battery-powered Wi-Fi, or PoE, and allows the connection of up to 16 cameras. With numerous options, you now have the freedom and fun to build your own surveillance system.
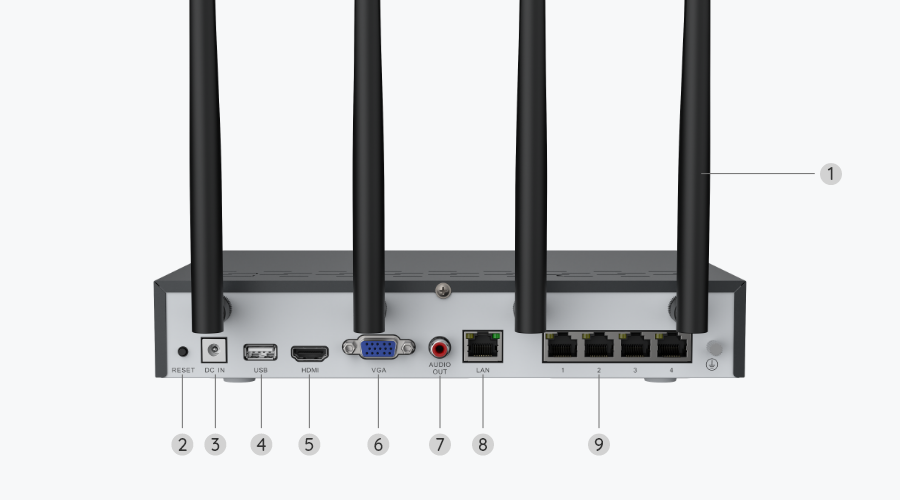
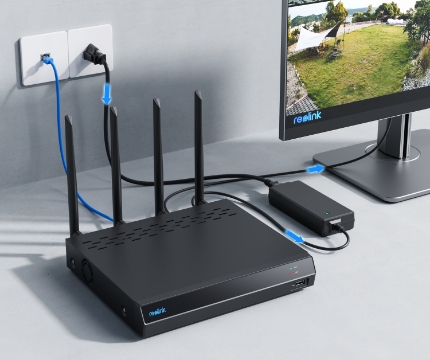
First connect the NVR to the power supply, then to the monitor via an HDMI/VGA cable and to the router via a network cable.
Power on the camera and connect it to the NVR via a network cable, then initialize it on the monitor and synchronize the Wi-Fi.
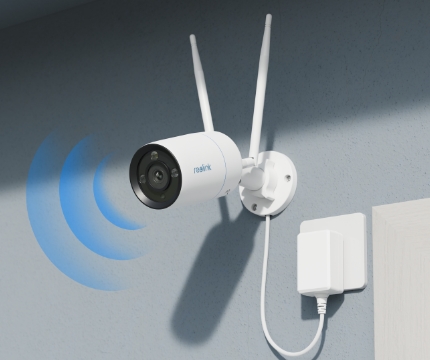
Disconnect the network cable from the camera and mount it in the desired location, then view the live view on your monitor/Reolink App/Reolink Client.
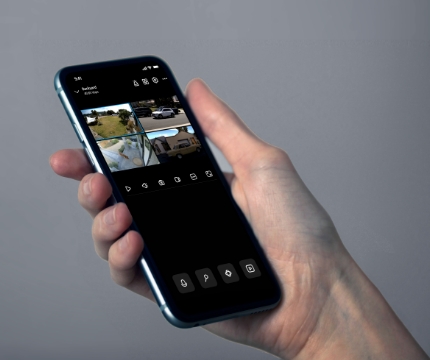
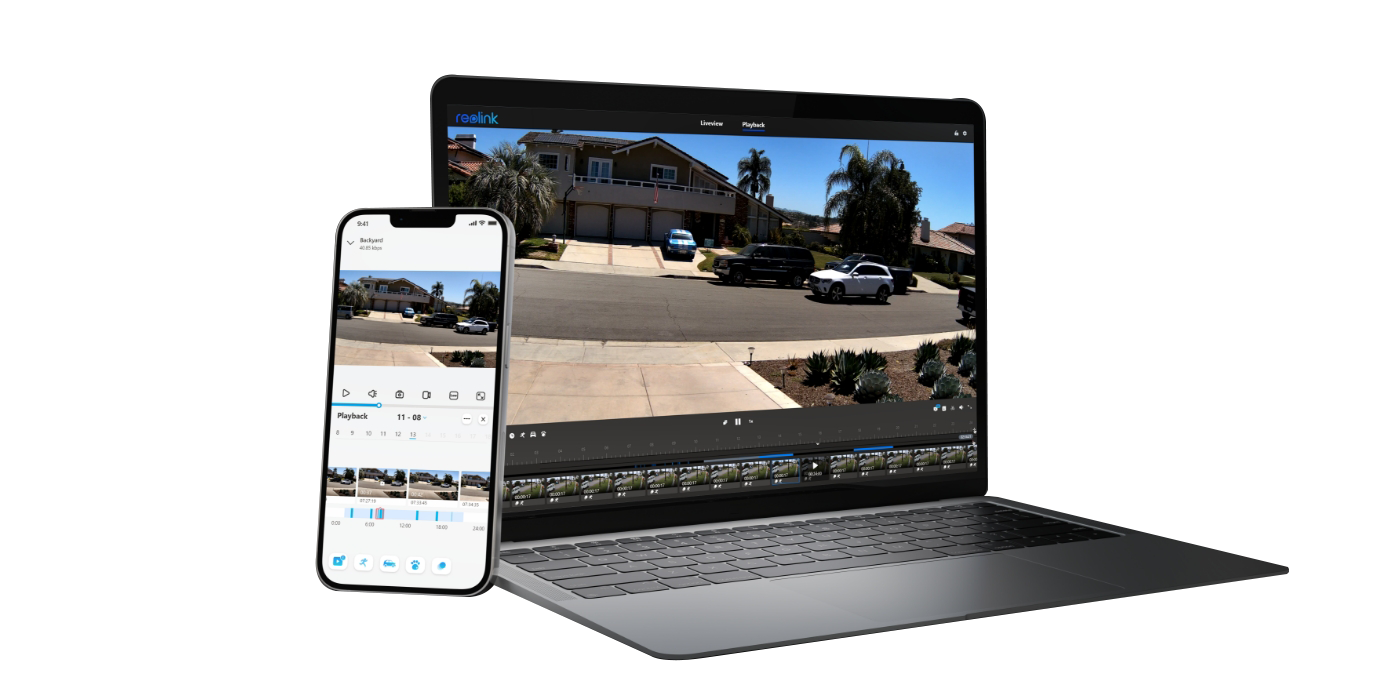
With the free Reolink app or client, you can conveniently view the live-stream of the cameras connected to the NVR, play back the recorded videos and adjust the settings or connect the NVR to a monitor for local management and monitoring.
Check Shipping & Delivering for Areas Excluded

Google, Google Play, Google Assistant and related marks and logos are trademarks of Google LLC.
Amazon, Alexa and all related logos are trademarks of Amazon.com, Inc. or its affiliates.
Mac and Safari are trademarks of Apple Inc.
App Store is a service mark of Apple Inc., registered in the U.S. and other countries.
Firefox and the Firefox logo are trademarks of the Mozilla Foundation in the U.S. and other countries.
Other product and company names mentioned herein may be trademarks of their respective companies.